Showing posts with label Delectable Desserts. Show all posts

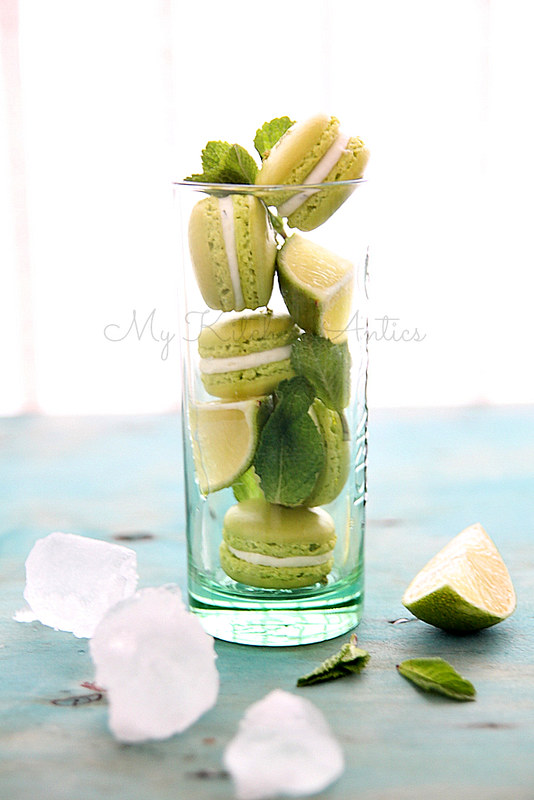
Macarons for grown ups- Cosmopolitan and Mojito macarons

0 nhận xét

IMG_2883-1
OK! I'm super duper excited about these macaron flavours and even more about the photographs, that turned out exactly the way i imagined. It was a crazy week of baking for us at Bobo Macarons. More than 1000 macarons baked, printed, filled and packed for a wedding and I was beyond exhausted. I did not want to do any baking for a really long time, or so I thought, until this fabulous idea for flavours developed in my head. I HAD to make it immediately. And so I did.
IMG_2844
I decided to go with two of my favourite cocktails- Mojito and Cosmopolitan. I make these at home quite often and I'm soooo in love with the flavours, it HAD to work in a macaron. I must admit though, it wasn't easy. I wasn't sure how to make the flavours pop and if adding liquid to the filling was a good idea, but I had to give it a go to see if it was feasible...and well, here they are...spot on with the cocktail flavours. Next on the list is margarita and sangria and maybe even a pink champagne one ;)

I have a basic macaron recipe that I fall back on and it fetches me perfect results. I halved the batter and added hot pink to one set and kiwi green to the other. I got 12 macarons in each colour. For the mojito macarons, I grated some lime zest and sprinkled over the shells about 10 minutes after I piped them out. This totally made a difference.

Mojito Macarons
IMG_2889
The mojito ones- lime, mint and rum being the main ingredients, were easy to put together. I mean I decided to do a white chocolate ganache filling and incorporate these flavours into it, keeping the base simple. I would however increase the alcohol a bit more the next time, as the lime was overpowering (in a good way, of course) with this batch. I'm so kicked about how the styling for this came through and its one of my favourite shoots till date.

Double cream- 45ml + 1/4 to 1/3rd cup to whip
White chocolate- 2 oz, roughly chopped
White rum- 1 tbsp
Lime juice- 3 tbsp
Lime zest- of one lime
Mint leaves- 2 to 3, finely chopped
IMG_2877
Gently heat the double cream, either in a sauce pan, or in the microwave and pour over the chopped up white chocolate. Keep aside for a couple of minutes.
Gently stir, without incorporating air into it, till you get a smooth mix. Keep aside to cool.
Add the rum, lime juice, lime zest and chopped up mint leaves and mix it in well.
Keep refrigerated till ready to use.

When ready to pipe, whip the ganache with 1/4 to 1/3rd cup of double cream with a hand held blender or in a free standing mixes with whisk attachment, till stiff peaks form. Make sure you don't over do this, or you'll end up with split cream.
Transfer into piping bags and pipe on to macarons and sandwich them.
Keep refrigerated in an air tight container till ready to use.

Cosmopolitan Macarons
IMG_2839
These - taste wise- were spot on but I did have a bit of trouble getting the right consistency. I used a butter cream filling for the macs and the amount of liquid that went into it, made it a lot difficult. I know that vodka is an important component in a cosmo, but i shied away from it because of the Cointreau and cran juice that was already making it quite fluid. I had to keep adding icing sugar to reach the desired consistency, which meant, the filling was a bit too sweet for my liking. I will find a way to work around that, but for now here's the recipe. 

Unsalted butter- 55 gms, at room temperature
Icing sugar- 6 tbsp
Cointreau- 1 tbsp
Cranberry juice- 1 tbsp
Orange zest- 1/4 tsp (optional)
IMG_2853
Beat together the butter and icing sugar till light and fluffy.
Add all the liquid ingredients plus zest and continue beating till they all come together.
If the mix looks like its curdled, add some more icing sugar to bring it back to desired consistency.

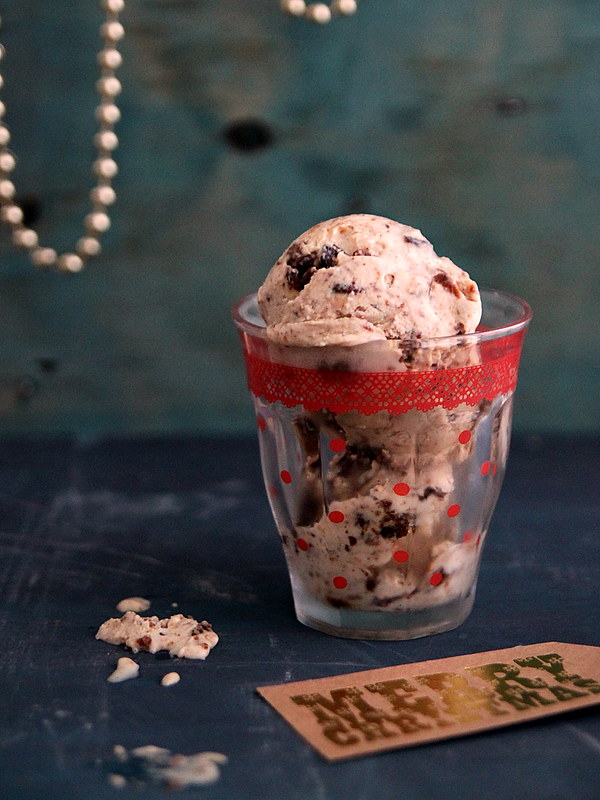
Christmas pudding ice cream

0 nhận xét

IMG_2250 
Last week, a bunch of us had a cook-along session on Google+ Hangout hosted by Great British Chefs and Tesco Real Food. We were cooking along with award winning Chef Galton Blackiston who runs Morston Hall, up at the Norfolk coast, and making Christmas pudding ice cream was on the agenda. It was my first time doing a hangout session like this and so was a wee bit nervous as to how it would churn out (pun intended).

We were asked to do a few preps before hand and jot down any relevant questions we wanted to ask Chef Galton during the session. It all went on extremely well and I'm completely amazed at how technology can just make things so much more convenient. I mean we were all in different parts of UK, in the comfort of our own kitchen and cooking along with so much ease. Except for a few glitches with the audio at times, it was an absolutely well thought out session. Thanks to GBC for this fantastic opportunity and to Chef Galston for the demo. You can watch it here.
IMG_2229
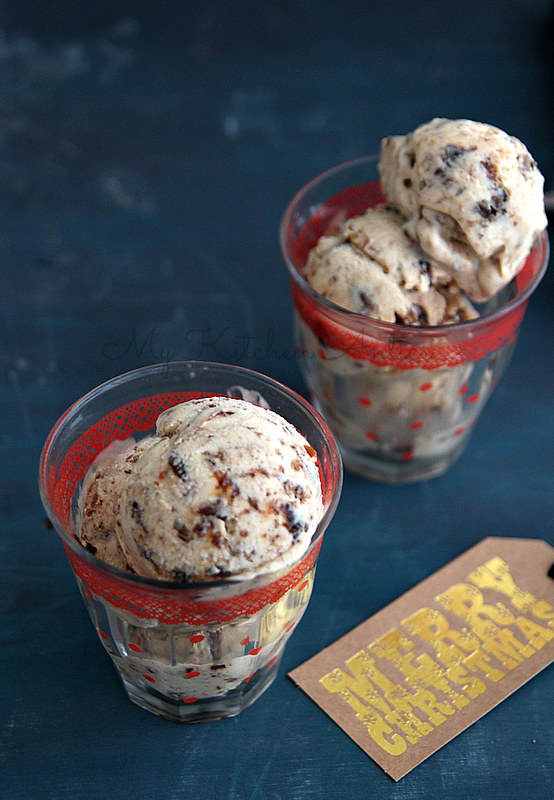
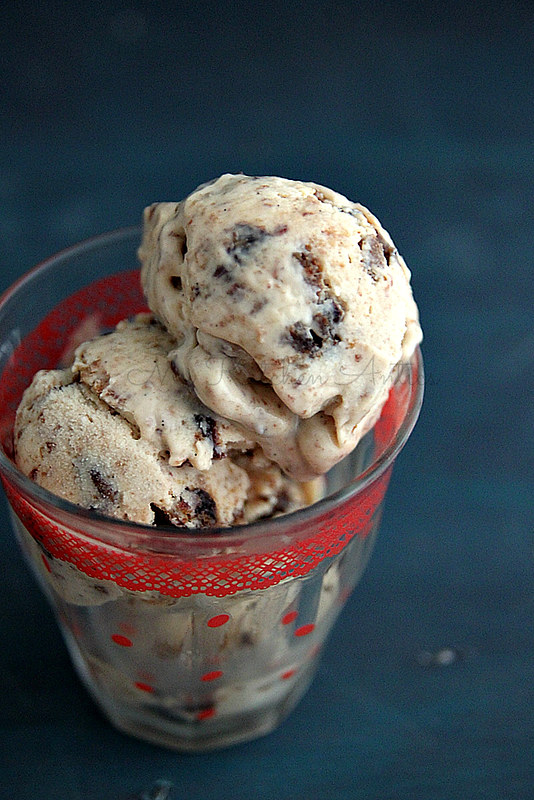
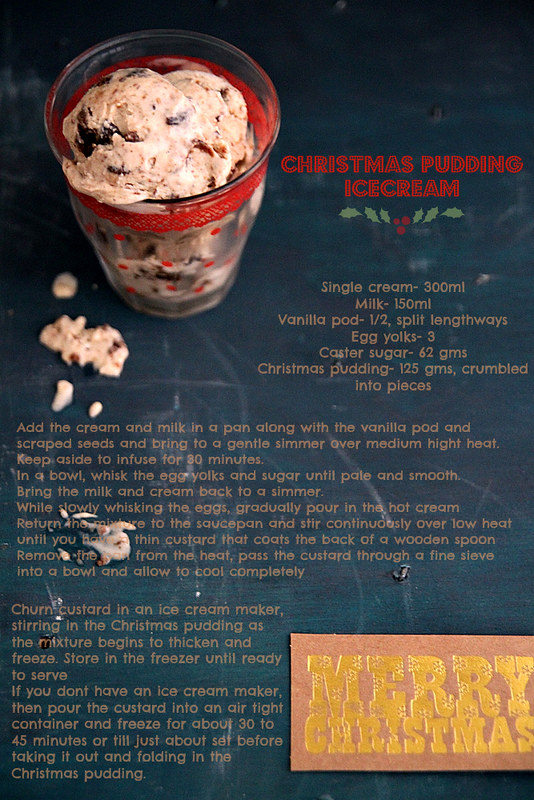
Now, I know its not the perfect weather for ice cream, but really this one needs to be made this Christmas y'all. We are all going to od on Christmas pudding and even worse, have tonnes of it left over. Chucking them into a custard base and churning them to make fabulous ice cream is THE way to go about using whats left over. I am not a big pudding fan or for that matter an ice cream fan, meaning I can just about have a slice or scoop of each, but when the two come together it just makes it so much better.

I had to try hard to not keep eating spoonfuls of custard while it was cooling down. So the ice cream base is a really good one, to experiment with. You can use it as it is with a kick ass sauce, chuck in some candied fruits, or add some nuts and such to make it appealing. Its pretty basic and except for the whisking bit, doesn't really take too much time. Those in India, remember the rum and raisin ice creams we get..well this ones sort of like that.. but a whole lot boozier..who's complaining about that now? :)

Recipe adapted from Great British Chefs (serves 5 to 6)
Single cream- 300ml
Milk- 150ml
Vanilla pod- 1/2, split length ways
Egg yolks- 3
Caster sugar- 62 gms
Christmas pudding- 125 gms, crumbled into pieces
IMG_2241
Add the cream and milk to a sauce pan and scrape in the vanilla seeds along with the pod.
Place the pan over medium high heat and bring to a gentle simmer.
Remove from heat and set aside to infuse for about 30 minutes or so.
In a bowl whisk together the egg yolks and sugar till pale and smooth.
Bring the cream and milk mix back to a simmer.
While whisking the egg, slowly pour  in the cream.
Pour the mix back into a saucepan and place over low heat.
Keep stirring continuously till you have a thin layer of custard that coats the back of the spoon.
At this point, take the saucepan off heat and pass the custard through a sieve into a bowl.
Allow to cool completely. Lay cling film on top of the custard to prevent a skin from forming.
If you want to speed up this process, place the bowl over an ice bath and keep stirring till it turns cool. I actually chucked it into the refrigerator for a while.

Once cool, you can either churn it in an ice cream maker, stirring in the Christmas pudding once the mixture begins to thicken and then freeze till ready to use.
If you don't have an ice cream maker, then pour the custard into an air tight container and freeze for about 30 to 45 minutes or till just about set.
Take it out, whisk well and then fold in the Christmas pudding gently, to not break it up too much. 
IMG_2265
Notes: This is a halved recipe
My air tight container was really good and so i only had to whisk the custard twice, at 1hr intervals and it was perfect. I also added the pud into the custard the first time and kept whisking gently each time.
I may not infuse the cream for 30 mins next time. Couldn't really find much difference.

I was paid for the ingredients and the time. Thanks GBC

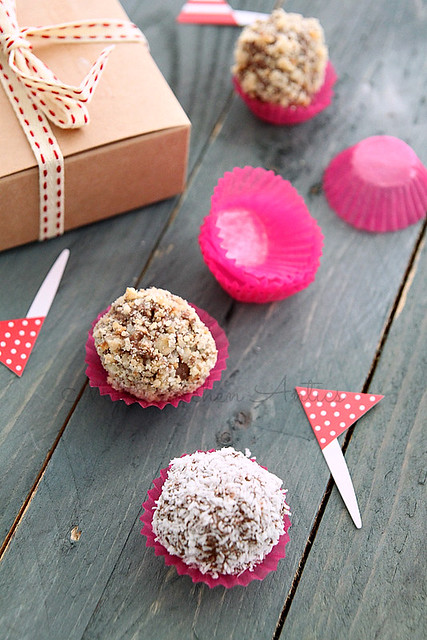
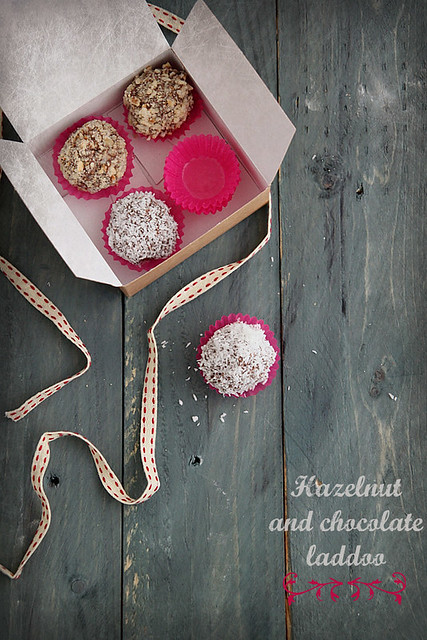
Chocolate and hazelnut laddoo (truffles)

0 nhận xét

IMG_0389
First of all a huuuuge thanks to all those who left comments on the ad post. I am a wee bit embarrassed and at the same time overwhelmed at the outcome. Its weird watching myself on telly and I hope I get used to it soon :)

Those who attended Bloggers' Buzz beginning of this year might remember Devnaa who sponsored a box of sweets for the goody bag? Or let me put it this way, those of you who attended BB will not forget Devnaa and that amazing box of Indian-inspired sweets in the goody bag. I remember a lot of you writing back and saying that was the best part of the goody bag- the well packaged, colourful box with delicate chocolates. Started by brother-sister duo Roopa and Jay Rawal, the journey of Devnaa began at their kitchen table with praises flowing in about Roopa's home made sweets. They decided to take this interest further by starting Devnaa, a collection of sweets and desserts combining authentic Indian recipes and artisan chocolate techniques. 

Now, I am not a big fan of Indian sweets and desserts, with maybe gulab jamun and gajjar ka halwa being an exception. So in all honesty I was not too excited about the box of chocolates. But of course I had to give it a try and must say I wasn't too disappointed. I mean i did have a few favourites like the saffron and pistachio caramel and the cinnamon praline, and my not so favourite were the ones with ginger. Ginger or not, I think the whole concept of Devnaa is quite interesting.
IMG_0477
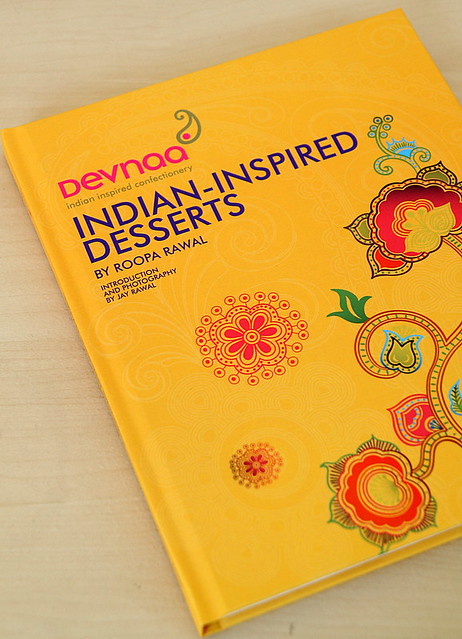
They also sent me their cookbook and ingredients for two recipes. I have bookmarked a whole bunch of recipes from the book, but like a million other recipes I have bookmarked, God alone knows when they will actually make an appearance on the blog. The recipes are pretty descriptive, but being a big fan of food photography, I would have liked some better pictures. I mean desserts are so pretty to photograph and I would have loved to see some cool styling and stuff. 

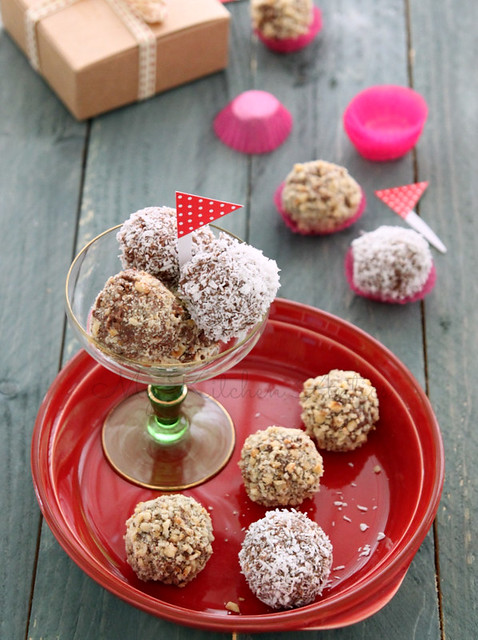
These chocolate and hazelnut laddoos did not disappoint, but i would def try them with dark chocolate next time. Gave it to some friends at a party and they loved it. They are really easy to make a do a good job of being pretty, presentable and tasty. Do some cool packaging, and they would double up as return gifts for guests. 

IMG_0397 
Condensed milk- 200 gms
Cocoa powder- 1 tbsp
Milk- 2 tbsp
Milk powder- 100gms
Milk chocolate- 100 gms
Chocolate-hazelnut spread- 1 tbsp (say like Nutella or equivalent)
Hazelnuts- 60 gms, slightly roasted and crushed or chopped finely
Dessicated coconut- 20 to 25 gms (optional)
IMG_0383 
Mix together the condensed milk, cocoa powder and milk in a saucepan and heat gently. (It would make it a lot more easier if you sift the cocoa powder into the condensed milk, because it was a bit of a trouble for me with small bits of cocoa powder dotting the mix. I had to use my spatula to break them down and still couldn't manage to do it all. So my mix was speckled with cocoa).
Keeping the heat on low-medium, add the milk powder and stir until the mixture starts forming a smooth dough that comes away easily from the sides of the pan. This may take about 4 to 5 minutes. Make sure you don't leave it unattended and that you keep stirring till you get the desired consistency.
Take the mix off heat and leave aside to cool in the refrigerator. The recipe called for just leaving it aside to cool, but still warm and pliable. I did as mentioned, but the dough was just too loose to work with. So I chucked it into the refrigerator for about 15 minutes, and waited for it to become completely cold (like with truffles) and then it was easier to handle.
Scoop out 1 tbsp of the dough at a time and roll into a smooth ball. Mine were slightly bigger in size so I got a total of 12. Leave on a tray lined with baking paper.
Meanwhile, melt the chocolate in a microwave.
Stir in the chocolate-hazelnut spread and make sure that the mix is not too hot, but warm and runny. If it hardens up when you are ready to dip, then just give a burst or two in the microwave and stir again to mix well.
Arrange the chopped/crushed hazelnuts on a plate.
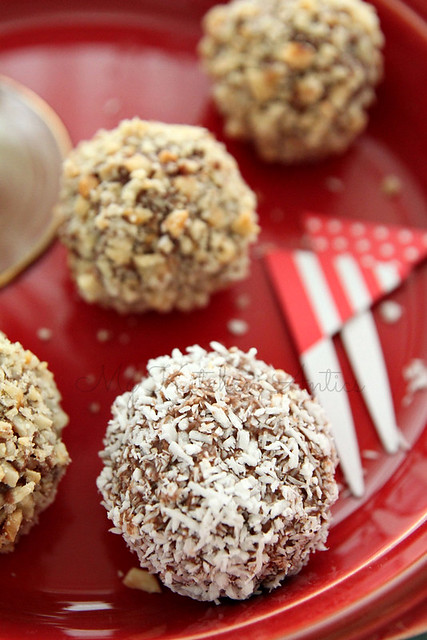
Dip the rolled dough balls into the melted chocolate, trying to coat them evenly on all sides, followed by generously rolling them in the chopped hazelnuts.
Carefully place them back on the same lined baking tray. Continue with all the dough balls and chuck the tray back into the refrigerator till the chocolate hardens, say about 30 minutes.
Serve them at room temperature.
IMG_0429
Notes: I generously rolled the dough balls in hazelnuts, so I didn't have enough to roll the entire batch. So i used dessicated coconut and did the same rolling process.
Feel free to use chocolate of any type for the dipping...dark, white, flavoured etc.

With thanks to Devnaa for sending me the book and the ingredients to make two recipes from the book.

Pin it Forward UK and the 1-minute chocolate chip cookie (in a mug)

0 nhận xét

I'm assuming most of you know about Pinterest already? For those of you who don't, its this amazing platform for collecting and organising the things you love, or are interested in by "pinning" them. I first came across Pinterest on one of my random blog stats check where I saw a lot of traffic form the site. Suspicious and a bit worried really, I checked out the site and couldn't make head or tail of it at one look. Spent a couple of hours reading up and doing some research and I was hooked. Got myself an account and was soon spending hours on the site pinning the things I love. 
Now its become such a part of my research that I have this tendency to search for anything on Pinterest first, rather than Google. I mostly pin recipes, both from my blog and otherwise, and fabulous food photography from where I derive a lot of my inspiration from. Other than these boards, I totally love the DIY, fashion & beauty and home décor information and inspiration I find from all the fabulous pinners. The advantage here is that these pins are linked back to the original source and so you don't need to worry about stuff being copied. 

Pinterest has officially launched in UK and they had this fabulous party to celebrate that. We all got to meet fellow pinners and it was a fun night with loads of food and drinks. If you are already on Pinterest then do follow me here or if you aren't hooked on as yet, then register on Pinterest here. Just a warning, its frikking addictive, but you'd love, love, love it :)

I would also like to introduce two amazing fellow pinners and food bloggers, Michelle of Greedy Gourmet who has an amazing array of recipes, reviews and giveaways on her blog, not to mention her beautiful food photography, and Emma of Poires au Chocolat who completely got me hooked on her beautiful cakes and treats.
IMG_8810
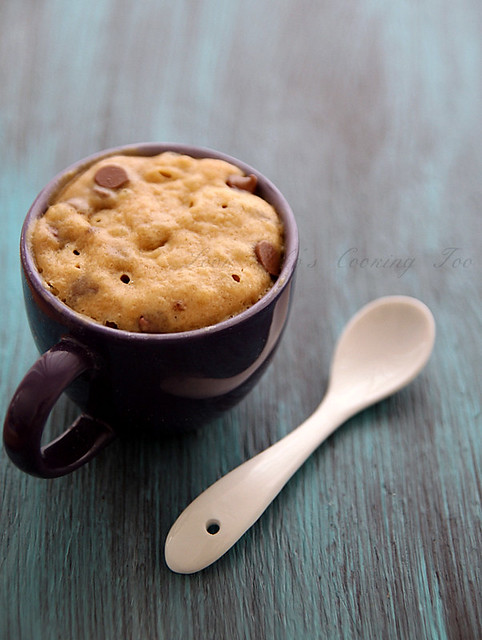
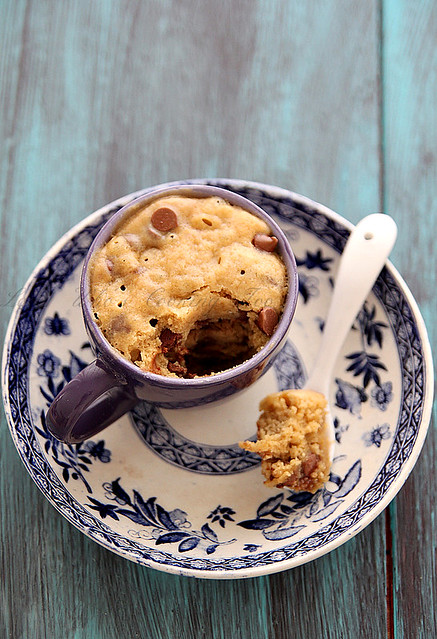
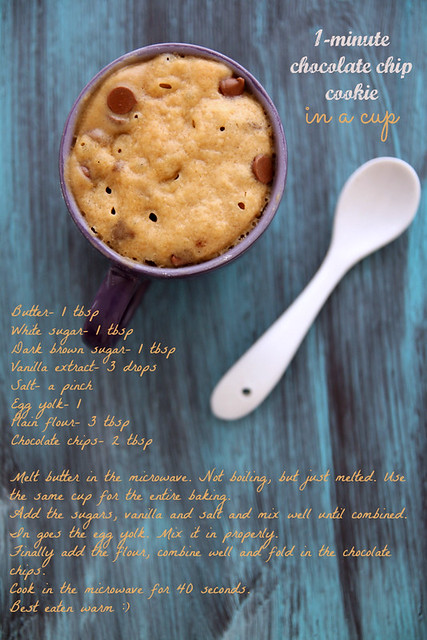
The recipe below is one I got from Pinterest. Its been pinned some 3000 odd times (yes, there is every reason to trust this recipe) and its as easy as it can get to make a cookie. When the whole mug cake recipe was a rage in the blog world, I didn't fall prey to it because, truth be told, I hate microwave cakes.  This happened out of desperation, on a day I was sugar starved and HAD to have a cookie, yes just one would have made me happy. As usual Pinterest came to my rescue and I had a chewy chocolate chip cookie in under a minute. In fact, if it wasnt for the egg yolk, I would have had the batter on its own :)

You will most certainly have all these ingredients in your pantry at any given time and so there is no excuse to not make it. So immediately after reading this, please do yourself a favour and check if it works, if not for the cookie craving (which usually for me is after mid night) :)

1-minute chocolate chip cookie (in a mug). Recipe adapted from here
IMG_8824
Butter- 1 tbsp
Granulated white sugar- 1 tbsp
Dark brown sugar- 1 tbsp, firmly packed
Vanilla extract- 3 splashes
Salt- a pinch
Egg yolk- 1
Plain flour- 3 tbsp
Chocolate chips- 2 tbsp ( I used dark choc. chips)

Melt butter in the microwave, preferably in the same cup you are planning to make the cookie in (to make it mess free and simpler). The butter should not boil, it should be just melted.
Add the white and brown sugars, vanilla and salt and mix well to combine, using a spoon.
In goes the egg yolk. Mix it in properly till no traces of the yolk is seen.
Mix in the flour properly and then fold the chocolate chips.
Cook on high in the microwave for 40 seconds, or a maximum of 50 seconds.
Serve warm (maybe even with a dollop of ice cream).
IMG_8816
Note: If you over cook it, the cookie starts drying and is awful (yes it has happened). So reduce cooking time if that happens to you
Like most cookies, this once will continue to cook as it cools.
Feel free to double it, in case your partner longingly looks at you gobbling it all up :)
I used a small espresso cup which was about 3/4th full. The dough rises a bit so make sure you dont fill it to the brim.
Feel free to use a ramekin, coffee cup or any small dish.

I was invited to be part of the Pin it Forward campaign by Pinterest, but was not compensated in any way for the same. All thoughts on Pinterest are my own.

Apple pie pancakes and OXO pancake kit review

0 nhận xét

IMG_7230
I have a love hate relationship with apples. I mean I love apple pie and apple turnover and apple cakes and stuff, but biting into an apple as a snack or so is not preferred. That said, if I'm given a slice or two, I'd eat it without complaint. Ro has taken a liking towards apples (????!!!) and we now have apples lying around all the time. He will soon get over it, I know! ...its like his pear phase, or green tea phase. But till then, I have to play along. 

I guess a whole lot of you know about Shrove Tuesday or Pancake day as its more commonly referred to as? It was on the 12th of Feb and I was sent the OXO pancake kit to review. Due to busy schedules, I could not post it on the day or after the day or even a week after, but finally got around to doing it today. Almost a month later, but better late than never right?
IMG_7204-1
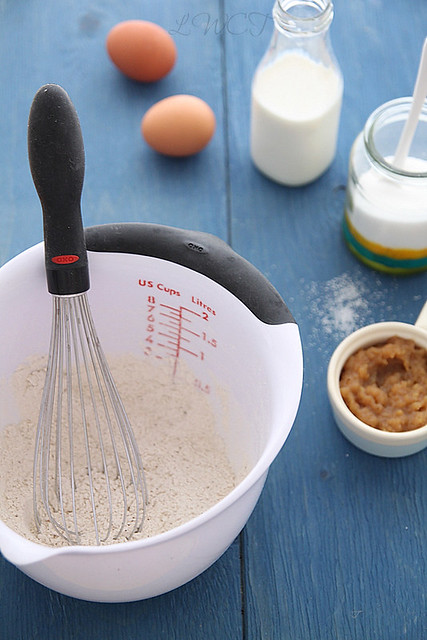
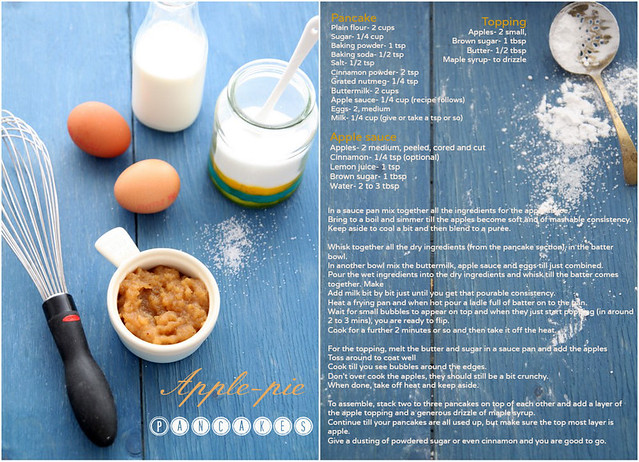
Anyways, talking about OXO. Its one of my favourite brands and I have quite a few OXO products in my kitchen. The pancake kit which comprises of a batter bowl, whisk and pancake turner is a welcome addition to my already existing collection. I have had terrible luck with whisks, it breaks on me or is too flimsy to do its job properly and just when I was ready to give up, the OXO Good Grips Balloon Whisk makes its appearance. Its so sturdy that I can whisk the hell out of a batter or sauce and it doesn't give up. Heck, I even whisked cream to stiff peaks using the whisk. The silicone flexible pancake turner is another fabulous piece. The size makes flipping pancakes a treat and since I don't make pancakes that often, I have been using it for omelettes and rotis and anything that needs to be flipped (pun intended). The batter bowl looks different from all the mixing bowls I own, and has a handle which I thought was a fabulous addition. Its so much more easy to handle a bowl when you can hold it properly, trust me! It has a beak which makes pouring out batter easy as well. Although I must admit, I tried to pour out the pancake batter on to the pan and it was a bit of a disaster. But that could also be because I am, in general, clumsy.

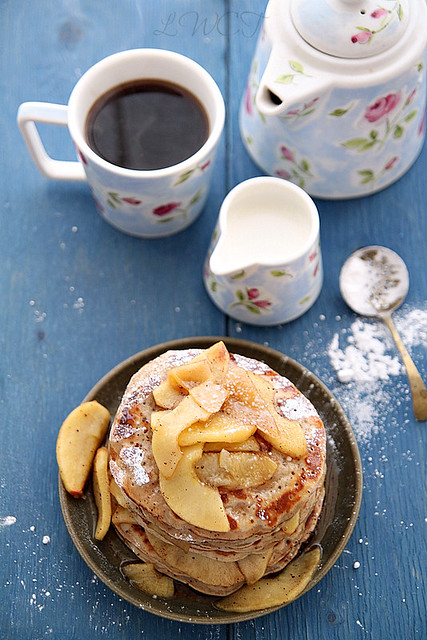
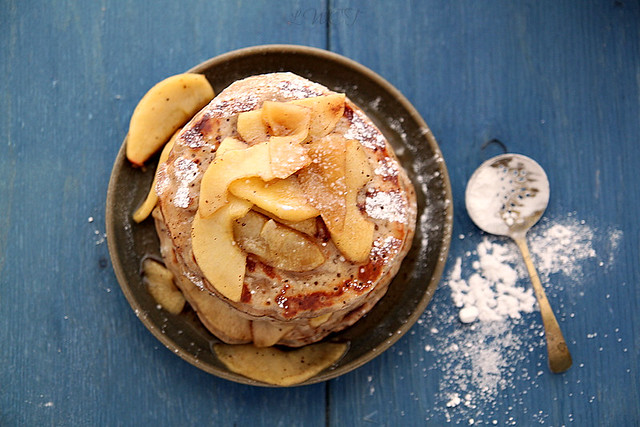
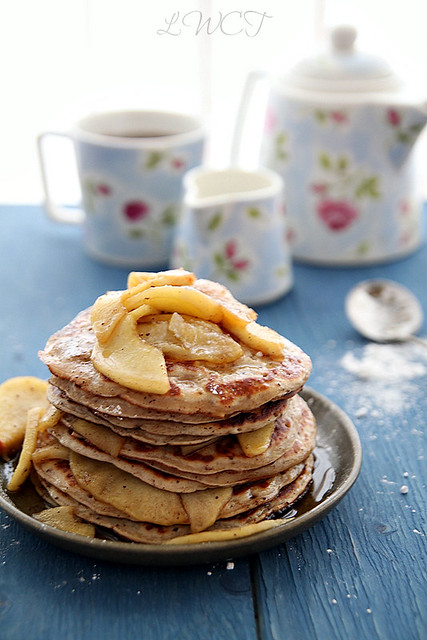
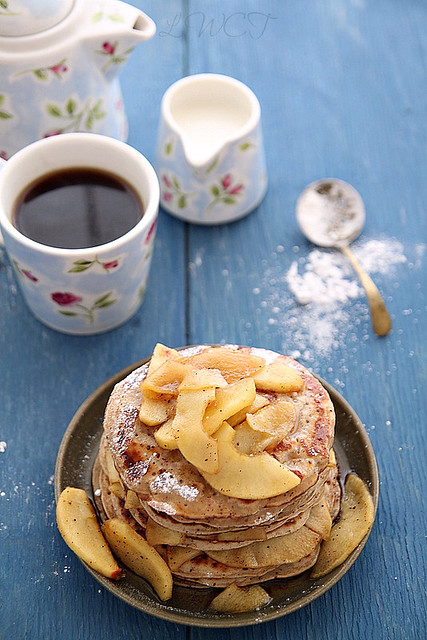
I decided to put the pancake kit to full use by making apple pie pancakes. Its a wee bit time consuming, especially if you don't have apple sauce ready but it tastes fab nonetheless. I doubt this would make it to a breakfast table, but certainly for brunch if you ask me. The apple sauce makes the pancakes super moist and well, apple-like and the cinnamon is what takes it to a whole different level. Try these for your next brunch session and your husband, kids, boyfriend, parents... would thank you :)

Recipe adapted from here (serves 2 to 3)
IMG_7235 
Plain flour- 2 cups
Sugar- 1/4 cup
Baking powder- 1 tsp
Baking soda- 1/2 tsp
Salt- 1/2 tsp
Cinnamon powder- 2 tsp
Grated nutmeg- 1/4 tsp
Buttermilk- 2 cups
Apple sauce- 1/4 cup (recipe follows)
Eggs- 2, medium
Milk- 1/4 cup (give or take a tsp or so)

Apple sauce (recipe adapted from here)
Apples- 2 medium, peeled, cored and cut into cubes
Cinnamon- 1/4 tsp (optional)
Lemon juice- 1 tsp
Brown sugar- 1 tbsp
Water- 2 to 3 tbsp

Topping
Apples- 2 small, peeled, cored and sliced into thin wedges
Brown sugar- 1 tbsp
Butter- 1/2 tbsp
Maple syrup- to drizzle

IMG_7227
In a sauce pan mix together all the ingredients for the apple sauce.
Bring to a boil and then simmer for about 10 to 12 minutes, or till the apples become soft and of mashable consistency.
Keep aside to cool a bit and then blend to a purée using an immersion blender or food processor.

For the topping, melt the butter and sugar in a sauce pan.
Add the apples to the mix and toss around, making sure its all well coated.
Cook till you see bubbles around the edges.
Don't over cook the apples, they should still be a bit crunchy.
When done, take off heat and keep aside.
28-1
Whisk together all the dry ingredients (from the pancake section), basically the first 7 ingredients, in the batter bowl.
In another bowl mix the buttermilk, apple sauce and eggs till just combined.
Pour the wet ingredients into the dry ingredients and whisk till the batter comes together. Make sure there are no lumps of flour. It wont be a smooth batter, though.
Add milk bit by bit just until you get that pourable consistency, making sure you don't over whisk the batter.
Heat a frying pan and when hot pour a ladle full of batter on to the pan.
Wait for small bubbles to appear on top and when they just start popping (in around 2 to 3 mins), you are ready to flip.
Cook for a further 2 minutes or so and then take it off the heat.
Continue till all of the batter is used up.
If you are not having them immediately, don't stack them up, instead, place them side by side on baking paper. 
When ready to serve, gently warm them up in a preheated oven (at 90C) for around 15 to 20 minutes.

To assemble, stack two to three pancakes on top of each other and add a layer of the apple topping and a generous drizzle of maple syrup.  
Continue till your pancakes are all used up, but make sure the top most layer is apple.
Give a dusting of powdered sugar or even cinnamon and you are good to go.
IMG_7256
Notes: You can also use a potato masher to mash the apple sauce, but i feel small chunks would remain, which of course is not an issue.
Add chunks of apples to the batter if you prefer that instead of the apple sauce.
I love cinnamon, but if its not your thing then reduce the quantity used.
You can do the same with any firm fruit of choice- nectarines, pears, apricots etc.

With thanks to OXO for sending me the pancake kit to review.

Eggless Tiramisu and Kopi Coffee review

0 nhận xét

IMG_7087
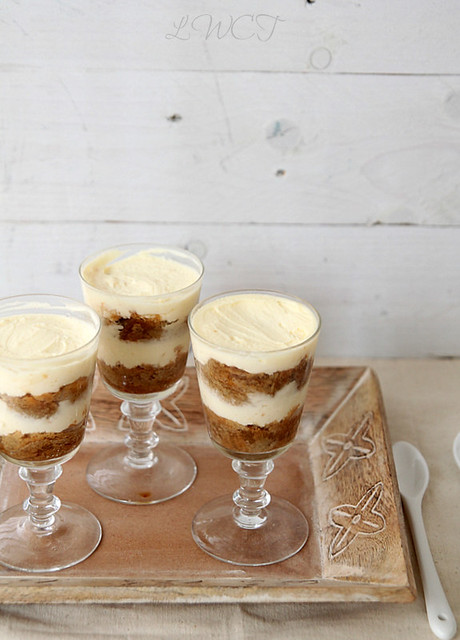
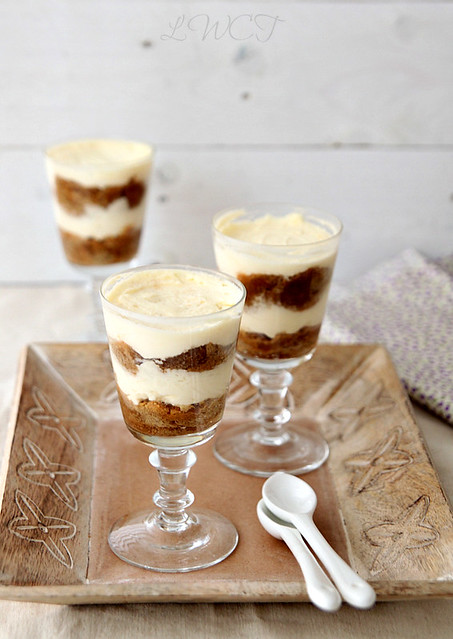
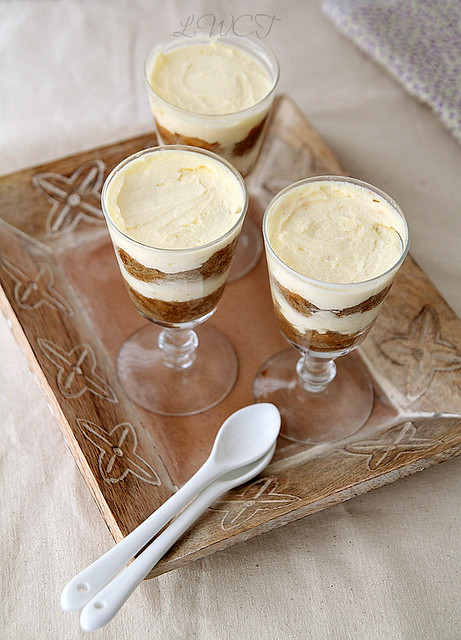
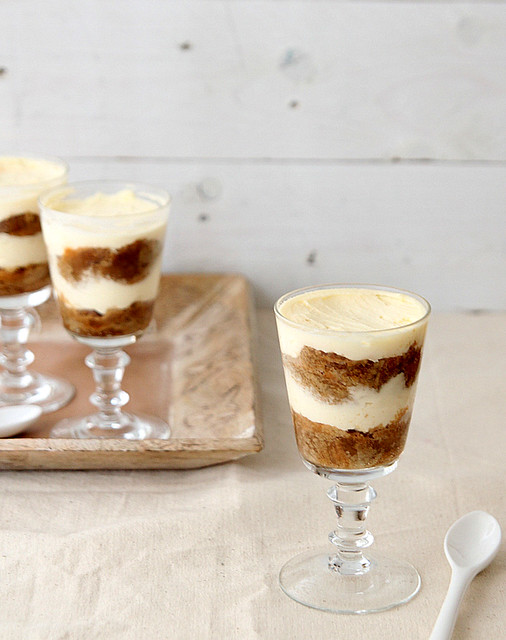
Life's been crazy busy over the last couple of weeks and I haven't taken a food photograph in a while. I haven't even recharged my camera battery which died on me 2 weeks back, to be precise, right after I took pics of the Tiramisu. I had my two BB team mates over 2 weeks back to sort out our goody bags etc etc for the event and I made an Italian spread. I usually make Tiramisu in a baking dish, but this time decided to do individual portions. I think its more convenient, both to serve and to eat, when its just 3 or 4 that you need to make. 

I have been making Tiramisu for a really really long time, and I think its one of the most easiest dessert recipes ever..that is, if you can get ready made sponge fingers (Savoiardi) and mascarpone cheese easily. I would never attempt it in India where I know I will have to make them both from scratch. Its possible, and there are loads of bloggers who have done the same. Just google it and you will not be disappointed. I had tried a recipe with eggs before and as good as it is, I somehow prefer the one without eggs, since you know the eggs are not cooked and such. I recently attended a bloggers day where we had to make the "authentic" tiramisu and boy we sweated it out whipping egg whites using a whisk. So that recipe used both egg yolk and egg white, and the outcome was really good, with absolutely no taste of the eggs obvious, and it was as creamy and silky as you'd imagine it to be. I shall try that out another time.
IMG_6817
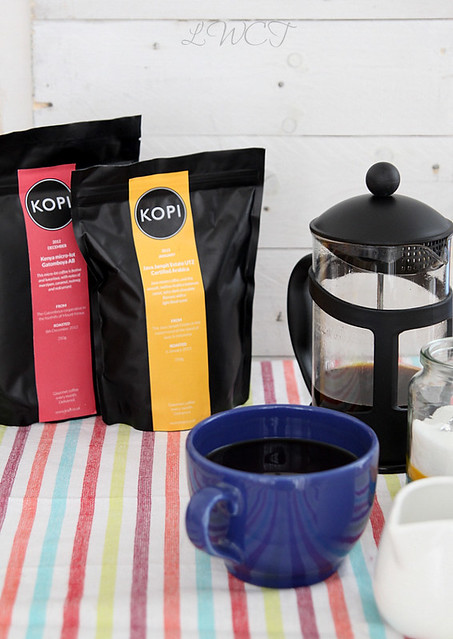
I also decided it was the best way to make use of the Kopi coffee samples that were sent to me, which I must say are simply amazing. The husband and I are hard core coffee drinkers and I for one need a really really good cuppa first thing in the morning. Kopi is an exclusive monthly subscription coffee club wherein each month the experts hand pick the finest single-origin coffee, freshly roast it and sends it over for you to enjoy. You can choose from different types of subscriptions and since the coffee is ground just 14 days before delivery, you can be sure of how fresh it would be. I was sent two different roasts to try. The Kenya Micro-lot Gatomboya AB with festive notes of marzipan, caramel, nutmeg and redcurrant is the kind of the coffee you'd like to wake up to on a Christmas morning. But my favourite however was the Java Jampit Estate Arabica which had very faint chocolate flavours, perfect for those after dinner coffee sessions. I decided to use the Arabica in my Tiramisu and it was a winner. The fact that the coffee packs can be sealed well even after they are opened, impressed me, and each time I opened the pack a strong whiff of the freshly powdered coffee used to hit me. Now that's what a good wake up call should be like :)

Coming back to the recipe...it is so easy to put together and the best part, you can make it a day or two ahead and keep it covered in the refrigerator. Serve it cold or leave it out on the kitchen counter for about 15 minutes, so its not tooo cold for your liking. 

Recipe adapted from here (makes 6 individual portions)
IMG_7069
Sponge fingers- around 12 to 15
Cocoa powder- to dust

Mascarpone cheese- 220 gms
Vanilla extract- 1 1/2 tsp
Powdered sugar- 3 to 4 tbsp (as sweet as you prefer)
Double cream- 1 cup

Strong coffee/ espresso powder- 1 tbsp (I used the Java Jampit Estate Arabica coffee)
Boiling water 1/2 cup
Kahlua coffee liqueur- 1 tbsp (optional)
Sugar- 1/2 tbsp
IMG_7054 
Make the coffee, dissolve the sugar and keep aside to cool. 
Once cool, add the coffee liqueur (if using), stir well and keep aside till ready to use.

In a free standing mixer, using the paddle attachment beat the mascarpone cheese with the sugar and vanilla extract till just smooth. Don't over do it.
Change the attachment to a whisk and add in the double cream.
Whisk well till soft, peaks are formed. Don't over do it, or the cream will split and then you are doomed. (has happened tonnes of times)

To assemble, have the individual glasses/ ramekins ready.
Break each sponge finger into two and dip them in the coffee mix. they should not be completely soaked, but still slightly crispy on the inside. 
Line them (rather squish them) into the base of the glass. If you need smaller pieces, just break them off from the remaining fingers and use as required. Make sure the entire base of the glass is covered.
Add a generous dollop of the filling and even it out as much as possible and dust some cocoa powder on top.
Layer again with the sponge fingers dipped in coffee and continue till your glass is full. The top most layer should be the cream.
Dust with some cocoa powder and keep in the refrigerator, covered with cling film, for at least 5 to 6 hours for the flavours to catch on.
IMG_7078
Notes: Use a thin sponge base instead of the sponge finger biscuits
While making the filling, if you don't have a stand mixer, then first mix the mascarpone with the other ingredients using a spatula, then in another bowl whisk the double cream till soft peaks form and then fold it into the mascarpone mix using a spatula.
Use the same measurements for a single dish of Tiramisu that would serve 6.

With thanks to Kopi Coffee for the review samples

Jan Ellis Pudding with a brandy-orange sauce

0 nhận xét

IMG_5687
I finally steamed my Christmas pudding two days back. The recipe said 10 to 12 hours but I just couldn't bear to carry on for that long and so after about 8 hours I checked it with a skewer, nothing stuck to it and so I decided it was time. While it was steaming, there was no divine smell of the soaked fruits in brandy or anything and I was disappointed. But once the cake was put aside to cool, the smells that filled my house was sooo good. It was like Christmas in a bowl. Ro on the other hand could have been a bit more enthusiastic about it..but instead he asked:
'cant we just buy a pud from M & S like we always do?' 
No we cant because I STIRRED this pud with aching arms and now I want to flambé it for Christmas. OK then this months electricity bill is coming out of your salary. 
Hmm, OK, screw the stirred pud, maybe we can actually just buy it from M & S

But then we agreed to still go ahead with this, with the bill situation still unresolved. But when those smells wafted through the house, I had a slight feeling it was thoroughly worth it. Its now well wrapped up and put in a cool, dark corner for the flavours to develop and then on Christmas day it has to steam for another 2 more house, after which it will be ready to be flambéed.
IMG_5676
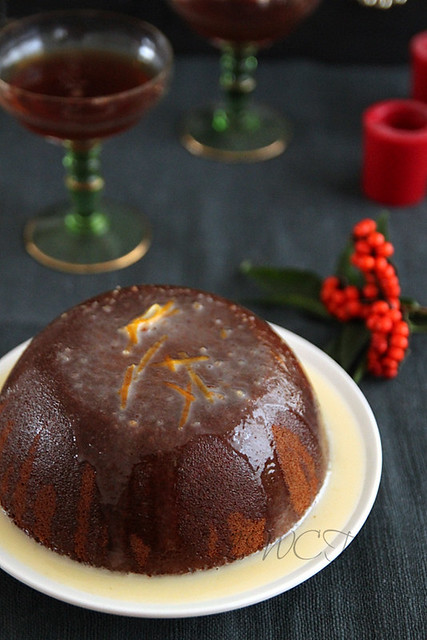
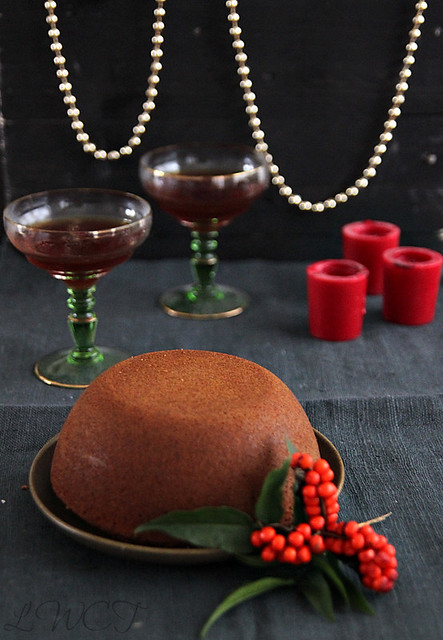
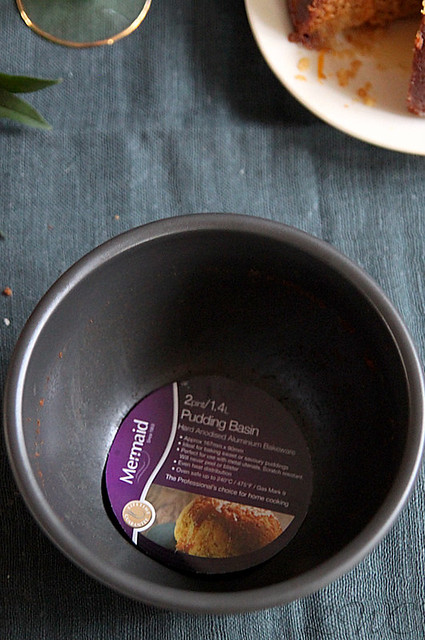
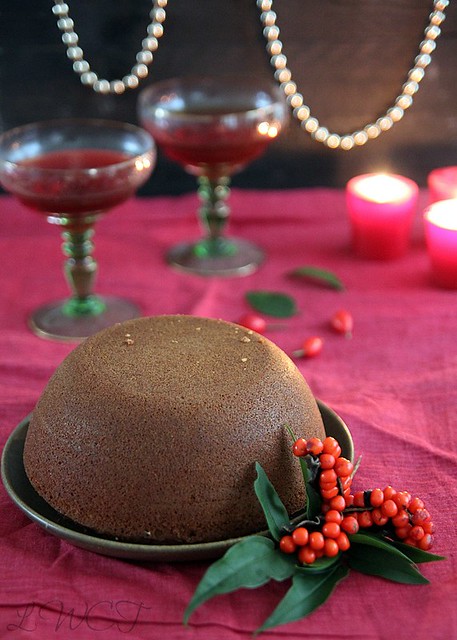
Since I couldn't eat the pudding I steamed, I went and baked another pudding yesterday. I am a novice when it comes to steamed puddings and after the 8hr experiment, I didn't want another steamed one. So I opted for the Jan Ellis Pudding which is probably the simplest but tastiest pud I have had in a while. I made it in a 2 litre Mermaid pudding basin which was absolutely perfect for the deed. Made of hard anodised aluminium, the basin is extremely solid and durable and there is even heat distribution which is great for the pudding to cook all the way through. I did butter the basin a bit with fear of not being able to turn it out on to a plate easily, but I doubt that was necessary, as it came out nice and smooth and with no fuss. The only thing I noticed was that, about 10 minutes into the baking time the top started to brown severely. I don't know if it was because of the heat from the basin or just the oven, but it was solved by covering with a silver foil sheet.  

The pudding is traditionally South African and you can read more about it on Cook Sister where I saw the recipe a loong time back and had book marked it. The pudding on its own is pretty average, but the sauce that accompanies it just takes it to a whole different level. Soaked in the sauce, this dessert will definitely be a hit. Go on, try out something different for Christmas and I assure you wont be disappointed.

Recipe adapted from here and here (serves 4 to 6)
IMG_5711IMG_5700
Milk- 1/2 cup
Baking soda- 1 tsp
Plain flour- 1 1/2 cups
Granulated sugar- 1/2 cup
Salt- 1/4 tsp
Apricot jam- 2 tbsp
Eggs- 2
Butter- 2 tbsp, melted
Cinnamon powder- 1/8th tsp (optional)

For the sauce
Double cream- 3/4 cup
Boiling water- 1/2 cup
Granulated sugar- 1/2 cup
Orange zest- 1/2 tbsp
Vanilla extract- 1/2 tsp
Brandy/ Cognac- a few splashes 
IMG_5660 
Dissolve the baking soda in the milk and keep aside.
Mix together the flour, sugar and salt in a large mixing bowl and into that add the remaining ingredients. Mix well using a strong wooden spoon, breaking down the apricot jam as you go.
Pour in the milk mix and continue stirring till all the ingredients come together and you get a smooth batter.
Pour into a lightly greased 2 litre pudding basin and bake in an oven preheat at 180C for about 40 to 45 minutes.
Once the skewer comes out clean, take the basin out of the oven and leave to cool for about 5 minutes after which you can turn it on to a wire rack to cool completely.

While the pudding is in the oven, you can get working on your sauce.
Mix together the cream, boiling water, sugar and orange zest in a sauce pan and bring to a boil over medium heat.
Take it off the heat and add in the vanilla and brandy, give a good stir and leave aside till your pud is ready.

When ready to serve, douse the pudding with enough syrup and have it hot or cold.
What I did was, I transferred the pud into a deep plate, warmed it up a wee bit in the microwave and poured over the some of the sauce. 
Left it aside for a couple of minutes and it had soaked up pretty well.
If you don't want to do this, then once you slice the pud, you can pour over the sauce then and serve. Not everyone might enjoy a soaked up pud. I sure did though :)
IMG_5707 
Notes: Feel free to halve the recipe, in which case you may need to reduce cooking time and also use a smaller pudding basin.
That said, you are free to bake this in any pan you like, a 9 inch cake pan would work perfectly well. But again watch out for cooking time.
I think i over baked my pud  a bit more than necessary and so it wasn't it soft soft. But once the sauce went over, it was no problem at all.
Jeanne of Cook Sister has used orange zest in her batter as well. Feel free to use about 2 tsp of zest if you please.
The cinnamon powder can be replaced with a pinch of nutmeg powder, or completely avoided. Your choice.
The brandy is purely optional. Avoid if not a fan.
I thought the apricot jam would lend a nice taste to the final product, but was disappointed I couldn't even taste it. I wonder why???

With thanks to Mermaid Bakeware for sending me the Pudding Basin for this challenge. All views expressed are my own.

No bake biscuit pudding (biscuit cake)

0 nhận xét

IMG_5434-1
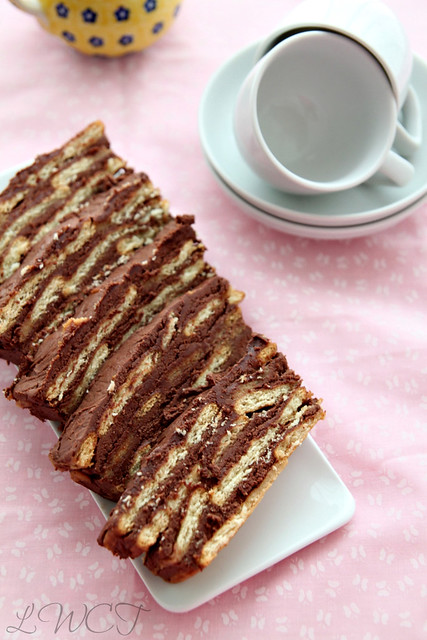
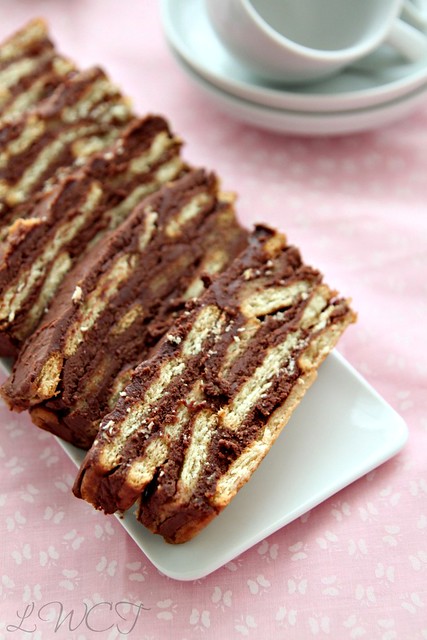
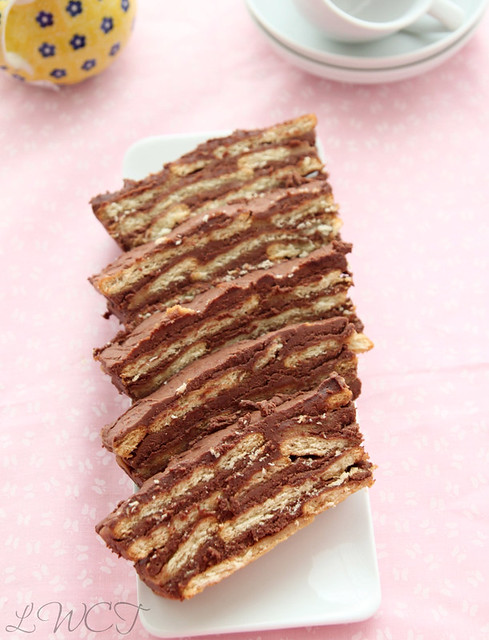
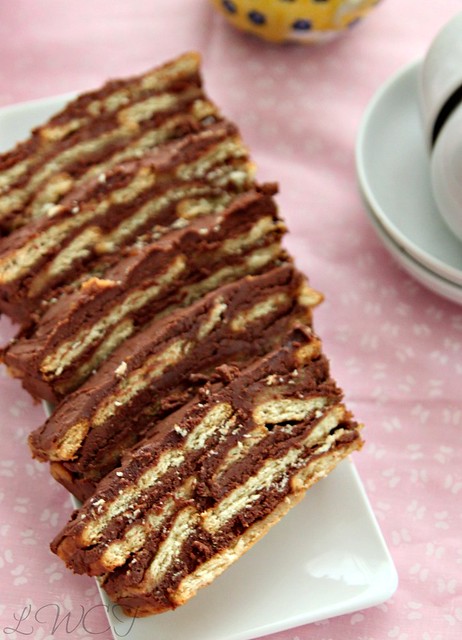
This is my mums signature dish. She makes it at every party and get together and is so popular among everyone. Back in those school/college- going days (I know I sound like a grand mother) whenever there is a party and my mums making a list of things to make, my brother and I would beg her to NOT make this damn biscuit pudding. It used to be so funny...even some of my uncles and relatives used to joke saying, we are not coming to your house if you are serving that biscuit pudding as dessert. Ironic, because, today I'm missing home terribly and thought what better to post than my mums infamous biscuit pudding on this Diwali day, and remember all things comforting and secure...home.

She used to claim its so damn easy to put together and was any day better than a store bought tub of ice cream (which we wouldn't agree of course) and also since it could be cut into slices, it made for a perfect fuss free, plate-free dessert, hence less washing up and easy solution. You might by now understand where I get my lazy genes from..yes mum, thank you very much. But in all honesty, I would completely understand her reasoning. Parties used to go till late in the night and no one wants to sit and wash dishes and clear up stuff till the wee hours of the morning. No dish washer and no live-in house maid to make this job easier. So anything to ease this process was welcome. 
IMG_5440
I called her up the other day to get the recipe and my exact line was 'Mummy I want the recipe for that horrible biscuit pudding you make.' To which she replied, I knew you would one day ask me for the recipe and I shall not give you. I said don't push it since I already had a tonne of biscuit pudding recipes from google searches and if by chance one of those turned out awesome, it would replace her boring recipe. After pulling each others legs for a while, she slyly told me shed just made the recipe that very day cos they had guests over for lunch the next day and so I got the recipe off hand.

So this Diwali, when everyone's making jamuns and Mysore pak and other yummy desserts, go against tradition and made this biscuit pudding instead. Its hassle free and tastes absolutely delish. I have tried another version of the same from Shabs Cuisine and it was great, even though a bit time consuming, and is much more richer and fancier than this version. Take your pick. Either ways, you will love it.

I would also like to dedicate this post to a blog reader of mine U, who sends me the sweetest emails and keeps in touch with me constantly. I thoroughly look forward to her inputs on the recipes I have posted and she once requested for a biscuit pudding recipe. Although I'm terribly late in posting it, I hope she enjoys it and is the recipe she was looking for. 
IMG_5424 
Tea biscuits/ Marie biscuits- 1/2 a pack (as needed)
Coffee/ Espresso powder- 1 1/2 tsp
Water- 1 cup
Butter- 100 gms, at room temperature
Icing sugar- 1 cup
Cocoa powder- 4 tbsp
Milk- approx. 2 tbsp
Vanilla extract- 1/2 tsp

Make a cup of coffee by diluting the coffee/ espresso powder in 1 cup boiling water. Keep aside to cool.
In a large bowl beat together the butter and sugar till light and fluffy. You can do this using a spatula or your hand held beater/ free standing mixer. Its not too difficult if your butter is soft enough.
Sift the cocoa powder into the mix and continue beating till they are all mixed well.
Add the vanilla extract followed by milk and continue beating till everything comes together. Add the milk bit by bit and see if it reaches the required consistency. It shouldn't be too stiff, but easily spreadable consistency, and not too watery. I used around 1 1/2 tbsp.
Dip the biscuits in the coffee and place a layer at the bottom of the pan (refer notes). Its ok if some of them overlap.
Drop a couple of spoons of the chocolate-butter cream mix on top of the biscuits and using a palette knife/ spatula spread it out as evenly as possible and pushing the cream into all the corners and spaces. Again, it need not be smooth and stuff.
Continue with another layer of biscuits followed by cream till all of it is over and the cream is the top most layer. I got 4 layers of each.
Fold over the cling wrap, give a gentle press and refrigerate for at least 4 hours..
When ready to serve, lift the pudding out of the pan, unfold it, turn it onto a plate and decorate (if needed) or immediately slice and place in a serving plate.
IMG_5414 
Notes: There are 2 ways to assemble the pudding..
  • Line a 9 inch loaf pan with cling film, so that the ends fall over the sides and there is enough cling film to fold over the top. This method will let you lift the entire thing off the pan and slice into desired sizes. Less messier, easier and looks pretty.
  • Just layer the entire thing in a square glass/ brownie dish and slice them as required. May be a bit tricky to get the pieces out, but my mum follows this method. She says it works.
The chocolate melts really fast when kept outside for too long, so hand around paper napkins along with the slices. You don't want chocolate stains on your new Fab India cushion cover do you?? :)
You can decorate the top with chopped nuts, chocolate swirls etc. I didn't do it because Ro will dig into it in a matter of seconds and its not worth all that decoration ;)
My mum uses up an entire pack of biscuits, but that could be because she uses a square Pyrex dish for the same. If using up all the biscuits, you may need a wee bit more coffee.

Blueberry breakfast muffins

0 nhận xét

IMG_3856
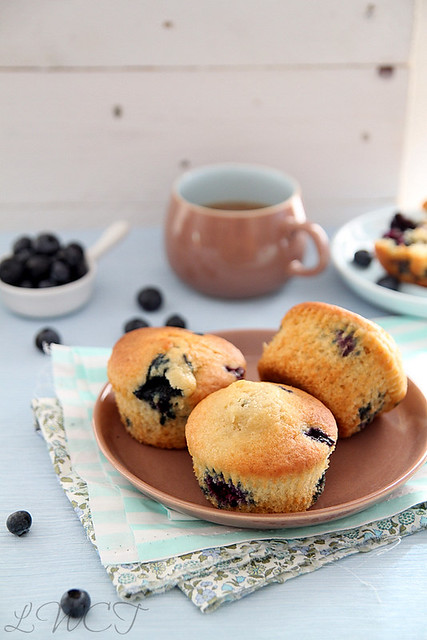
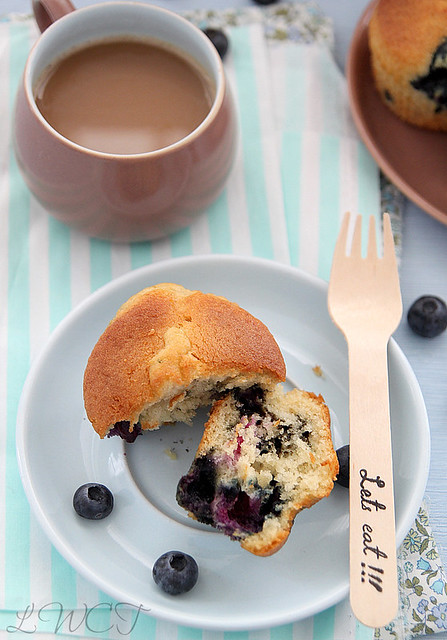
The husband started complaining about how boring his morning breakfast of toast, butter and cold meats were getting too monotonous and I thought I'll whip up some blueberry muffins for him. The muffins came out ok but our gluttonous minds set to work the moment they came out of the oven and so we were left with around 3 by the next morning. Since its just me and Ro doing all the eating, I usually make small quantities of all the cakes and bakes and cookies and such. This was no exception and yes, out of 8 large muffins, we ate around 5 within a time span of about 3 hours and then resisted the urge to have them as dessert after dinner.

So the muffins lasted for exactly one morning and it hasn't made its way through ever since. But please don't judge them by what I just said. It's got nothing to do with taste, just that blueberries went out of season right after this and the husband went back to having toast and cold meats because the muffins still left him hungry!!!!

I have tried making muffins numerous times before and except for the time I tried them with whole wheat, the rest have all been disastrous. I keep wanting them to taste (and look) like the Starbucks ones, but they don't come anywhere close. These, however, were moist, easy to put together and good to look at, and I was sold. If I ever make blueberry muffins again, I shall be sticking to this recipe. Well unless Starbucks actually gives me the recipe for their mother of a muffin :)

Recipe adapted from here (makes 8 of them)
IMG_3881-1 
Egg- 1 large
Sugar- 1/2 cup
Vegetable oil- 1/4 cup
Vanilla extract- 1/4 tsp
Plain flour- 1 cup
Salt- 1/4 tsp
Baking soda- 1/4 tsp
Plain yogurt- 1/2 cup
Blueberries- 1/2 cup (heaped)
IMG_3863-1 
Mix together flour, salt and baking soda in a small bowl. Keep aside
In a large mixing bowl, using a wire whisk or a wooden spoon, beat the egg till light and fluffy.
Gradually add in the sugar, while continuously whisking, followed by oil.
Stir in the vanilla extract.
Tip in the dry ingredients alternating the yogurt and mix it all in, without any traces of flour being obvious.
Slowly fold in the blueberries and using a large ice-cream scoop add the batter to a muffin pan, lined with muffin cases/ cups.
Bake in an oven preheated at 200C for about 20 to 22 minutes or till a skewer comes out clean (if you by chance pierce a blueberry, it wont come out clean, so don't take that into consideration)
Transfer the tray on to a wire rack and after about 5 minutes, remove the muffin cups and leave to cool completely.
Stays fine at room temperature for 2 days.

Notes: Original recipe calls for sour cream, but I had only yogurt at hand and used it instead. came out super moist whatsoever.

Fraisier trifle and a master class with Eric Lanlard

0 nhận xét

IMG_3724
(Ridiculously long post with loads pics and info, so feel free to scoot right away)
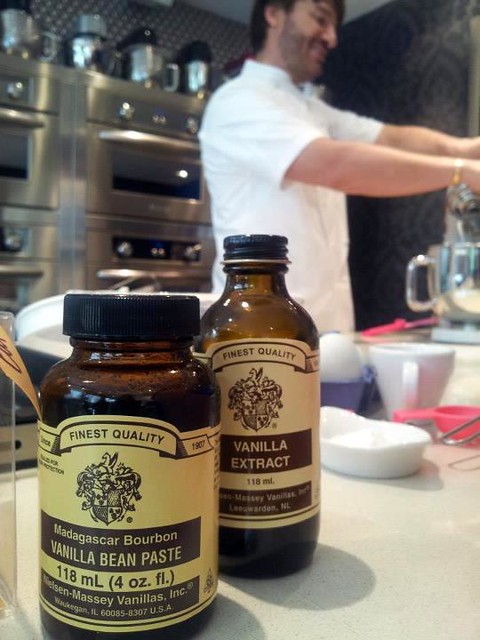
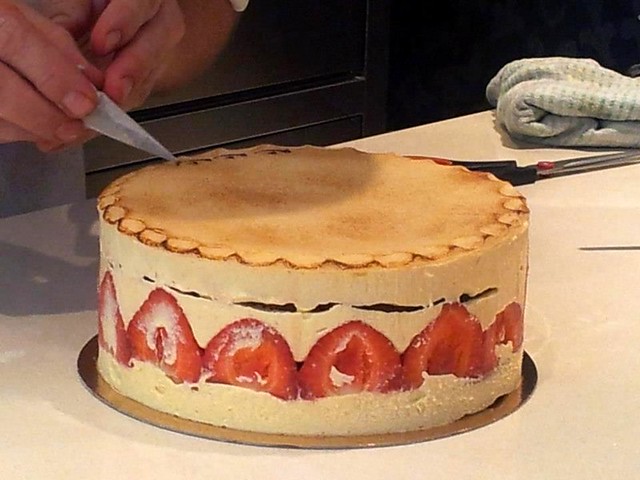
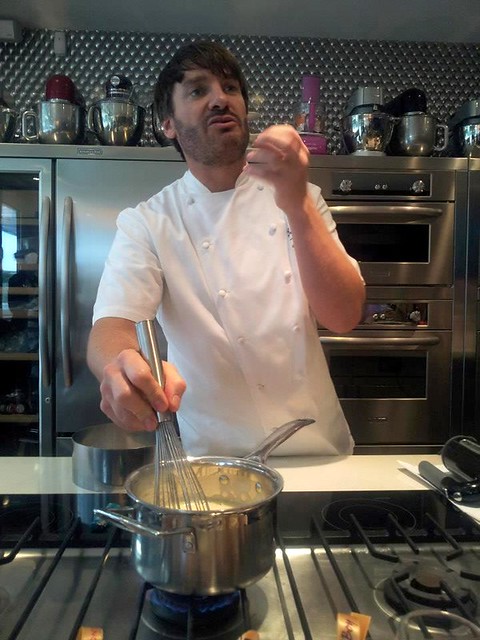
A few weeks back, some of us food bloggers were invited to a master class with Eric Lanlard featuring Nielsen-Massey Vanilla products at his signature store Cake Boy in London. It was an evening packed with loads of information on vanilla (which was truly an eye opener), yummy canapés and of course Eric Lanlard showcasing his fabulous baking skills by making a gorgeous French Fraisier, a cake so gorgeous to look at, you wont feel like cutting into it. And what a charming patissier he is...so full of energy, clearing our doubts, engaging us in conversation about baking and of course cute!!! :)

The class ended on a fine note with all of us getting goody bags along with the recipe of the fraisier cake and a challenge at hand. We were asked to create something to rival Eric's fraisier and blog about it. I have been breaking my head about it for so long to an extent it started haunting me in my sleep. I finally got around to doing the challenge a couple of days back and here is my take on it.
378253_396302733756158_1961166869_n 
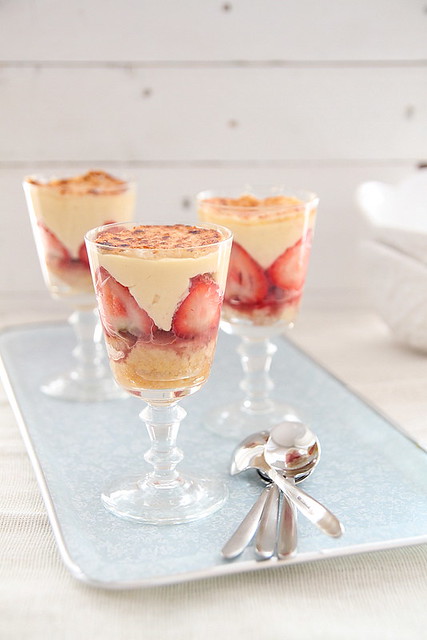
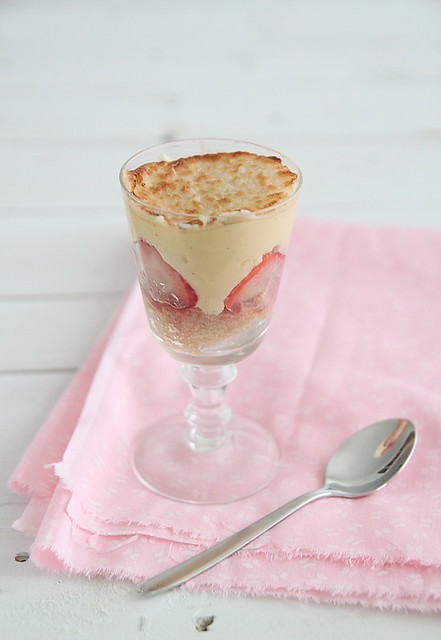
Since a fraisier cake was slightly out of my league, well mostly because it was just the two of us at home and scared that we would both finish it off in one sitting, I steered away from it. Instead I went ahead with a Fraisier trifle with all the goodness of the cake, but half the effort and oh so pretty they look in a glass and a great dessert idea since individual portions are less messier and storage in refrigerator is easier. 

I had baked a cake the day before for a friend and had some remaining which was on my kitchen counter nicely wrapped in cling film waiting to be assembled. I then set about making the filling of custard butter cream or fancily referred to as crème mousselini which I think is gods gift to bakers, especially to bakers who hate plain butter cream and cant pipe a frosting for nuts. I started off convinced I would screw it up somewhere and end up wasting a whole lot of ingredients, but when I saw it all come together, I knew I'd succeeded. And OMG I couldn't stop licking it from the mixing bowl and when I tried piping it on to a cupcake, it worked out just as fine and for the first time I had managed to pipe it without it it falling flat or it being too stiff it refuses to come out of the nozzle. I can very well say this is going to be my fav frosting as of now and my next experiment would be to try this with custard powder instead of making it from scratch. Yes laziness is my second name, in case you hadn't figured it out by now.
428942_396302973756134_2091831608_n 
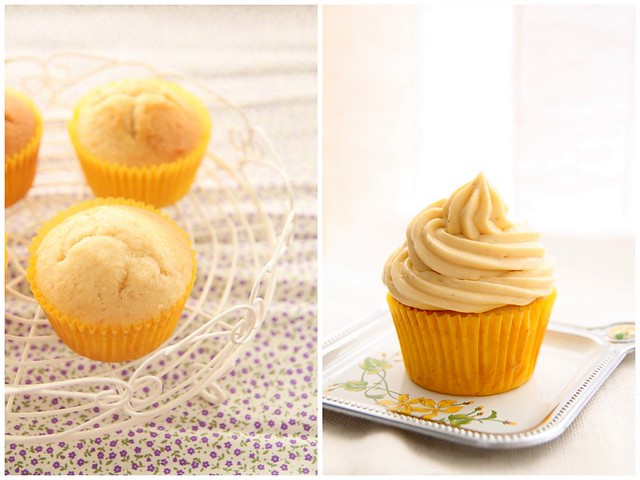
Although Eric's recipe was the base of all this experimenting, I did tweak it a bit here and there to suit my availability of ingredients. Eric's cake was a basic sponge cake, (which I am definitely going to try some day) whereas I used a vanilla buttermilk cake which has provided me with great results. I feel its best on its own as a tea cake, but of course so versatile you can use it as a base for any other fancy stuff, like a Tiramisu cake for example. It is light and airy, and moist at the same time making it impossible to hate. My love for plain cakes and that too vanilla flavoured ones never end, so this is the latest addition to the list, with the French yoghurt cake still topping the list (more so because of how easy it is)

Anyhoo, the final outcome was great and we did enjoy scooping it out and eating mouthfuls. Next time however, I would omit the toasted marzipan, only because I'm not a big fan, not because its bizarre or anything. When I have something to celebrate, I would also try doing the entire cake like the one above so I can share the calorie intake with others and not suffer on my own. In the mean time, I am thoroughly enjoying the Nielsen-Massey Vanilla paste and extract that is making its way through to almost all my cooking expeditions (sweet of course) ;)

For Eric's original recipe, follow this link. I am giving my version here, with Eric's recipe as the base. The measurements given are for the fraisier cake on the whole and not the trifle. I have, however, explained how I went about getting the trifle in order.

Vanilla Buttermilk cake (recipe adapted from here, makes 2- 9 inch cakes or 12 large cupcakes)
14 
Cake flour- 2 cups (make your own by measuring 2 cups of plain flour and taking out 2tbsp of flour from that and replacing it with 2tbsp of cornflour. sift it together. This results in a more tender crumb)
Baking powder- 2 tsp
Baking soda- 1/8th tsp
Salt- 1/4 tsp
Unsalted butter- 10 tbsp, at room temperature (or 142 gms, 1 1/4 sticks)
Sugar- 1 cup
Eggs- 3 large
Egg yolk- 1 large
Vanilla extract- 1 1/2 tsp (of course I used Nielsen-Massey)
Buttermilk- 3/4th cup

Sift together the first 4 ingredients into a bowl and keep aside.
Into the bowl of a free standing mixer with paddle attachment, add the butter and beat on medium speed till soft and creamy.
Add the sugar and continue beating till the mix becomes light and fluffy, about 3 minutes.
In goes the eggs one at a time, beating well after each addition. Follow with the egg yolk and beat it in.
Beat in the vanilla. At this point the batter may look curdled, don't panic, just keep doing the good deed.
Now reduce the mixer speed to the lowest and add the dry ingredients and buttermilk alternatively, starting and ending with the flour mix.
Scrape down the sides, making sure no traces of flour is seen and everything is mixed well.
Pour into the lined cake pans and bake in an oven pre heated at 176C for about 30 minutes or till golden brown and the skewer test comes out positive.
If making cupcakes, fill liners till about 3/4th full and bake for about 20 to 22 minutes, checking in between.
Cool completely on wire racks and then cling wrap it and leave it at room temperature for up to 2 days.

Creme Mousselini (combination of Eric Lanlard's recipe and from here, makes 1 cup)
309288_396302783756153_80501488_n 
Creme patissiere/ pastry cream- 1 cup (recipe below)
Unsalted butter- 150 gms cut into cubes, at room temperature

Creme patissiere
Whole milk- 1 1/4 cups
Sugar- 1/4 cup
Egg yolks- 3 large or 4 small
Plain flour- 2 tbsp
Corn flour- 2 tbsp
Vanilla bean paste- 1 tsp (I used Nielsen Massey)
Kirsch liqueur- 1 tsp (optional)

Into a heat proof bowl throw in the sugar and egg yolks and whisk till you get a smooth mix.
Sift together the plain flour and corn flour and add to the egg, whisking till you get a lump free, smooth mix. Don't let this mixture sit for too long as the sugar will start eating into the eggs, thus making pieces of egg form. (thanks to cake boy for that piece of valuable information)
Meanwhile, pour the milk into a saucepan placed over medium heat, and bring to a gentle boil, just till the milk starts foaming up.
Take it off the flame and add it to the egg mix, bit by bit, whisking continuously till well incorporated. If you find pieces of curdled egg don't panic just run it through a sieve.
Return this mix back to the saucepan placed over medium heat and cook till boiling, whisking continuously to prevent the custard from sticking to the bottom and forming lumps. This takes quite a while, so patience is highly recommended.
When the custard boils and has become thick and silky smooth, continue whisking for about a minute longer and then take it off the flame.
Transfer to a mixing bowl and add half of the butter, whisking well to incorporate it into the custard.
Cover with a cling film and leave to cool in the refrigerator. Or if you have time on the kitchen counter.
Once completely cool, add the vanilla bean paste and liqueur (if using) and whisk it in.
Add the remaining butter bit by bit whisking well after each addition to get a smooth and gorgeous creme mousselini which makes a perfect frosting.

For assembling
Ripe strawberries- 1 kg, hulled
Marzipan- 200 gms, rolled out and cut into 9 inch circle.
Melted chocolate- for decoration
309259_274400052661791_234769332_n 
When ready to assemble, unwrap the cake and slice off the top if it has domed.
Then place the cake at the bottom of a cake ring and using a palette knife, spread a thin layer of creme mousselini over it.
Cut some of the strawberries in half and place it around the edge of the ring, cut half facing out.
Fill the centre with the remaining strawberries, making them stand upright. (the trifle version is as below).
Spread the remaining creme mousseline on top of the strawberries, trying to fill in the gaps as much as possible.
Place the second layer of cake on top and press down to settle them all in.
Place the cut out marzipan on top, flute the edges and toast using a blow torch.
Melt the chocolate and use it to write 'Fraisier' on top and decorate the cake a bit. Also use some strawberries dipped in chocolate to adorn the sides.
Chill for a few hours before you unmould to get a gorgeous looking cake.

Fraisier trifle     
141
Crumble some of the cake roughly and keep ready. You can also cut them into the exact size of the glass, but I didn't have the patience.
Get 3 see through glasses, tumblers, martini glass, pudding mould...anything you fancy and layer the bottom with the crumbled cake...generously and tuck it in lightly.
Melt about 3 tbsp of strawberry jam lightly and mix with 1 tsp water.
Spread a thin layer of jam on top of the cake.
Cut the strawberries as mentioned above and place them inside the glass, cut side outward.
Fill with one large strawberry upright.
Top generously with creme mousselini, filling in the gaps as much possible, but really its no big deal because the messier a trifle looks, the better.
Top with a toasted marzipan and chill till ready to serve.
IMG_3701
Notes: I don't own a blow torch so I rolled out the marzipan, cut them into rounds and placed under the grill for about 2 to 3 minutes to lightly toast it. But as you can see I ended up burning most of it. Take extreme care when you do this as one blink of the eye and you can end up with black marzipan.

Now I'm gonna say a lil prayer and hope I become the competition winner :)

Disclaimer: I was invited to attend Eric Lanlard's masterclass

 
  • The Best Blog Recipes © 2012 | Designed by Rumah Dijual, in collaboration with Web Hosting , Blogger Templates and WP Themes