Showing posts with label Fine French. Show all posts

Lemon madeleines

0 nhận xét

I know this post was supposed to go up a couple of weeks back, but that was me being optimistic about posting stuff on the blog from home. Horrible internet connection and working on a tablet is not really a favourite thing, and to add to it, blogger or flickr - one of these- were acting up, forbidding me to place images the way I want. Anyways, I had to have the post up and running because as part of my New Year resolution, at least a recipe post a week on the blog was a must. I actually don't have anything else in my drafts and if i need to keep with the resolution:
1. The weather must be significantly better for me to (want to) take pictures
2. I should get off my lazy ass and cook
3. I should unpack my bags and dig out the props i bought from India (really cool ones BTW)
4. I should get off my lazy ass and COOK!!!

After diving straight into work, today is my day off and I don't see any of the above happening. Its Valentine's day, and what I should actually be doing is to cook up a storm for Ro (who couldn't care less about VD) and then cuddle up and watch a movie or something. But all I'm thinking of is what cocktail I can make with the new bottle of Cointreau I picked up from duty free and how many varieties I can whip up with the mixers lying around home. (It's only 11.30am btw! Do I have a drinking problem??? No don't answer that). Its raining and unbelievably windy and I don't want to cant go out. Oh, and Ro is working from home and in about 15 minutes he's going to ask me 'what's for lunch.' I'm going to reply 'love and fresh air,' and then it might end up in an argument and we'd be the awesome couple who fights on every VD.
Ok so madeleines. When I visited Paris last September with my blog buds, one of the things on my 'to buy list' was a madeleine tray. We visited a couple of stores that sell cooking paraphernalia and they all had gorgeous madeleine trays, but bloody expensive. So I conveniently forgot about it and instead came back home with other rubbish.  

Imagine my excitement when I found a similar tray in TKMaxx for a third of the price. I had to pick it up and make madeleines immediately. So I did and they came out perfectly well. Its so easy to incorporate a flavour of choice into these and I chose lemon- i used my home made extract. Its just a basic sponge recipe and I'm sure you can make it without the molds, but then they wont be called madeleines, will they? I once saw a post trending on Pinterest where oven safe spoons replace the molds. They don't give you the bump, but they do look pretty madeleine like and is a substitute for the tray. 

Enjoy!

Recipe adapted from here (makes 18, 8cm madeleines)
Eggs- 3 large, at room temperature
Granulated sugar- 1/2 cup
Dark brown sugar- 2 tbsp
Butter- 1/2 cup
Plain flour- 1 cup
Baking powder- 1/2 tsp
Salt- a pinch
Vanilla extract- 1 tsp
Lemon extract- 1/2 tsp
Lemon zest- 1 tsp, freshly grated
Whisk together the flour, baking powder and salt in a bowl and keep aside.
Beat together the eggs and both the sugars on high speed, either in a free standing mixer with whisk attachment, or using a hand whisk, for about 5 to 8 minutes or till pale and thick.
While the egg mix is being whisked, melt the butter in a saucepan and keep aside. It should be warm to touch.
Into the egg mix add the vanilla and lemon extracts and the lemon zest and whisk till just combined.
Sift in the flour mix bit by bit, folding well after each addition. Do this slowly and carefully, as you don't want to deflate the egg mix. I used a silicone spatula to fold it in.
Take about 1 cup of this batter and mix it with the warm melted butter.
Whisk it in really well to make sure the butter has been nicely mixed in with the batter.
Add this to the remaining egg batter and gently fold it in till well mixed. (Its easier to mix a bit of the batter with the melted butter and then add that to the bigger batch. You also don't end up deflating the mix too much.)
Cover with a cling film and refrigerate for a minimum of 1 hour. You can also keep it up to 3 days in the fridge.
When ready to bake, preheat oven to 190C and generously grease a 2 12 mold madeleine trays with melted butter using a pastry brush. Also dust the molds with plain flour (tapping out the excess) to be on the safer side.
Drop a tbsp each of batter into each mold. It will be slightly domed in the centre which is precisely what you want.
Bake for about 9 to 11 minutes or just until the cake springs back when touched with a finger, or till the edges turn a light brown. Don't over bake it.
Take the pans out of the oven and immediately tap out the madeleines on to a wire rack.
Dust with some icing sugar and serve immediately with a cup of coffee.

Notes: I had only one 12 mold tray and so after i finished baking the first batch, i kept it aside for a few minutes to cool down and then repeated the greasing process. The dough was kept back in the fridge while the first batch was baking. The second batch also came out perfectly fine for me.
The madeleines are best had immediately, but it can also be stored up to 3 days in an air tight container in the fridge.

Oeufs en cocotte (eggs in pots) and Paris in pictures

0 nhận xét

When the husband ditched me on my dream trip to the vineyards of Burgundy region, I was really upset. I whined about it to my friends and suddenly a plan materialised. Ananda and Finla decided to join me and emails started flying back and forth with Paris holiday plans. Its high time I accepted the sad fact that the husband and I have completely different ideas of a holiday, which is good, because then you are not forced to do things we don't like. The practical thing to do would be to meet half way and decide on something we both enjoy, but that's lot of work apparently!

I have been in UK for 5 years and have wanted to travel around Europe ever since we came here. I always felt bad for broaching the topic to Ro because I was unemployed and it didn't feel right. Now that I have started working, I think I can start paying for my holidays and it feels great to be able to do that. Thanks to my blog, I have friends who are equally enthusiastic about travelling and food and it makes the holiday even more fun. I spent 3 fabulous days with the girls and we plan on making this an annual ordeal. Greece is up next and I am going to start saving for it right away.

Our plan was to do a bit of sightseeing, but trying out all the French food we whipped up for the blog, and have become so familiar with, was priority. We also wanted to check out some of the famous cook shops in Paris, known for the copper vessels and pastry making utensils and go crazy there. The vineyard trip was on the list, but we couldn't make it because travelling there without a car was slightly difficult (and expensive) and so it was replaced with another day out in Paris. 
Highlight of the trip was the amazing dinner we had at a quaint French restaurant which Finla found after loads of research. Reservations were made and I cant tell you how glorious the food was. I think I'll never forget the food I had there. After a bottle of wine and some cocktails, we stumbled back to the hotel past midnight and yapped away, till we no longer could keep our eyes open. Day 2 was relaxed since the vineyard trip was cancelled and so we took it easy and generally roamed around some markets and streets and also went up the Eiffel tower. Day 3 was spent at the numerous cook shops and we went crazy seeing all the cooking utensils there. They were expensive so we had to choose and select what we really needed. I can still see Finla's excitement at having bought authentic canele moulds- copper ones at that- which would be like a family heirloom :)  We also wanted to check out the famous Sabre Paris store but Monday was their day off (which we painfully found out only after visiting 2 locations) and so that didn't work out, much to Ananda's disappointment as she was planning to go crazy with prop shopping there ;)

In all honesty, Paris failed to amaze me with regard to the city. Its beautiful alright, but when you actually travel around like the locals you'd see that the metros are terribly dirty, smelly and the number of homeless people sleeping in the stations and people begging were scary. Food, I must admit was fabulous- the crepes, the croissants, the pastries and the wines would never be forgotten. I didn't think it was crazy expensive but of course it depends on where you eat. If you stay clear of the touristy areas (which we decided we would) you wont be bankrupt. I found the French people very very helpful, We'd be standing on the pavement with our maps open and there would be passers-by who would tell us how to get to a place. They'd correct the way we were pronouncing names and generally strike up a conversation. This would have usually irritated me (me not being social and all), but when you are in a foreign country, it somehow makes a difference. 

Back to reality after 3 great days, and dreaming of our next trip to Greece. Thanks girls for coming to my rescue when I was down in the dumps and making it a memorable holiday. 
Hotel de Ville (the local administrative office)


Notre-Dame de Paris - perfect example of French Gothic architecture


'Love Lock' Bridge


River Siene

We picked up a few macarons from Laduree, my favourite being the pink peppercorn.


Of course we checked out rival Pierre Herme as well. I must say, I preferred L'aduree better


Jardin du Luxembourg where we enjoyed our macarons. Of course we only saw the main fountain area.

Dinner was at this fabulous restaurant called Chez Toinette where we had the most amazing French food. Started off with snails (which were yum) and Oeufs en cocotte and went on to the famous Boeuf Bourguignon, Steak au poivre with Potato Dauphinoise and Sea bass with olive oil and thyme


Dessert was of course Creme Brulee at another restaurant (which was not really up to mark)

Day 2 started off with a visit to a farmers market

Breakfast was freshly baked croissants and coffee


Fell in love with the balconies

Eiffel..soaring high. I thought it was a bit over rated. In fact when i saw it from afar I thought it was the BT Tower (like we have in London)
My dream of kissing a guy under the Eiffel Tower is yet to come true. ONE DAY!!! :)


Le Louvre, I thought, was another one of those over rated places, but boy was I wrong. The mere magnificence of the exterior had me floored. I'm kicking myself for not having spent a day at the museum. Next time!


The French Onion Soup which was not that fab, but I HAD to give it a go.

Oeufs en cocotte (eggs in pots) (Recipe adapted from Julia Child's Mastering The Art of French Cooking). Serves 1
Butter- 1/2 tsp
Double cream- 2 tbsp
Egg- 1 (or 2)
Salt and pepper to taste
A ramekin that is 3 inches in diameter and about 1 1/2 inches high
An pan containing water

Pre heat oven to 187C.
Take a bit of butter and grease the ramekin
Pour in 1 tbsp of double cream into the ramekin and place into the pan containing simmering water over moderate heat.
When the cream is hot, break the egg into it and pour in the remaining tbsp of double cream over the egg.
top with the remaining butter and chuck into the oven along with the pan of water.
Cook for about 7 to 10 minutes..
Its done when the egg is set but still a bit wobbly. Make sure you don't over cook the egg, or else it would turn hard. (which of course I managed to do)
Take it out of the oven but leave he egg in the water bath for about 7 to 8 more minutes after which you can season, add some herbs and enjoy.

Macarons {3 ways}

0 nhận xét

IMG_0827-3
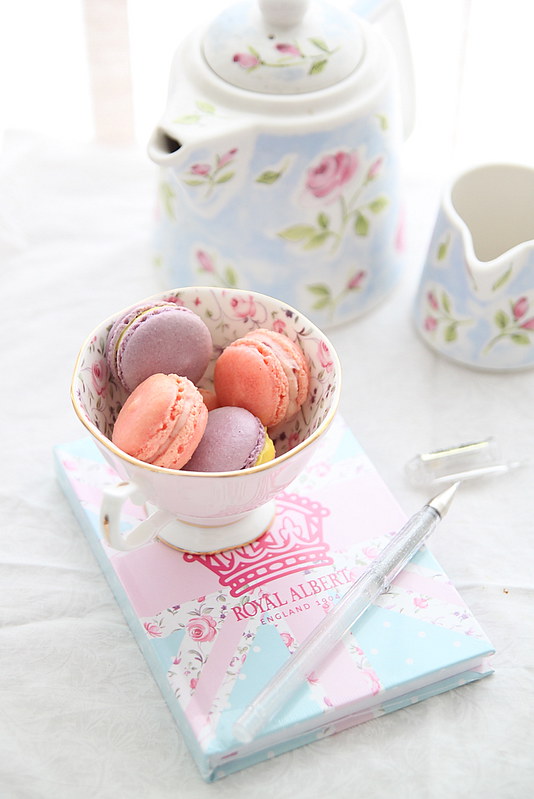
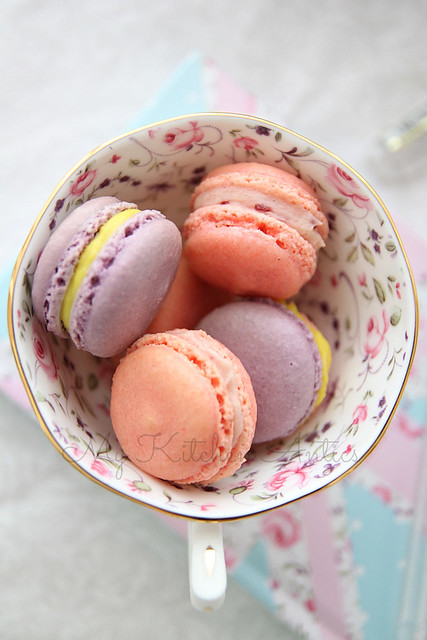
Last week, a couple of us food bloggers went to the Royal Albert Afternoon Tea Tour in association with Breast Cancer Care. It was an afternoon of fun, eating and oohing and aahing the gorgeous, gorgeous vintage style tea sets that were used to serve the cupcakes and tea in. Just a few days before, we were oohing and aahing their collection at one of the department stores and Id seen this one particular cup and saucer set with tiny flowers inside, and I even remember exclaiming to a fellow foodie that some pretty and dainty macarons would just look gorgeous in them.

Little did I know that two days later I'd actually get the exact same cup and saucer from Royal Albert in my goody bag at the tea party. I HAD to make macarons and I even had a clear idea what colour and how Id style and photograph it. I am very pleased with how they have turned out and even had a small afternoon tea party at my place. The tea tour will be heading to different locations around London, so please do drop by, enjoy some tea and cakes and support the great cause.
Thursday 12th and Friday 13th- Bloomsbury Square
Saturday 28th and Sunday 29th- Parsons Green

I always follow the basic macaron recipe from Ottolenghi (Recipe here) which fetches me around 22 to 24 medium sizes macarons. For a full, detailed post on macaron making, follow this link. The fillings are for 12 macarons. I always halve the batter and add two colours. I get around 12 macarons in each colour.

Pineapple cheesecake filling
IMG_0840
The filling for the purple one was Pineapple cheesecake a really pleasant one made with the Castello Pineapple Halo, a soft cheese coated in pineapple and almonds. Castello has this fabulous range of cheese which go great with white wine. My favourite however is the pineapple flavoured one which works great as cheesecake (trust me on this, I tasted it at the Castello event and loved it). So inspired by that I made the cheesecake filling for the macarons. It was a hit. (I added some yellow colour to emphasise the pineapple bit)

Castello pineapple halo cheese- 1/3 rd cup, at room temperature
Double cream- 1/4 cup
Honey- 2 tbsp

Whisk the double cream till soft peaks form.
Fold in the soft cheese slowly, till well mixed and no traces are seen.
Add the honey (or icing sugar) and mix well.
Refrigerate till ready to use.

Raspberry jam buttercream filling 
IMG_0817-1 
The pink macarons made specially for Breast Cancer Care were filled with raspberry jam filling. This is a really easy one and quite versatile because you can use any jam and make it into a filling.

Butter- 4 tbsp, at room temperature
Raspberry jam- 2 tbsp
Vanilla extract- a drop (optional)
Icing sugar- 2 tbsp (add more if you like it sweeter)

Whisk the butter and icing sugar together in a bowl, till light and fluffy
Add the jam and vanilla and continue whisking till they all come together.
Refrigerate till ready to use.

Cardamom cream cheese filling
IMG_0517-1 
I love cream/ soft cheese fillings and frosting and my macaron fillings are almost always cream cheese based. I used the Lactofree soft white cheese for this and was pleasantly surprised at how nice it tasted. Lactofree products are perfect for those who are lactose intolerant and doesn't have to give up dairy altogether. I had the privilege of tasting some of their products and you wouldn't even be able to make out the difference. Check out the website for more details.

A couple of us were invited to Preeti's place for an Indian themed lunch and while breaking my head on what to take for her, Suchi came up with the idea of the tricoloured Indian flag theme. The party was just two days after Indian Independence Day and it was the perfect theme. It looked gorgeous when put together and I filled it with cardamom to give it an Indian touch. Personally, I find cardamom to be an over powering spice, and I prefer it in the mildest possible dose, so this was not really my favourite. I did get good reviews about it though.

Cream cheese- 1/2 cup
Icing sugar- 3 tbsp
Vanilla extract- a generous splash
Cardamom powder- 1/2 to 3/4 tsp (powder the cardamom seeds to make enough)

Whisk the cream cheese and sugar gently using a wire whisk. Make sure it doesnt become too loose.
Fold in the vanilla extract and cardamom and continue mixing till they all come together.
Do a taste test and add more cardamom if required.

With thanks to all the brands for inviting me to the events and for the samples.

Vanilla macarons with speculoos filling

0 nhận xét

IMG_7420
Dora of BoBo Macarons had given a master class on macaron making at the Bloggers' Buzz event, and that really pushed my confidence levels. I got down to business a few days after the class with a free mind and casual approach and voila, the perfect macarons at my disposal. I had tried espresso macarons a while back (when the macaron rage was full on) and although they weren't perfect, at that time I thought it was an accomplishment. After that I would have had at least 4 to 5 disasters and had almost given up on making macarons when Dora showed us how easy it was. Really, you need to see an expert do it all with ease to actually learn the art of macaron making. 

So after the success with vanilla macarons, I was over confident that I had tackled the macaron monster. and happily agreed to make some chai spiced macarons for a shoot (as per request of course). Little did I know the macarons had a mind of their own. The day before the shoot, I shortlisted Meeta's recipe for the same (spiced chai macarons) and got down to business- confident to the core and a bit nervous at the thought of ending up with no feet at all. Well, feet were the least of my problems. The first batch had feet but came out cracked on top, like crazy cracked. Of course, what do I do first, panic. Panicked like crazy for about 1/2 an hour, read up on troubleshooting macarons, thought it was the temperature that caused it to crack and decided to make another batch. Followed the same recipe, reduced temperature a bit and nope, no difference, cracked tops on some, and those which didn't crack came out with crinkled tops. Chucked out that lot as well. 
IMG_7457
By this time, I was almost in tears. I immediately called up Shab (an expert at this) who calmed me down and I decided to do the recipe I was used to, with just the addition of the spiced chai powder. Piped them out onto two trays and this time, one tray came out sort of perfect, but the other again crinkled and cracked tops. The problem here was... I had no clue what the hell I was doing wrong, to actually rectify it. If one tray of the same batch came out right and the other didn't, it couldn't have been the macronage or the setting time or the temperature. The only reason I could come up with was the tray lining used. One was a silicone mat and the other just baking paper. The macs on silicone mat came out good whereas the other was rubbish. I got around 6 to 8 decent macs from that lot, but it still wasn't enough for the shoot.

My mum called at the exact minute I was fretting over the macs and managed to freak her out as well. Her solution, just buy them from the store. If only chai spiced macs were readily available..and that too not filled, because that I had to do on the day of the shoot since they wanted to capture the piping technique. I had other dishes to prep for the shoot, plus a prop consultation by the stylist and I was a mess by then. I decided to give the macs a break and started tackling my other dishes. And then at around 9 at night I decided to give macs one last try. Yup, you guessed it right..disaster again. I mean I just didn't know what to do. Sorted out around 10 decent macs from the 4 batches I made, which means just 5 sandwiches. I knew I was in deep shit and had to figure out a way to make the macs work at the shoot. Lesson learnt..never ever agree to do macs for anyone. Like Dora said, your mood clearly reflects on the macs you make, I completely believe that now!
IMG_7563
In the pic above you can see the disastrous macs (see the cracks?). Even after sandwiching them, they looked ugly. The flavour however was brilliant and I hope to try them out again when my macaron phobia is over. Comparing the vanilla macs to the chai ones, I'm in awe of how great they turned out. The biscoff / speculoos spread is a current fav and Nutella has been happily replaced. Keeping the macs simple with vanilla worked because the speculoos filling is fab and that was the only way to bring out its flavour. I loved the combo and some of our friends who tried it, loved it as well.

Recipe adapted from here, makes around 18 to 20 sandwiched macs (originally from Ottolenghi)
Ground almonds/ almond meal- 60 gms
Powdered sugar- 100 gms
Caster sugar- 40 gms
Vanilla paste- 1/2 tsp (or 1/2 tsp vanilla extract)
Egg whites- 60 gms (I used eggs whites from a carton Two Chicks)

For the filling
Double cream- 1/4 cup
Speculoos spread- 4 tbsp (Lotus spread)
Granulated sugar- 2 tbsp (optional)
IMG_7435
If you are trying macs for the first time, do read Demystifying Macarons by the ever talented Helen Dujardin and you will be fine (except if the macs just decide they will not make us happy).
Before you start, get the baking trays lined with baking paper and the piping bag with round tip nozzle ready.
Sift the icing sugar and almond meal together once or twice to make sure there are no lumps. Its ok if they are not too fine. 
In a free standing mixer with whisk attachment whisk the egg whites till frothy.
Add the caster sugar bit by bit, while continuously beating, till soft peaks form.
It should hold its peak shape when you lift the whisk, but shouldn't be too dry and stiff.
Add two spoons of almond powder mix into the meringue and fold it all in using a spatula. You can be a bit vigorous here.
Add the remaining almond powder mix and slowly fold it in till you get a smooth mix.
To check if the consistency is right the batter should fall back in ribbons when you lift the spatula.
Also put a spoon full of the batter on a plate and if it spreads out on its own (not too fast) then you are good to go. If it doesn't, give a couple more folds and loosen it out. This is very tricky, if too loose  you are ruined.

IMG_7452-2
Fill the piping bag with batter and pipe small rounds on to the trays. leave around 2 inches gap between the shells.
Gently tap the trays on the kitchen counter to rid of the air bubbles and keep aside to dry. This can range from 15 minutes to about an hour, depending on the humidity of the place. 
They are ready to bake when a film forms on the shells and when you lightly touch them, they no longer stick to your fingers.
Pre-heat oven to 140C and bake the macarons on the middle rack for 12 to 14 minutes. And do pray that nothing goes wrong in the oven. 
Once time is up, take the trays out of the oven and leave aside to cool completely after which you can carefully remove the shells from the paper and store in an air tight container till ready to pipe.

IMG_7477
For the filling, whip the double cream till soft peaks form.
Fold in the sugar and speculoos spread and mix till they all come together.
I have eye balled the measurements here, if you need more spread flavour coming through, then add more.

Either fill a piping bag with the filling and pipe on to the macaron shells or if you are lazy like me, use a small tea spoon and spread on to the shells.
Sandwich them and store in the refrigerator in an air tight container over night for the flavours to set in.

Fraisier trifle and a master class with Eric Lanlard

0 nhận xét

IMG_3724
(Ridiculously long post with loads pics and info, so feel free to scoot right away)
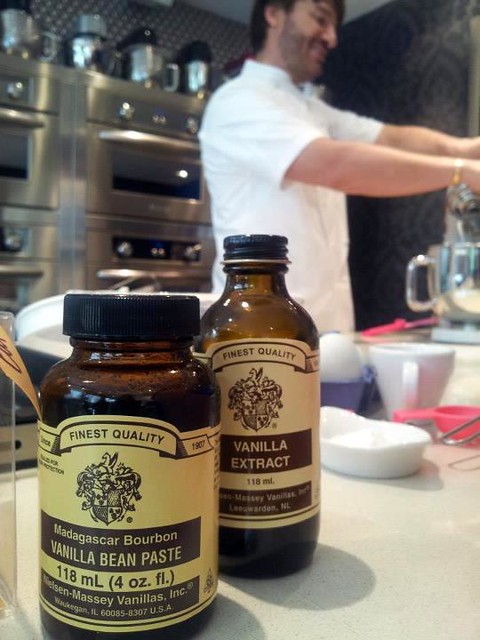
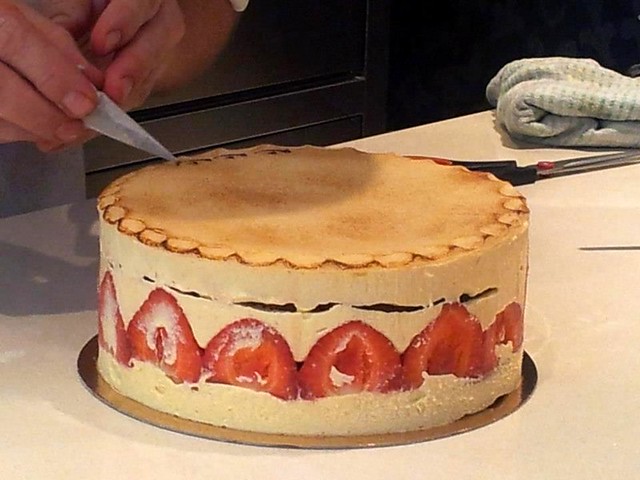
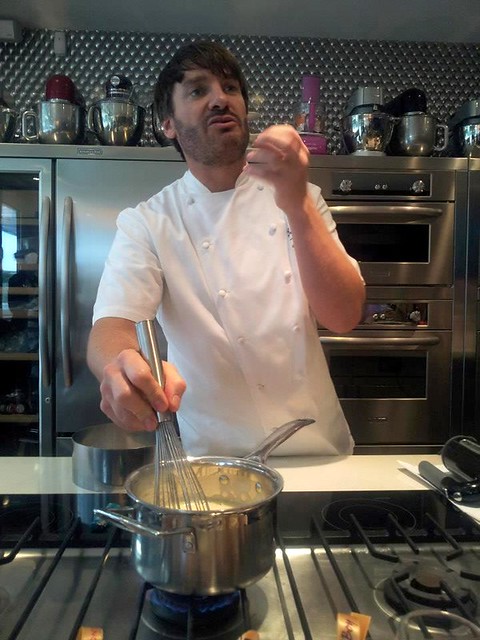
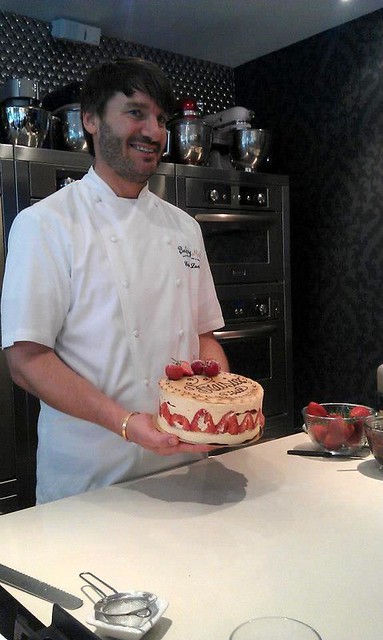
A few weeks back, some of us food bloggers were invited to a master class with Eric Lanlard featuring Nielsen-Massey Vanilla products at his signature store Cake Boy in London. It was an evening packed with loads of information on vanilla (which was truly an eye opener), yummy canapés and of course Eric Lanlard showcasing his fabulous baking skills by making a gorgeous French Fraisier, a cake so gorgeous to look at, you wont feel like cutting into it. And what a charming patissier he is...so full of energy, clearing our doubts, engaging us in conversation about baking and of course cute!!! :)

The class ended on a fine note with all of us getting goody bags along with the recipe of the fraisier cake and a challenge at hand. We were asked to create something to rival Eric's fraisier and blog about it. I have been breaking my head about it for so long to an extent it started haunting me in my sleep. I finally got around to doing the challenge a couple of days back and here is my take on it.
378253_396302733756158_1961166869_n 
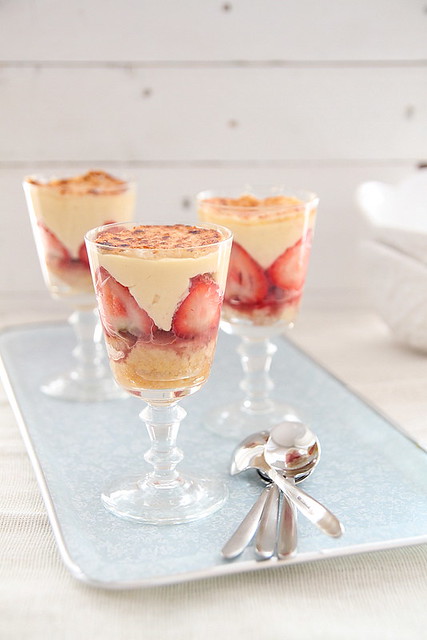
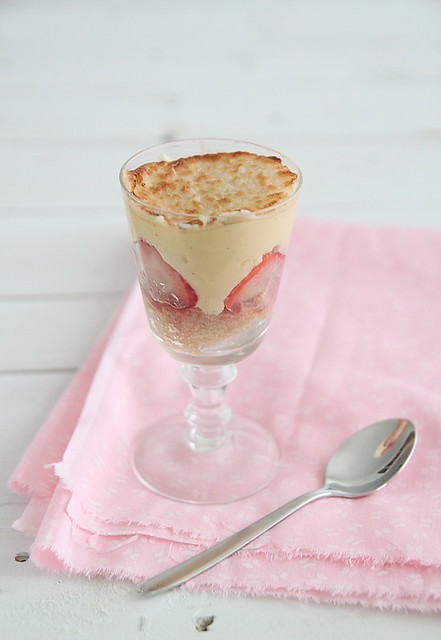
Since a fraisier cake was slightly out of my league, well mostly because it was just the two of us at home and scared that we would both finish it off in one sitting, I steered away from it. Instead I went ahead with a Fraisier trifle with all the goodness of the cake, but half the effort and oh so pretty they look in a glass and a great dessert idea since individual portions are less messier and storage in refrigerator is easier. 

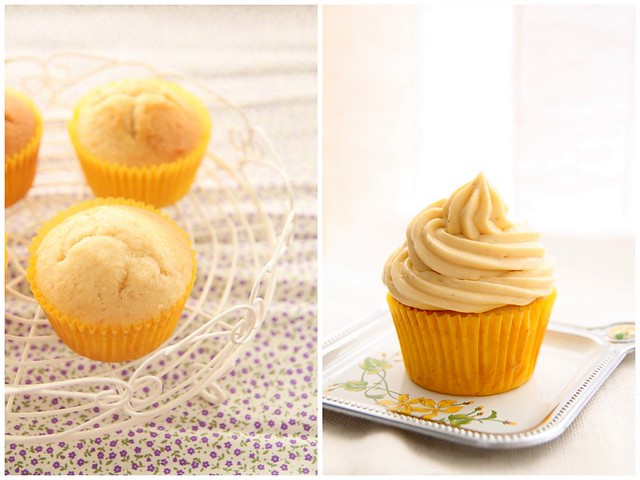
I had baked a cake the day before for a friend and had some remaining which was on my kitchen counter nicely wrapped in cling film waiting to be assembled. I then set about making the filling of custard butter cream or fancily referred to as crème mousselini which I think is gods gift to bakers, especially to bakers who hate plain butter cream and cant pipe a frosting for nuts. I started off convinced I would screw it up somewhere and end up wasting a whole lot of ingredients, but when I saw it all come together, I knew I'd succeeded. And OMG I couldn't stop licking it from the mixing bowl and when I tried piping it on to a cupcake, it worked out just as fine and for the first time I had managed to pipe it without it it falling flat or it being too stiff it refuses to come out of the nozzle. I can very well say this is going to be my fav frosting as of now and my next experiment would be to try this with custard powder instead of making it from scratch. Yes laziness is my second name, in case you hadn't figured it out by now.
428942_396302973756134_2091831608_n 
Although Eric's recipe was the base of all this experimenting, I did tweak it a bit here and there to suit my availability of ingredients. Eric's cake was a basic sponge cake, (which I am definitely going to try some day) whereas I used a vanilla buttermilk cake which has provided me with great results. I feel its best on its own as a tea cake, but of course so versatile you can use it as a base for any other fancy stuff, like a Tiramisu cake for example. It is light and airy, and moist at the same time making it impossible to hate. My love for plain cakes and that too vanilla flavoured ones never end, so this is the latest addition to the list, with the French yoghurt cake still topping the list (more so because of how easy it is)

Anyhoo, the final outcome was great and we did enjoy scooping it out and eating mouthfuls. Next time however, I would omit the toasted marzipan, only because I'm not a big fan, not because its bizarre or anything. When I have something to celebrate, I would also try doing the entire cake like the one above so I can share the calorie intake with others and not suffer on my own. In the mean time, I am thoroughly enjoying the Nielsen-Massey Vanilla paste and extract that is making its way through to almost all my cooking expeditions (sweet of course) ;)

For Eric's original recipe, follow this link. I am giving my version here, with Eric's recipe as the base. The measurements given are for the fraisier cake on the whole and not the trifle. I have, however, explained how I went about getting the trifle in order.

Vanilla Buttermilk cake (recipe adapted from here, makes 2- 9 inch cakes or 12 large cupcakes)
14 
Cake flour- 2 cups (make your own by measuring 2 cups of plain flour and taking out 2tbsp of flour from that and replacing it with 2tbsp of cornflour. sift it together. This results in a more tender crumb)
Baking powder- 2 tsp
Baking soda- 1/8th tsp
Salt- 1/4 tsp
Unsalted butter- 10 tbsp, at room temperature (or 142 gms, 1 1/4 sticks)
Sugar- 1 cup
Eggs- 3 large
Egg yolk- 1 large
Vanilla extract- 1 1/2 tsp (of course I used Nielsen-Massey)
Buttermilk- 3/4th cup

Sift together the first 4 ingredients into a bowl and keep aside.
Into the bowl of a free standing mixer with paddle attachment, add the butter and beat on medium speed till soft and creamy.
Add the sugar and continue beating till the mix becomes light and fluffy, about 3 minutes.
In goes the eggs one at a time, beating well after each addition. Follow with the egg yolk and beat it in.
Beat in the vanilla. At this point the batter may look curdled, don't panic, just keep doing the good deed.
Now reduce the mixer speed to the lowest and add the dry ingredients and buttermilk alternatively, starting and ending with the flour mix.
Scrape down the sides, making sure no traces of flour is seen and everything is mixed well.
Pour into the lined cake pans and bake in an oven pre heated at 176C for about 30 minutes or till golden brown and the skewer test comes out positive.
If making cupcakes, fill liners till about 3/4th full and bake for about 20 to 22 minutes, checking in between.
Cool completely on wire racks and then cling wrap it and leave it at room temperature for up to 2 days.

Creme Mousselini (combination of Eric Lanlard's recipe and from here, makes 1 cup)
309288_396302783756153_80501488_n 
Creme patissiere/ pastry cream- 1 cup (recipe below)
Unsalted butter- 150 gms cut into cubes, at room temperature

Creme patissiere
Whole milk- 1 1/4 cups
Sugar- 1/4 cup
Egg yolks- 3 large or 4 small
Plain flour- 2 tbsp
Corn flour- 2 tbsp
Vanilla bean paste- 1 tsp (I used Nielsen Massey)
Kirsch liqueur- 1 tsp (optional)

Into a heat proof bowl throw in the sugar and egg yolks and whisk till you get a smooth mix.
Sift together the plain flour and corn flour and add to the egg, whisking till you get a lump free, smooth mix. Don't let this mixture sit for too long as the sugar will start eating into the eggs, thus making pieces of egg form. (thanks to cake boy for that piece of valuable information)
Meanwhile, pour the milk into a saucepan placed over medium heat, and bring to a gentle boil, just till the milk starts foaming up.
Take it off the flame and add it to the egg mix, bit by bit, whisking continuously till well incorporated. If you find pieces of curdled egg don't panic just run it through a sieve.
Return this mix back to the saucepan placed over medium heat and cook till boiling, whisking continuously to prevent the custard from sticking to the bottom and forming lumps. This takes quite a while, so patience is highly recommended.
When the custard boils and has become thick and silky smooth, continue whisking for about a minute longer and then take it off the flame.
Transfer to a mixing bowl and add half of the butter, whisking well to incorporate it into the custard.
Cover with a cling film and leave to cool in the refrigerator. Or if you have time on the kitchen counter.
Once completely cool, add the vanilla bean paste and liqueur (if using) and whisk it in.
Add the remaining butter bit by bit whisking well after each addition to get a smooth and gorgeous creme mousselini which makes a perfect frosting.

For assembling
Ripe strawberries- 1 kg, hulled
Marzipan- 200 gms, rolled out and cut into 9 inch circle.
Melted chocolate- for decoration
309259_274400052661791_234769332_n 
When ready to assemble, unwrap the cake and slice off the top if it has domed.
Then place the cake at the bottom of a cake ring and using a palette knife, spread a thin layer of creme mousselini over it.
Cut some of the strawberries in half and place it around the edge of the ring, cut half facing out.
Fill the centre with the remaining strawberries, making them stand upright. (the trifle version is as below).
Spread the remaining creme mousseline on top of the strawberries, trying to fill in the gaps as much as possible.
Place the second layer of cake on top and press down to settle them all in.
Place the cut out marzipan on top, flute the edges and toast using a blow torch.
Melt the chocolate and use it to write 'Fraisier' on top and decorate the cake a bit. Also use some strawberries dipped in chocolate to adorn the sides.
Chill for a few hours before you unmould to get a gorgeous looking cake.

Fraisier trifle     
141
Crumble some of the cake roughly and keep ready. You can also cut them into the exact size of the glass, but I didn't have the patience.
Get 3 see through glasses, tumblers, martini glass, pudding mould...anything you fancy and layer the bottom with the crumbled cake...generously and tuck it in lightly.
Melt about 3 tbsp of strawberry jam lightly and mix with 1 tsp water.
Spread a thin layer of jam on top of the cake.
Cut the strawberries as mentioned above and place them inside the glass, cut side outward.
Fill with one large strawberry upright.
Top generously with creme mousselini, filling in the gaps as much possible, but really its no big deal because the messier a trifle looks, the better.
Top with a toasted marzipan and chill till ready to serve.
IMG_3701
Notes: I don't own a blow torch so I rolled out the marzipan, cut them into rounds and placed under the grill for about 2 to 3 minutes to lightly toast it. But as you can see I ended up burning most of it. Take extreme care when you do this as one blink of the eye and you can end up with black marzipan.

Now I'm gonna say a lil prayer and hope I become the competition winner :)

Disclaimer: I was invited to attend Eric Lanlard's masterclass

 
  • The Best Blog Recipes © 2012 | Designed by Rumah Dijual, in collaboration with Web Hosting , Blogger Templates and WP Themes