Showing posts with label starter. Show all posts

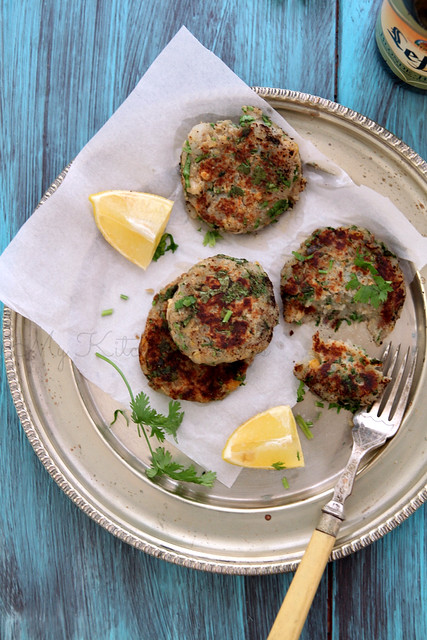
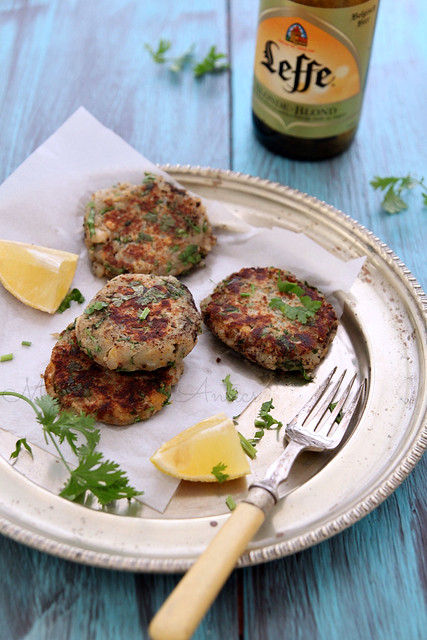
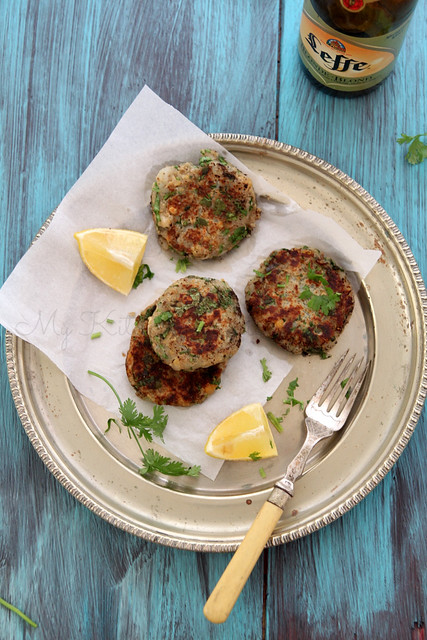
Potato and chickpea cakes

0 nhận xét

IMG_9940
Are you all enjoying the weather wherever you are? Too hot? Too cold? Too much rain?? or is it just perfect? Too many questions??? :) :)

We have had gorgeous sunny weather for the past few weeks and its been good. Well most of the time that is. I have been out galavanting with friends, attending events and generally being busy which sometimes drains me out in the heat. But I'm not complaining.. Work has taken a back seat for the time being and I'm glad it is so, because I really do need to figure out how to handle the backlog of work that has accumulated over this past few months..yes, you read it right, months. I'm slowly finishing it off and hopefully will learn how to manage time more efficiently. My husband would be very glad I've even declared this in public because he has the biggest issue with me not managing time responsibly and planning well.

Coming to the recipe. No offence to all the vegetarian, but I have the toughest time cooking for them. Its not because there are no recipes available, but because I suck at it. My vegetarian dishes don't really come out nice and paneer, potatoes and spinach are the only options I usually play around with. Its become boring and I've run out of ideas. This combination of potatoes and chickpeas however was a welcome change. The recipe is by Alfred Prasad from Great British Chef's Vegetarian Recipes and a very easy one at that. Few ingredients needed, can be put together in no time and you get a decent vegetarian starter.
IMG_9933
I had a bit of trouble with cooking the patties, since there was nothing to really hold them together like egg white or bread crumbs. So after two failed attempts at getting perfect shaped cakes, I decided to try the method mentioned in the recipe (I know, I should have just stuck to it the first time) and then it worked. I happily ate the first two that didn't turn out well without any complaint though. The recipe is apt for kids, but I don't have kids and so chucked in a green chilli which was such a fab idea. Serve it with just ketchup and you have a perfect snack to please your guests

Recipe halved from Great British Chefs
Potatoes- 2 large
Cooked chickpeas- 100 gms (I used canned)
Cumin seeds- 1/2 tbsp
Garam masala- 1/2 tsp
Green chilli- 1, finely chopped
Coriander leaves- 1/2 cup, finely chopped
Salt- to taste
Oil- 1 tbsp
IMG_9930
Slice the potatoes into quarters and steam in a dumpling steamer for about 15 minutes or so. I find steaming much easier than boiling. But feel free to boil till tender and a fork goes through easily.
Cool for a while and then peel. Break the potatoes with a fork, but don't mash it completely.
Into a big bowl add all the remaining ingredients except oil and mix well using a masher or even better, your hands.
Again, they need not be completely smooth, a few chunks here and there is fine,
Heat the oil in a frying pan.
While that's heating, shape the potato mix into small discs.
Cook each cake in the pan, making sure you press it down so it gets cooked evenly.
Drain on paper towels and serve hot with ketchup.

Notes: Don't add a lot of oil, the cakes will only fall apart and make life difficult. The 1 tbsp oil was enough for all the potato cakes, but if you feel you need more oil, add bit by bit and fry.
The recipe calls for refrigerating the cakes after shaping them, which i didn't. I'm thinking this would sort the falling-apart issue.

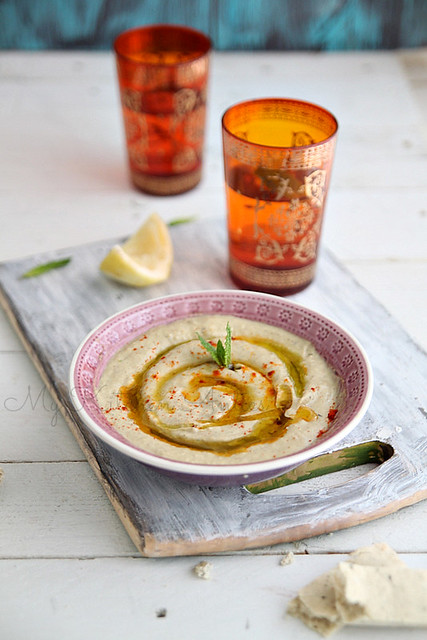
Baba ghanoush (Moutabel)

0 nhận xét

IMG_9237
Let me say this over and over again. The best part about blogging are the friends you make in the process. Friends who have now become such an essential part of your life, that even if you stop blogging, they wont just disappear. I have been lucky enough to meet some of the UK-based food bloggers and most of us try and catch up once in a while.

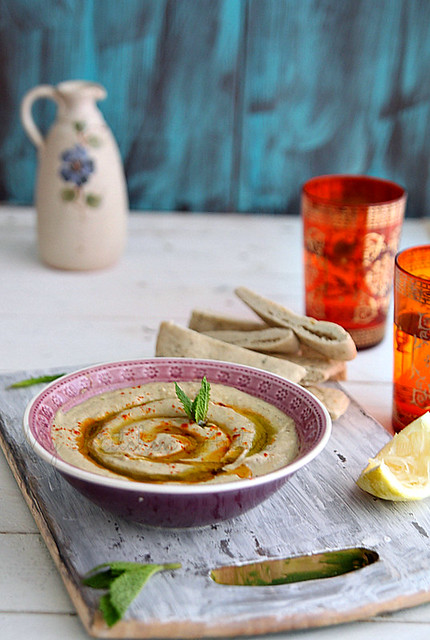
Last week, Suchi of Kitchen Karma invited Manjiri (Slice off me) and me over to her place and we had such a blast. She'd made a Mediterranean spread for lunch and everything tasted fab. The baba ganoush she'd made from scratch was the winner for me, closely followed by the Moroccan braised chicken. Got the recipe links from her the next day and made myself a Mediterranean feast for dinner :)

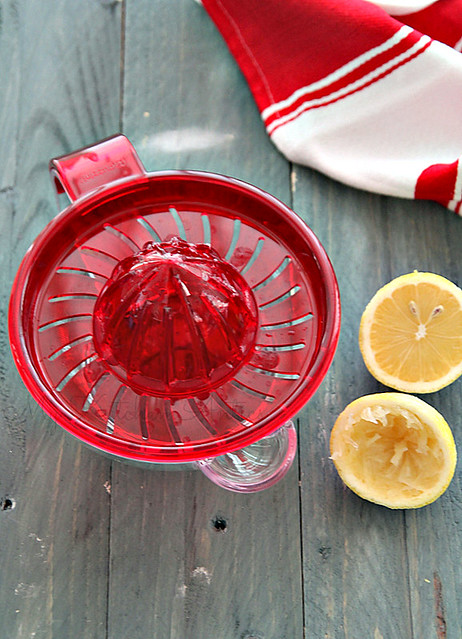
I am a big fan of Mediterranean food. In fact, a breakfast staple for us is hummus and toast. But I've never really tried making any of this at home, simply because I thought I'd never get the taste spot on. Suchi totally inspired me to give it a go at home and I'm surprised at how a few common ingredients prepared in a different way bring about awesome flavours. Talking of which, I recently got myself a citrus juicer from this really cool online store called Red Candy. Yes, all these years I was painstakingly squeezing limes and lemons and oranges, till the gorgeous red coloured beauty made an appearance. I love it to bits and its made my life so much easier. Previously I used to waste a lot of the juice, but now (like for example in Mediterranean cooking, a lot of lemon juice is used), I squeeze the heck out of the fruit and it gives me immense pleasure :)
IMG_9200
The really cool thing about the store is that it is dedicated to the colour red. Be it home furnishing, interior accessories, kitchen stuff or gifts, red is the colour you'll get them in. They have some really innovative products and designs and some of them make really cool gifts. I got myself the citrus juicer, the pretty red and white tea towel and a nice churn jug. Hint: you know where to go for your Valentines day gifts right??? :)

Back to the recipe...To be honest, I had no idea baba ganoush and moutabel were the same thing. Its one of those dishes we religiously order at our favourite restaurant on Edgware Road, and till now thought it was a complicated recipe with speciality ingredients. Well, I couldn't be more wrong. The only ingredient I actually had to buy was the Tahini paste, which is now easily available in all the grocery stores. If it wasn't for my flat glass hob I would have charred the aubergine on fire and would have taken only half the time. Not complaining! It was yum and Ro is so thrilled I made food from his second favourite cuisine in the world (first being Chinese, no kidding!).

Recipe adapted from here 
IMG_9245
Aubergines- 3 large, cut in half lengthwise
Garlic- 4 cloves (read notes)
Lemon juice- from one small lemon
Tahini paste- 3 tbsp 
Olive oil- 3 tbsp
Pepper- two grinds (around 1/4 tsp)
Salt- to taste
Chilli powder- to sprinkle (optional)
IMG_9219
Preheat the grill/ broiler and line a baking tray with silver foil.
Pierce the aubergine halves with a fork, rub them with about a tsp of olive oil all over and place them, cut side down, on the baking tray.
Place the tray on the top most rack (closest to the broiler) and cook for about 30 minutes or till the aubergines are charred nicely on the outside. Keep checking half way through to avoid burning.
Once done, remove them carefully from the tray and chuck into a zip lock bag and zip it up. Keep aside for about 15 minutes, so that the aubergines can steam in their skins.

Scoop out the flesh from the charred skin (it comes off easily) and place in a bowl. 
Add the garlic, lemon juice, tahini, 2 tbsp olive oil and salt and pepper and pulse using an immersion blender or just whisk vigorously using a fork till they all come together.
Transfer the goodness into a serving bowl, swirl the remaining olive oil on top, sprinkle the chilli powder and serve with pita bread, vegetable sticks, bread or even tortilla crisps.
IMG_9224
Notes: The original recipe called for only 2 cloves of garlic, but i had 4 peeled ones lying around and used that. Bad idea, as it was very garlicky. Id stick to two the next time.
I don't like chunky pieces of aubergine in my dip, so I blended it to a smooth consistency. Feel free to leave some of the texture in your dip by just mashing it with a fork.
You can also char the aubergines in the oven. Follow the above prep. methods but instead of grilling just bake them in an oven preheated at 200C for about 40 minutes.

With thanks to Red Candy for sending me the red props to review :)

Netholi fry (Fried anchovies)

0 nhận xét

IMG_8338
I've been a bit busy (good busy) with work catching on and a cousin visiting from India. Its been quiet around here and I haven't really cooked that much or taken pics in a while. Its a long weekend here and for some strange reason, the weather has been great. We've been out enjoying the sun before the next set of rains and temperature drops happen. 
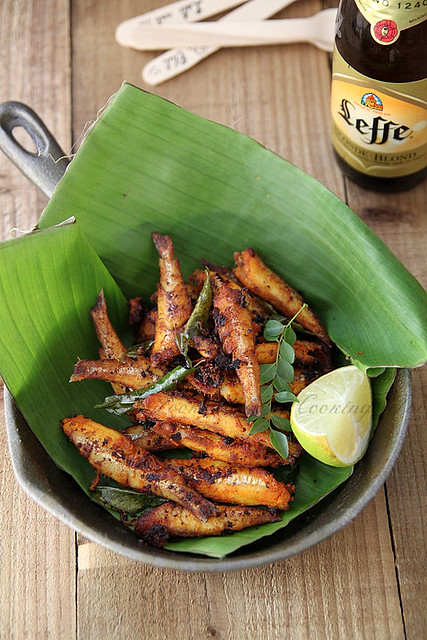
I made nethili fry a couple of weeks back with the intention of serving it as a starter for a party we threw at home. Since it was my first time with the fish, I decided to try it out a day before, just to see if it would turn out ok. It didn't. It went all soggy on me and I decided to not serve it at the party. Instead I just bought crisps :)

I have this thing against deep frying and after some helpful inputs from Ria, I decided to give it a shot again. I didn't deep fry it, instead shallow fried it. It does make a terrible mess (or maybe that's just me) and takes a tad longer than deep frying, but you do get crispy anchovies..the way its supposed to be. If cooked well, they are great to snack on and perfect with some cold beer. 

Recipe adapted from here and here (serves 2)
IMG_8359
Nethili- 250 gms, cleaned- remove head, tail and all the unnecessary inside parts
Lemon juice- 1 tsp
Salt- 1/4 tsp
Oil- to fry

Marinade
Kashmiri chilli powder- 2 tsp
Turmeric powder- 1/4 tsp
Fennel powder- a lil less than 1/4 tsp
Pepper powder- 1/4 tsp
Coriander powder- 1 tsp (optional)
Ginger paste- 1/2 tsp
Garlic paste- 1 tsp
Yoghurt- 1/2 tbsp (optional)
Curry leaves- a sprig
Salt- to taste
Marinate the fish with lemon juice and salt for about 5 minutes. This really gets rid of the fishy smell. Rinse well and keep aside.
Mix together all the ingredients for the marinade. If it is too dry, feel free to add a spoon or so of water to get a smooth paste. 
Do a taste test and add more salt or spice if required.
Add the fish to the marinade and mix well to coat the pieces well. Keep aside for about 15 minutes.
Heat the oil in a kadai or frying pan (enough to cover the base of the pan properly). It should be really hot, otherwise you will end up with soggy ones. 
Add the fish (in batches if required) and fry on both sides, till brown and crispy. Keep the heat on medium all through.
Remove the fish and the crispy curry leaves with a slotted spoon and drain on paper towels.
Squeeze a lemon over and serve warm.

Notes: The recipe can be easily doubled.

Curried coconut shrimp and Merrydown cider review

0 nhận xét

IMG_8589
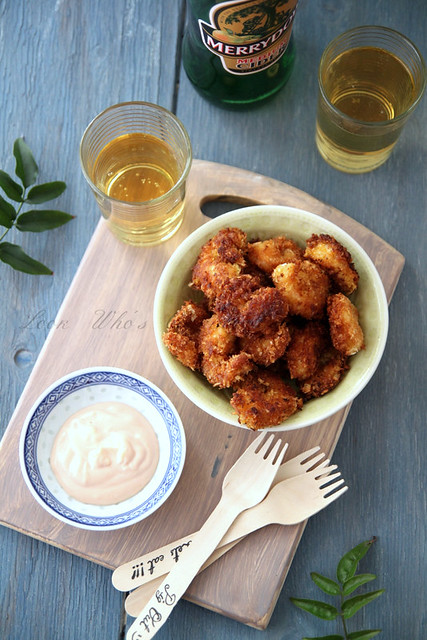
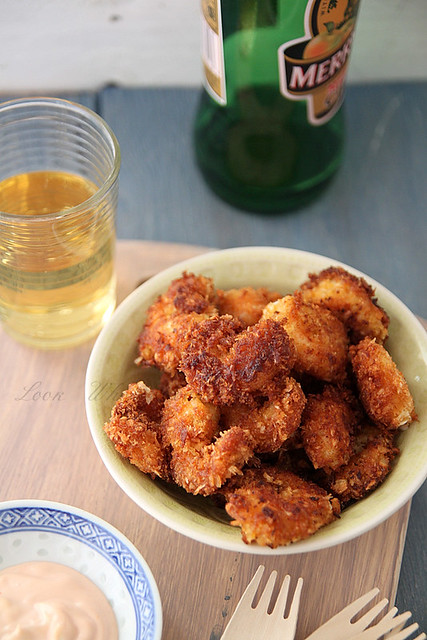
I love cider, more than beer. I started off with the really sweet ones and now my preference is the medium or the dry ones which are perfect to glug on a hot summer afternoon. A couple of weeks back, we had some great weather and as luck would have it Merrydown Cider sent me their cider to review. It was my first time with Merrydown and my first cider this season and so was really excited. Yes, I do have seasonal drinks, in case you ask ;)

They also sent me a Great Summer Celebrations recipe booklet featuring some great ideas using cider as a key ingredient, which you can download. Since summer is just around the corner (or I'm hoping its just around the corner), I thought the cider would be a great addition to the BBQ parties and brunches. I paired it with this simple coconut shrimp starter and it was perfect. I always think fried food and cold drinks go hand in hand. My initial plan was to make a cider-batter for the shrimp, but the dry cider bottle broke in transit and so had to just do a pairing instead. I promise I'll update the post once I get hold of their dry cider, which I'm pretty sure would be my favourite out of the two. Not that the medium cider was any bad, but it was a teeny tiny bit on the sweeter side and since I've evolved from  the really sweet drinks (be it wine, cocktails or cider), the dry version would have hit the spot (or so I think). 

Anyways, coconut shrimp has made its way through to my blog before and this time I did a curried version which is not too bad, but I preferred my first version better. The marinade options are endless and if you do get your hands on some dry beer or cider, then the batter would be even better. I served the shrimp with a mayo-ketchup sauce (recipe here), but feel free to serve with just ketchup or any other hot sauce.

Serves 2 to 3 as starter
IMG_8549
Shrimp- 250 gms, cleaned and deveined
Curry powder- 1 tsp
Salt- to taste

Plain flour- around 1/4 cup
Baking soda- 1/4 tsp (optional)
Pepper- 1/4 tsp
Salt- to taste
Egg- 1, small
Water- 1 to 2 tbsp
Dessicated coconut- 1/2 to 1 cup
Oil- to fry
IMG_8595
Marinate the shrimp with curry powder and salt and keep aside for about 15 minutes.
In a bowl whisk together the flour, baking soda, pepper and salt.
Add the egg and enough water to make a smooth batter. It shouldn't be too loose.
Tip in the marinated prawns into the batter and mix well to coat the prawns evenly.
Get the dessicated coconut ready in a plate
Heat oil in a deep saucepan. Check that the oil is done by dropping some batter into it. If it floats to the top immediately then you are good to go.
When ready to fry, take each shrimp out of the batter, drip off any excess and roll in the dessicated coconut a couple of times to coat as evenly as possible.
Drop into the oil. 
Repeat with remaining shrimp. 
Once the prawns turn golden brown on one side (in about 2 minutes), turn them over and cook for another 2 minutes or so.
Remove the shrimp with a slotted spoon and drain on paper towels.
You may need to fry them in a couple of batches, depending on the size of the pan.

With thanks to Merrydown Cider for sending me the samples.

Kuzhi paniyaram

0 nhận xét

IMG_8328
That's one more thing crossed off the "to make" list. I kept whining about not having an unniappam/aebleskiver pan for so long, my mum sent hers through my sister-in-law last year. For some strange reason I thought I couldn't use it on my flat glass hob and packed it up to send it back. But an over packed suitcase meant she had to leave some stuff behind and this pan was the first thing to be thrown out of the suitcase because my mum really couldn't care less about unniappams and she said she dint really want it back. So it was stashed away in a corner and forgotten....

...till a few weeks back when Vineetha sent me some yummy unniappam from her Vishu celebrations and I decided it was high time I fixed my unniappam pan issue. I mean I was having unniappam after some 2 or 3 years and it brought back all those memories and cravings for the same. Took the pan out and decided to give it a go (before Ro got back home from work, or else he would find some fault with it). As usual the necessary ingredients- jaggery and bananas- weren't in stock, but since the pan was out I HAD to make something in it. 
IMG_8308
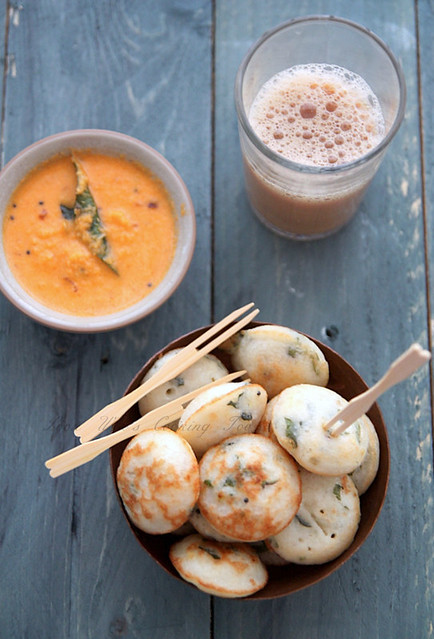
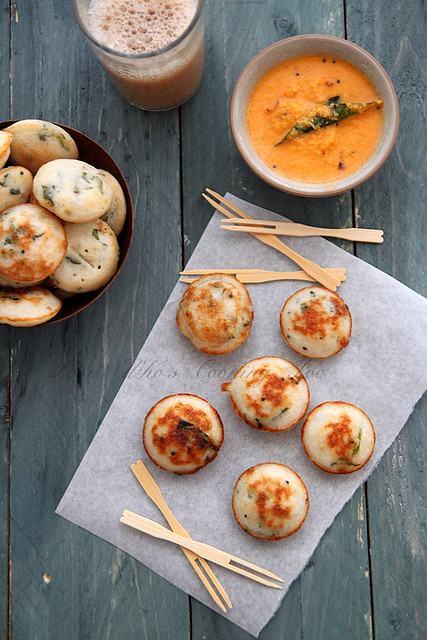
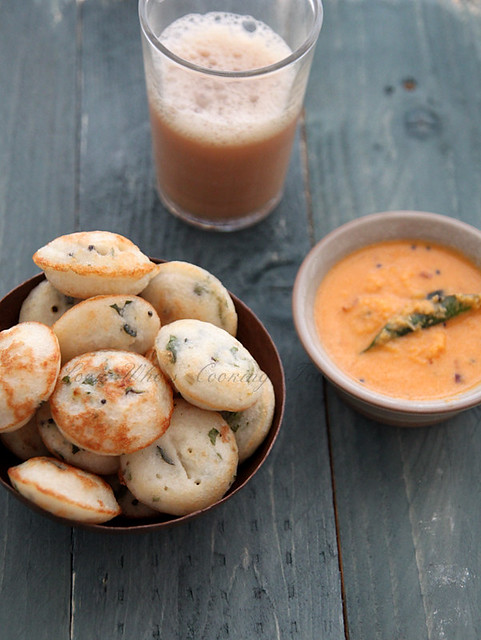
The dosa batter (store bought) came to my rescue and since kuzhi paniyarams were a close second on the list, I got down to business. The pan worked and the paniyarams came out great. I was so excited at the outcome I couldn't wait to show Ro when he got back home. Of course he couldn't understand why I was getting hyper about the "idli's," after he bit into one. Thank god for whatsapp, I sent my sister-in-law (yes the one who brought me the pan) a pic and she was as excited as me, cos I introduced her to paniyarams at a South Indian restaurant here in London.

I served these with coconut chutney and it was the perfect tea time snack. The pan was put to good use shortly after where I made tiny vada's using the MTR vada mix. Like a fellow blogger friend said, it would be great as a starter with drinks and such.
IMG_8312
Idli/ dosa batter- 2 cups
Baking soda- 1/4 tsp
Coriander leaves- 3 tbsp, finely chopped
Mustard seeds- 1/2 tsp
Curry leaves- 6 to 8, finely chopped
Ginger- 1 tsp, finely grated (optional)
Green chillies- 2, finely chopped
Shallots- 1/4 cup
Asafoetida- a pinch (optional)
Grated coconut- 2 tbsp
Salt- to taste
Oil- to fry
IMG_8320
In a large bowl mix the batter with baking soda and salt and keep aside for about 15 minutes.
Meanwhile, heat 1 tbsp oil in a saucepan and splutter mustard seeds followed by curry leaves.
Tip in the ginger, green chillies and shallots and asafoetida and sauté till the onions wilt and turn light brown.
Add the grated coconut, stir for a couple more minutes and take it off the heat. Keep aside to cool.
Into the batter throw in coriander leaves and cooked mix and stir well to combine. Do a taste test and add more salt if required.
Heat the paniyaram pan and add a few drops of oil into each of the holes.
Once the oil is hot, add a tbsp of batter into each of the holes.
Cook on medium heat till the edges start turning brown.
At this point flip them using a fork or a skewer and let the other side cook equally. Drain on paper towels.
Add more oil into the holes and repeat till all of the batter is used up.

Notes: The batter I get from the store is very thick and so I dilute it with a bit of water.
The baking soda helps in achieving nice soft idlis and such and so by practise I always mix it in my batter. The paniyarams puffed up nicely with that addition.
Of course, you can make the same without a paniyaram pan, just that you wont get the perfect rounds. I have tried the same here is the recipe. Tasted just the same.

Jalapeño popper dip

0 nhận xét

IMG_6098
I had major plans of starting off the new year on a sweet note, but 2 cake baking disasters back to back left me disinterested in the same. I am pretty sure I've lost my cake baking mojo and poor Ro is bearing the brunt of it, along with eating the severely dry mocha cupcakes I baked (and couldn't get myself to dump).

Instead I thought I'll blog one of my recent favourites, the jalapeno popper dip. I love Jalapeno poppers, but unlike the US, its very difficult to get your hands on some fresh Jalapenos and even if you do its ridiculously expensive. But when I do have this craving for poppers I head on over to Borough market and pick some up, but of late I have been using the pickled jalapenos for my cooking requirements. It cant be used to make poppers, but I do generously use them in my Mexican dishes as well as dips and such. 
07
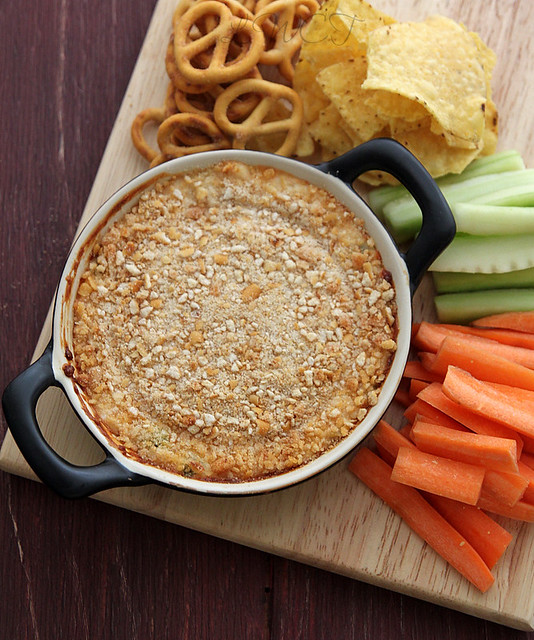
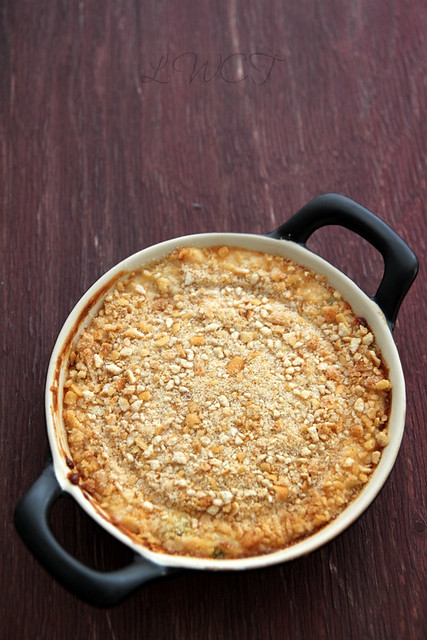
Penn State Snacks had sent me their Christmas (pretzel) range to review a while back and their challenge was to incorporate it into a recipe. They sent me 3 different flavours, each good it its own way. The sour cream and chive was deemed my favourite and I can very proudly say I myself finished off 3/4th of the pack. Their popular salted giant stars were perfect for Christmas entertaining and I served it with a sweet apricot chutney at one of my Christmas parties. The kids enjoyed it and that does say a lot about the flavour doesn't it :). Their brand new flavour- Maple bacon pretzel knots were used in this jalapeño popper dip and I must say it was a pleasant discovery. Instead of using bread crumbs to sprinkle on top of the dip, I crushed the maple bacon pretzels and used that instead. The subtle sweetness of the maple was a good addition to the creaminess of the cheese and heat from jalapenos. I still have half a pack of pretzels left and I may use it up to coat some chicken drumsticks and bake them. 

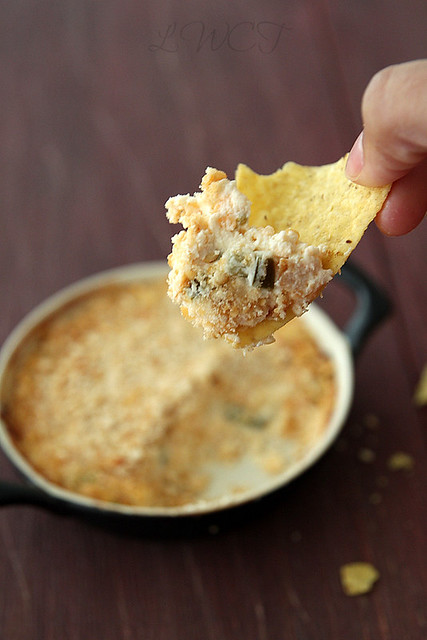
The jalapeño dip was served as a starter along with some carrots and cucumber sticks and tortilla chips at a party we had at home and everyone loved it. I wouldn't claim this dip to be healthy in any way, but serving it with some chopped veggies kinda makes it a wee bit acceptable. Oh well, who am I kidding, its an uber cheesy dip- hot and spicy- and I don't think anyone would say no to it. So go on, give it a try and see what I'm talking about.

Recipe adapted from here (serves 8, as a starter)
IMG_6125 
Cream cheese- 225 gms, at room temperature (I used Philadelphia cream cheese)
Mayonnaise- 1/2 cup
Cheddar cheese- 1/2 cup (coarsely grated)
Parmigiano Reggiano- 1/4 cup (coarsely grated)
Pickled jalapeños- 90 to 100 gms, drained and roughly chopped
Maple bacon pretzels- 3 tbsp (crushed *)
Parmigiano Reggiano- 2 tbsp (finely grated)
IMG_6094
In a mixing bowl mix together the cream cheese, mayo, cheddar and parmiggiano reggiano until well combined.
Add the chopped jalapeños and continue mixing till you get a smooth-ish mix. 
Transfer this mix into a baking dish and smoothen out the top as much as possible. Keep aside.
Meanwhile, preheat the oven to 175C.
*Transfer the pretzels into a zip lock bag and using a rolling pin crush them as finely as possible. Alternatively, transfer them into a spice grinder and grind till fine. 
Mix the Parmigiano cheese into the pretzel mix and sprinkle over the cheese mix, as evenly as possible. Tap the bowl on the kitchen counter to evenly distribute it,
Place on a baking tray and chuck into the oven for about 20 to 25 minutes or till the cheese starts bubbling from the sides and the crushed mix on top becomes a light golden colour.
Serve right out of the oven.
IMG_6134
Notes: Replace the maple bacon pretzels with equal amount of bread crumbs. I have tried it both ways and cant pick a favourite. Love both equally. You can also use any other crisp/ chips in its place as well.
I dont like too fine a crumb so I left a few chunks here and there.
Feel free to halve the recipe and bake it for only about 12 to 15 minutes.
Use more jalapeños if you want it spicier. Add one fresh one along with the pickled ones for some extra kick. The heat was just perfect for us.
Add flavourings like garlic powder, thyme etc. to give it more oomph.

With thanks to Penn State Snacks for sending me a sample pack of pretzels

Cheese and onion pull apart bread

0 nhận xét

IMG_1968
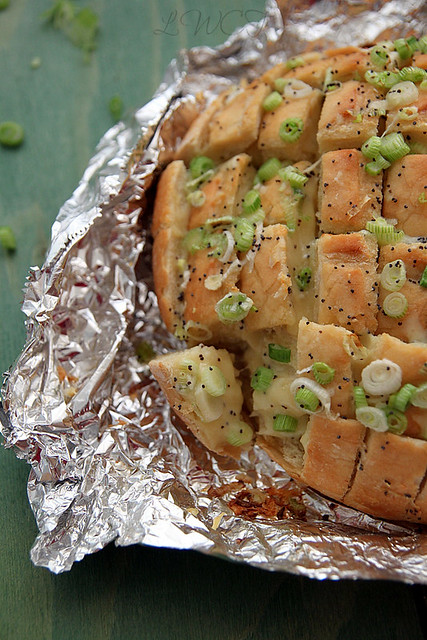
This recipe had been doing the rounds on Pinterest a while back and I had bookmarked it then. I did make it once, since it had all things yum and was too good a recipe to keep for another day. It was so easy to put together and I did take pics with the intention of blogging it, but like loads of my recipes, this one got lost among those Picasa folders.

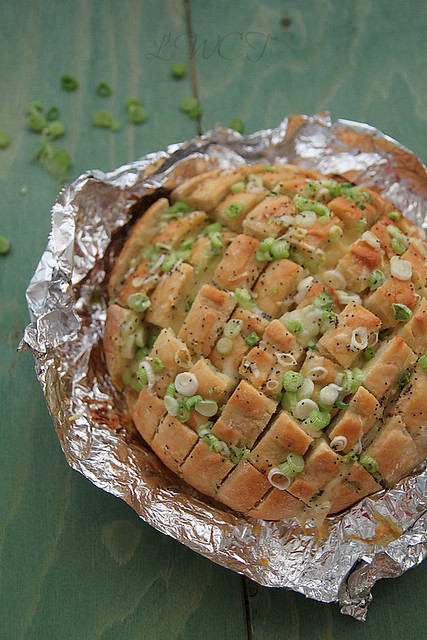
Yesterday I made this for dinner and that's when I realised I hadn't blogged it. Searched around and found the folder. Its a perfect appetiser idea, or if you want to serve bread with soup, then this is most certainly it. Its not something you'd want to have on a daily basis but once in a while its a treat and you deserve it. Make this if you want to feed about 5 to 6 people and like I said before its a great appetiser idea, where you can just tear and share the bread. 

The first time around I managed the whole thing on my own, but yesterday with the slicing and stuffing, I found it a bit difficult without an extra pair of hands. Ro, much to my annoyance, couldn't remember ever eating the bread. Sometimes I wonder why I even bother to try new things. Well to be honest its more for my benefit, but that's rant I shall leave for another time.

What's everyone's plans for New Years. No crazy party this year for us, just gonna chill out at my sister in laws place with some Champagne and good food, and maybe if we are up to it, head out to a club (just the ladies that is). Before signing off, here's wishing you all a Happy New Year and may you have a year filled with all goodness possible. 

PS: If you want to win a mini fridge for your home, don't forget to enter the giveaway

Recipe adapted from here
IMG_1917 
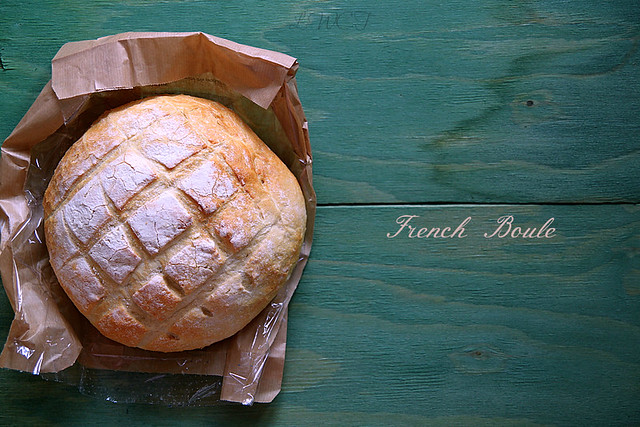
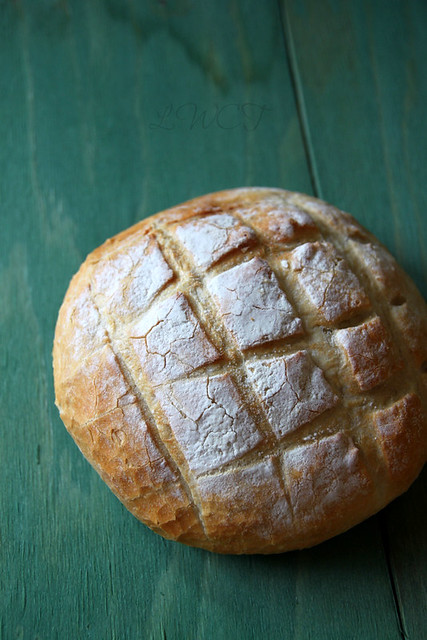
Sourdough bread- 1 loaf (I used a French Boule)
Cheddar cheese- 250 gms, thinly sliced (if you have a cheese slicer that's best)
Butter- 1/2 cup (i used a mix of garlic butter ans salted butter)
Green/ spring onions- 1/4 cup, roughly chopped
Poppy seeds- 1 1/2 tsp
IMG_1975 
Preheat the oven to 176C and line a baking sheet with aluminium foil.
Slice the bread lengthwise and widthwise without going all the way to the bottom. Don't fret about it too much, it doesn't need to be of equal size and such. Do whichever size is convenient, just make sure you don't go all the way through to the crust.
Place the bread on the foil and insert the cheese slices into the sliced crevices of the bread. Try stuffing it as deep as possible and between all the cuts.
Melt butter in the microwave and into it add the spring onions and poppy seeds.
Pour this on top of the bread as evenly as possible.
Wrap the bread with the foil and bake for about 15 minutes.
Unwrap the bread and continue baking for another 10 minutes or till all the cheese has melted.
Serve warm.
IMG_1922 
Notes: Original recipe calls for mushrooms as well. if you want to do so then saute 250gms of finely chopped mushrooms in 1tbsp of butter for about 3 to 4 minutes or till they start to sweat. Then add about 1/2 tsp of garlic powder and continue cooking the mushrooms till all the water has evaporated.

Transfer on to a plate and leave aside to cool. And just after you insert the cheese slices, pour the mushroom over the bread, again trying to stuff in as much possible between the cuts.
I have adjusted the measurements according to what the French boule could take. 
The cheese in the original recipe is Provolone. I couldn't get them here, so used Cheddar and it worked just fine. I also tried it with Gouda, but it wasn't up to mark.

Prawn thokku/ roast- A guest post for The Captain's Kitchenette; and the Andy Bates American Street Feasts Show

0 nhận xét

IMG_4808
There are so many wonderful food blogs out there, that I find it difficult to browse through all the yummy recipes they post. I still manage to run through a few once in a while, and eventually end up with tonnes of recipes bookmarked. Serah's beautiful blog, The Captains Kitchenette, certainly falls into this category and its her simple, easy-to-follow recipes that makes me a fan. I landed up on her blog after her sister (we were hostel mates in Chennai) posted a link to a recipe on FB. I was immediately hooked. We then exchanged a couple of emails, became friends on FB and the rest is history. She's now more of a friend than a random food blogger and I hope some day I get to meet her and her lovely family she cooks for. I also have to appreciate her for taking time to cook, photograph and blog in spite of having a toddler to tend to. Like I was telling her the other day, I complain if I have to continuously cook for a week ;)

Since Serah was taking some time off to tend to other commitments, she asked me if I could do a guest post for her blog and I truly obliged. She gave me full leverage on what I could whip up and since she said she preferred sea food, I thought I'd make this prawn thokku for her. I came across the recipe on one of my recipe search sessions on the internet and immediately wrote it down (yes believe it or not, I actually wrote it down). Completely forgot to bookmark the page and so apologies to the person who originally posted it. I did try searching for it again, but since this was written down ages back, I really had no luck.
IMG_4861
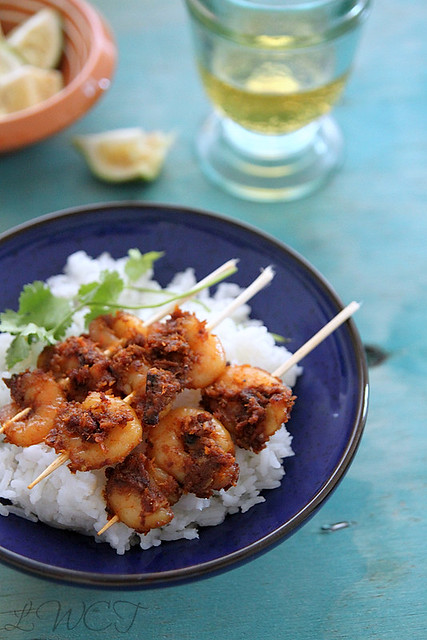
Thokku, loosely translated means paste, and I presume this is more a TN preparation as opposed to the mallu (Kerala) way of making prawn roast. The use of fennel seeds make this dish quite unique, and of course something with grated coconut can never go wrong. This is a favourite prawn recipe of ours and has made its appearance on quite a few occasions. Although it goes well with some warm rice, dal and pappad, my favourite way to have it is as a starter with some chilled beer. just thread it onto small skewers, sprinkle the masala on top, and serve. It's a crowd pleaser, trust me!

So without wasting more time, head on over to Serah's kitchenette for the recipe and while you are there dont forget to take a peek around and drool. I have bookmarked a whole lot of recipes from her blog and seriously, dont forget to check out the authentic Coorgi recipes she's put up. Absolutely droolworthy!
Thanks a bunch for having me over Serah :)
IMG_4839

On another note, here's something street food lovers might be interested in. Food Network is hosting a brand new series documenting the vibrant street food scene in the US called American Street Feasts and is hosted by the charming Andy Bates (yes, the blue-eyed Pie-Man with a delicious Brit accent). I have caught bits and pieces of his show here and is quite an eye-opener, especially because street food is seriously catching on and we have just started exploring some of the places.

The show basically follows Andy on a street food odyssey across the US, visiting the most vibrant food destinations and discovering the stories behind the recipes. He uses them as inspiration to create his own recipes, some of them being the Braised pork belly and Waldorf salad in a pretzel wrap and the Crawfish ball and Jambalaya. The show is aired every weekday at 12.30pm and 6.30 pm on Food Network and if you haven't been able to catch the previous episodes, visit Andy's collection page and give it a go. You can also use the interactive 'Street Food Map' to find out where to get the best street food in UK and while you are at it, go on and submit your suggestions on what to feature and so on. For the fans out there, Andy Bates' new cookbook is out in the market, so go on and grab you copy from any of the leading book stores or Amazon.

With thanks to Food Network for a copy of the cookbook

Curried spinach and mushroom tarts

0 nhận xét

IMG_3386-1
I have this knack to do things wrong. Its not a very frequent thing (although if you ask Ro, he would say its a recurring event), but since you cant ask him, I'm just going to go ahead and say its not always that I do idiotic things. I have the inane ability to tear packets and boxes without reading instructions. I rip them apart the wrong way which in turn makes it impossible to seal them back and then I have to hide it from Ro (who is annoyingly systematic and precise) so I don't get a dose from him. I attribute it to my 'no patience' trait which I don't know who I inherited from..mum, dad??? a little help here???

So the latest to the list are these mini tart tins. Every day for the past couple of weeks I used to pass by it in Sainsburys and notice that it was on a roll back- 3 pounds for 4 mini pans- but I could never decide whether or not I wanted it. I mean you get the sweet and savoury pre-made tart shells to buy so why bother to make them from scratch, was my logic.
IMG_3361 
Until one fine day I woke up and decided it would make a grand (also, unnecessary) addition to my already existing pans and pots, and also I could make tarts from scratch, show off a bit and blog it. Afterall how difficult is it to store 4 small tart tins. So off I went to Sainsburys and what do I see? Its no longer on a roll back but the damn thing now costs 5 bucks for 4 tins. Without even flinching (ya all that logic went down the drain) I put them in my basket, since by then I was already psyched about wanting tart tins and making some tarts for dinner that very day. 

I was also instantly lazy to make pastry from scratch so I picked up ready rolled pastry, did a tiny skip and headed home with my bounty. The tarts came out well, to say the least. In fact super duper well and I am very proud of my acquisition, although Ro later pointed it out to me that they weren't dishwasher safe, oh well bummer! But since he does the dishes anyway, I gave some gyan about how they are 'never' dishwasher safe. He bought it since he has no clue about tart tins :) :) :)

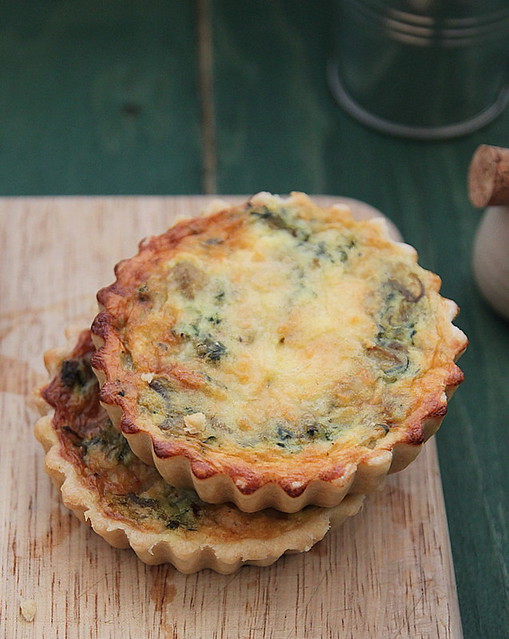
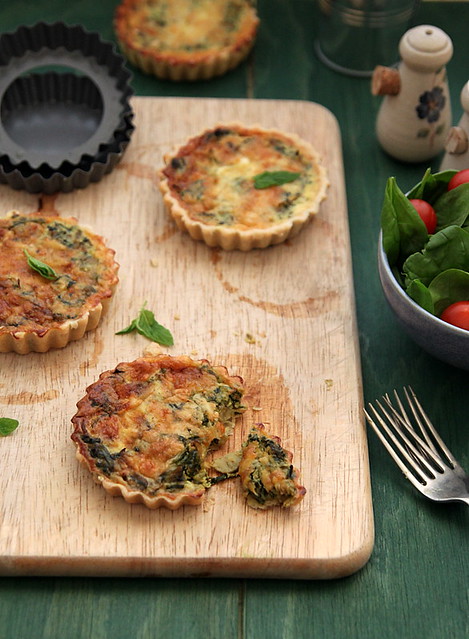
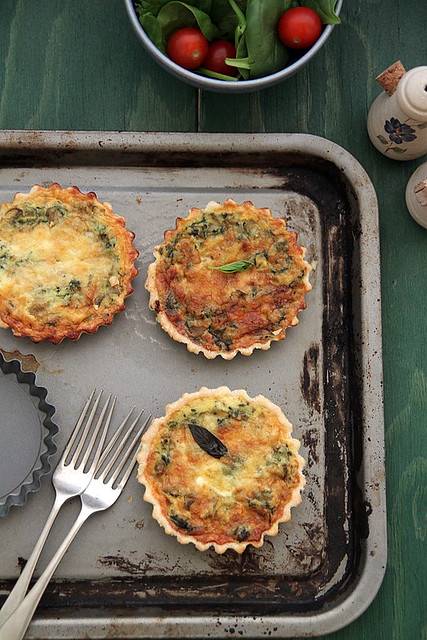
So yes, I do stupid things like that. But thanks to this trait of mine, you now get to see these yummy spinach and mushroom tarts. They are more quiche-like, and is a great breakfast item. Ro is now in the 'i am sick of bread for breakfast' phase and so I am trying to make some fun breakfast items for him. I hope he snaps out of it soon, because I sure am running out of ideas. Spinach and mushrooms are a fav combination of mine and I end up using it in pasta bakes, stir fries and such. Give it a go, and if you don't like it, you can come back and leave hate comments ;)
IMG_3376 
Makes 5 to 6 small tarts
Shortcrust pastry- 1 sheet (recipe follows)
Shallots- 2 medium, thinly sliced
Button mushrooms- 150 gms, cleaned and sliced
Spinach- 100 to 125 gms, washed and chopped roughly
Garlic- 2 tbsp, chopped fine
Curry powder- 1/2 tbsp
Eggs- 2 large
Cheddar cheese- 1/4 cup, grated
Milk- 3/4th cup
Butter- 1 tbsp
Salt and pepper- to taste

Pastry recipe adapted from here
Plain flour- 200 gms
Baking powder- 1/4 tsp
Salt- 1/4 tsp
Cold butter- 100 gms, cut into cubes
Cold water- 3 to 4 tbsp/ as required
IMG_3367-1
Mix together the flour, baking powder and salt in a large mixing bowl.
Add the cubes of butter and rub it into the flour, using your hands. It should resemble coarse bread crumbs.
Add the cold water bit by bit till it all comes together and you get a soft pliable dough.
Cling wrap it and place in the refrigerator while you get the filling going.

Meanwhile, melt the butter in a frying pan and sauté onions and garlic till soft and fragrant, for about 4 to 5 minutes on medium heat.
Add the curry powder and mix thoroughly.
Throw in the chopped mushrooms and sauté till all the water evaporates and is dry.
Finally, add the spinach, salt, a few twists of pepper and cook till the mixture becomes semi-dry in consistency. It shouldn't be too dry, but all the water from the spinach should have disappeared.
Transfer to a bowl and keep aside to cool.
Break the eggs into a bowl and whisk lightly.
Add the milk, season with enough salt and pepper and whisk the mixture well. Keep aside.
IMG_3375-3
When ready to bake, pre heat oven to 180C and lightly grease the tart tins with butter or oil.
Take the dough out of the refrigerator and roll it out on a lightly floured surface.
Cut out circles large enough to fit the tart tins and carefully place the pastry into the cases. Crimp the sides if required. Don't press it in too hard, taking them out can be a problem.
Add about 2 tsp each of the filling into the tart tins, spread it around and pour the milk-egg mix on top of the filling till about 3/4th full.
Repeat till all your filling and milk is used up.
Sprinkle the cheese on top of the filling and place all the tins on a baking tray.
Bake for about 20 to 25 minutes or till the eggs are cooked through. 
Once done, cool on a rack for about 15 minutes and then carefully unmould.
They taste the best on the very same day, but I stored them in an air tight container in the fridge for up to 3 days and used to reheat in the microwave for about a minute or two. Was perfectly fine!
IMG_3391 
Notes: You can either roll out the large ball of pastry and then use a lid or bowl to cut out circles or make small balls from the dough and roll it out to the size of the tart tins. If you already have rolled out pastry, then the first method works best.
Although I bought ready made pastry, I have used Maria's pastry recipe before and it is very easy and works great.
Use any filling of choice, eg, shredded chicken, sausages or even paneer. Paneer and spinach is a great combo BTW!
Store leftover dough, cling wrapped, in the freezer. Thaw completely in the fridge compartment and use as required.
Instead of milk, use double cream for a more richer filling.
Curry powder can be replaced with any meat/chicken masala.

 
  • The Best Blog Recipes © 2012 | Designed by Rumah Dijual, in collaboration with Web Hosting , Blogger Templates and WP Themes