Showing posts with label Indian. Show all posts

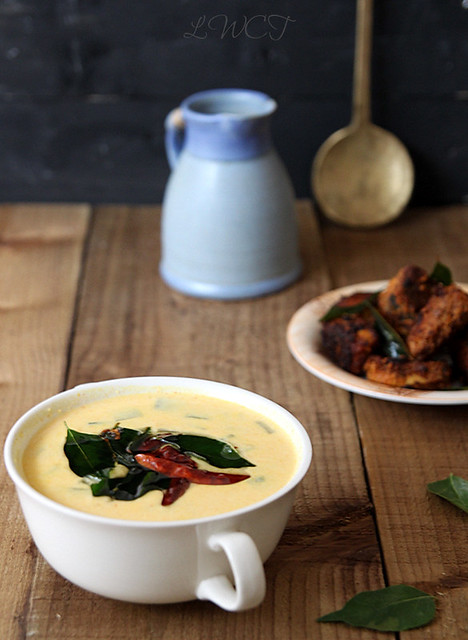
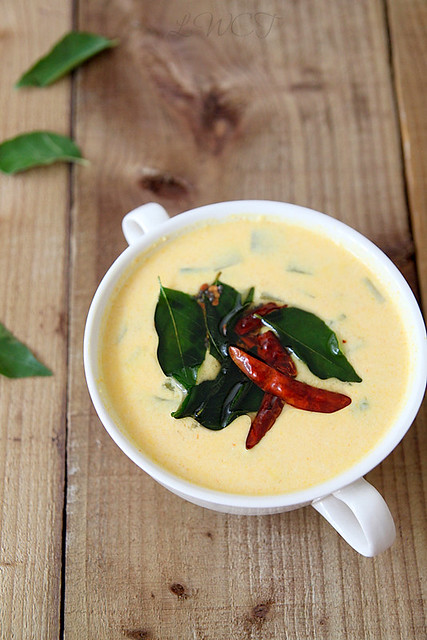
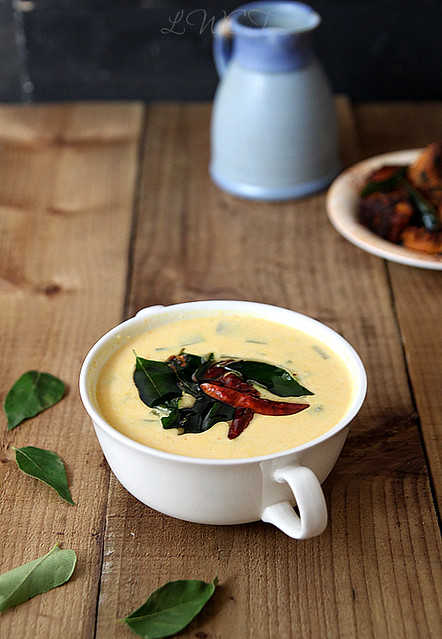
Padavalanga mooru curry (Snake gourd and yoghurt curry)

0 nhận xét

IMG_7854
We love yoghurt. Period.
We almost always have a stash in the fridge and can easily go through a pot in two days. That said, I have never tried making yoghurt at home and have to depend on the store bought ones (which is not bad at all)

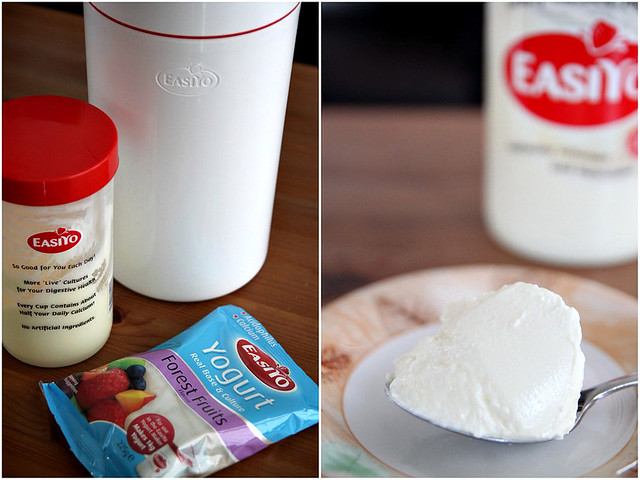
So when YoghurtDirect sent me the Easiyo yoghurt maker to review, I was excited. I'd never tried making yoghurt  at home and this was going to be fun. The yoghurt maker promises fresh yoghurt with three easy steps and makes use of the finest quality New Zealand milk powder, available in a range of plain and flavoured varieties (of course with varying or lower fat contents as well). The instructions were really easy to follow and on a cold night I set about making my first yoghurt.
25
From the two sachets I ordered, I tried the Full Fat Greek Yoghurt and kept the Sweet Forest Fruits sachet for another day. Followed the manual to the dot, kept it to set overnight and by next morn I had a kilo of perfectly set Greek yoghurt. The yoghurt turned out exceptionally thick and creamy and the slight sourness reminded me of the curds you get back in India, perfect for those south Indian curries. 

Its a no mess, no fuss system and I would think, much more economical than buying store bought yoghurt. The fact that the sachets can only be picked up online is a bit of an issue for me- the non planner that I am, I would invariably end up forgetting to order them and will have to head over to the nearest store to buy yoghurt when in need. If the online store is not an issue, I think Easiyo is a really good addition to your kitchen. 

We enjoyed half of the yoghurt on its own, and the other half, I used for a "mooru" curry (yoghurt based curry) which turned out really nice. 

Recipe adapted from here
IMG_7894
Yoghurt- 1 1/2 cups (beaten well)
Water- as required
Salt- to taste

Snake gourd (padavalanga)- 1 cup, peeled cleaned and diced
Turmeric powder- 1/4 tsp
Chilli powder- 1/2 tsp
Water- 1/2 cup

To grind
Dessicated coconut- 1/2 cup
Green chilli- 1, roughly chopped
Cumin seeds- 1/2 tsp

Tadka
Oil- 1 tbsp
Mustard seeds- 1/4 tsp
Fenugreek seeds- 1/4 tsp
Curry leaves- a large sprig
Dry red chillies- 2 to 3
IMG_7847
Beat the yoghurt with enough water and salt to make it lump free. It shouldn't be too thin. Keep aside.
In a saucepan mix together the diced snake gourd, turmeric powder, chilli powder and water and cook covered over medium heat till the vegetable is done. A fork should easily break through the flesh. 
While that's taken care of, grind the coconut, green chilli and cumin seeds in a coffee grinder to a coarse paste. Add a tsp or two of water if required.
Once the snake gourd is done, reduce heat to low and add the ground coconut mix.
Stir it all together and cook for a further 5 minutes.
Take the pan off heat and keep aside to cool for a couple of minutes (around 7 to 10 mins).
Add the beaten yoghurt and stir well to combine. 
Do a taste test and add more salt if required.
Do a tadka by heating oil and adding all the ingredients to it once the mustard starts to crackle.
Pour over the curry, give a good mix and serve warm with some rice, pappad, fish fry and pickle :)

Notes: The snake gourd can be replaced with the Indian cucumber or ash gourd.
Of course you can omit the coconut mix and instead just add some chopped onions and ginger to the tadka and pour over the curry for a different, but just as good, version.

With thanks to YoghurtDirect for sending me the Easiyo yoghurt maker to review.

Mysore masala dosa and an event announcement

0 nhận xét

IMG_5463
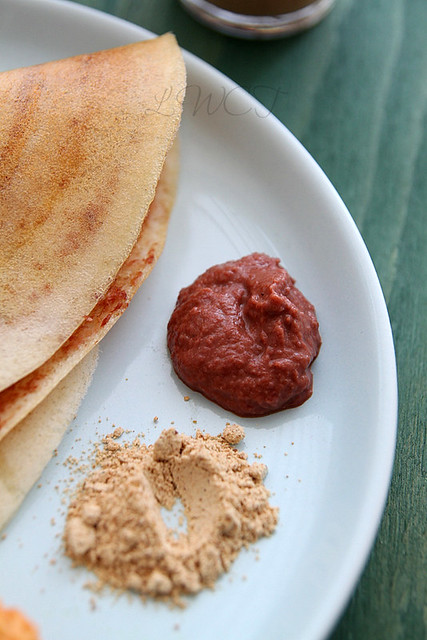
Before you go ahead and judge me by saying, omg another dosa recipe, who needs that? let me confirm that its actually for my benefit than yours because i really had to have a fool proof recipe on record since my life was wasted searching the internet for chutney and masala recipes. I don't make my own dosa batter, let me make that very clear, and am very happy with the results the ready made dosa batter gives me. 

I also suck at making a normal sambar and an even simpler chutney which is why I like to serve dosa with chicken curry (for dinner that is) and idli with fish curry. Have you tried the combo? Its divine, really it is! But on some very rare occasions, I feel like going all out and the Mysore Masala Dosa was an after effect of one of those days. 

I have fond memories of Mysore masala dosa and I don't think i have had any as good as the ones from Sangeetha restaurant in Nungabakkam, Chennai. My hostel was just around the corner from the restaurant and on Sundays, usually after a hang over from hitting the clubs the previous night, we would all wake up by around 11 or 12 and conveniently miss breakfast at the hostel (which would be upma or something uninteresting like that). With rumbling tummies we would then start discussing brunch/lunch options. Ideally it would be Crescent hotel which we would want to go to, for their yummy Prawn biryani (which btw if you haven't tried, YOU SHOULD!), but mostly we would all be broke and so Sangeetha Vegetarian restaurant would be our next best choice. And the Mysore masala dosa there is perhaps one of the best i have ever had. Let me assure you, this is no where close to what they serve, but it was good enough to shut me up about Mysore masala dosa for a while.
IMG_5452
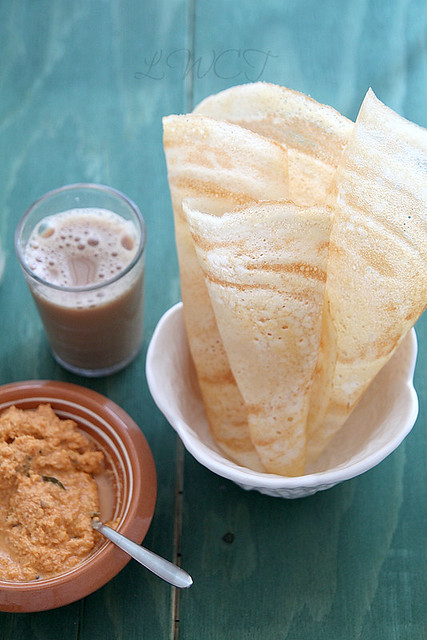
I would suggest you make all the items a day ahead so you dont ruin the whole assembling process. My dosa making skills are not so good and mostly the first 2 or 3 dosas always get dumped. Either the heat is not right or the spreading is not correct or something usually goes wrong. I also like my dosas crispy and so this time I was determined to make them right so I could take a few pics, which is no easy feat. One, because there are not many ways to make a dosa look appealing and two, they don't really stay crisp for that long. So this was the best I could do :)

For a recipe for perfect dosa batter, check out this informative post by Sala here
If it's idli's you are looking for then Nags has summed it up pretty well in her post here

I, on the other hand, use the store bought batter for both idli and dosa. I always freeze the batter the day i pick it up and it stays for a really long time. I thaw it at room temperature and use it as desired. I usually make idlis the day I open it. I mix a tsp of baking soda to the batter and leave it for about an hour. This has fetched me really really soft idli's. I then thin down the batter with some water for using it in dosas, or if I'm up to it I separate them in the beginning itself and use them accordingly. But really, if you are up to making your own batter, follow the above mentioned links like the Bible :)

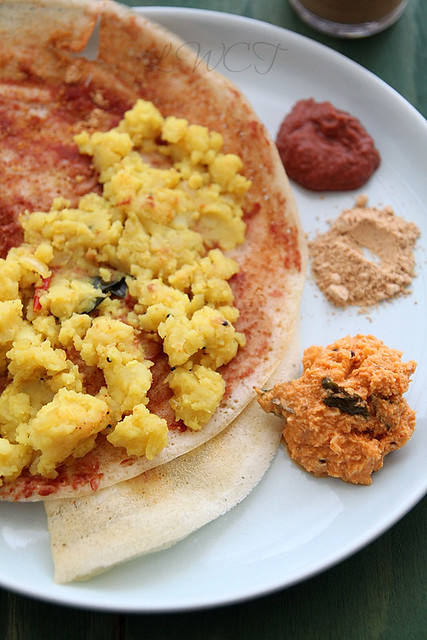
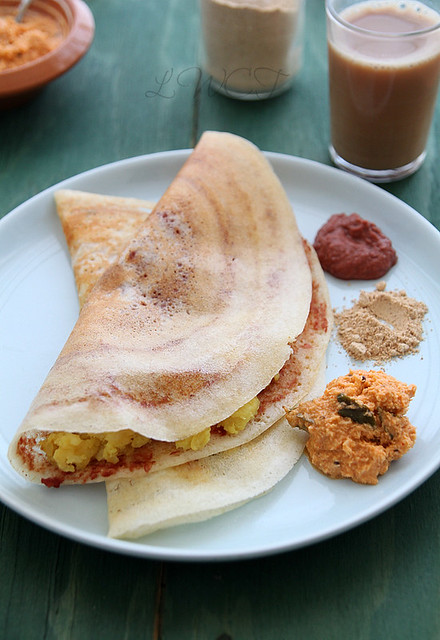
Mysore masala dosa
Dosa batter- around 1 cup
Ghee- enough to drizzle

For the filling
Idli podi/ mulaga podi- here & here (I buy mine from the store. Yes, I am a disgrace to the food blogger community)

Onion chutney
IMG_5478
Red onion- 1 medium, roughly chopped
Garlic- 4 to 5 pods, peeled and roughly chopped
Chilli powder- 1 tsp
Tamarind paste- 1 tsp
Salt- to taste
Oil- 1 tbsp

Heat oil in a pan and add the onions and some salt
Sauté on medium heat till they become a light brown in colour.
Add the chilli powder and continue to cook for a minute or so. 
Remove from heat and leave aside to cool for a while.
Add the cooled mix, garlic and tamarind paste and blend to a smooth consistency.
Resist the urge to add water, but if absolutely necessary, add a tsp or so and increase gradually.
You can do the above without cooking the onions by pulse all the ingredients in a blender. I find it a bit too overpowering and so I cook the onions.

Potato masala
IMG_5470
Potaoes- 2 medium, quartered and pre cooked
Mustard seeds- 1/2 tsp
Curry leaves- a sprig
Asafoetida- a generous pinch
Onion- 1 medium, thinly sliced
Ginger- 1.2 inch piece, thinly sliced (optional)
Green chillies- 2, slit
Turmeric powder- 1/4 tsp
Salt- to taste

Break down the pre-cooked potatoes using a fork, but don't mash it up. Keep aside.
In a kadai heat the oil and temper mustard seeds, curry leaves and asafoetida.
To this add the onion, ginger and green chillies and cook till the onions wilt and turn a light brown colour.
Add the turmeric powder and cook for a minute or two after which you dump in the potato and give a good stir, making sure the potatoes are well mixed with the masala.
Check for salt, add a dash of water to prevent it from drying out and cook for a further 2 to 3 minutes after which you can transfer the masala to a serving plate and keep ready. 

Accompaniment
Sambar- here & here

Coconut chutney (recipe adapted from here)
IMG_5477 
Grated coconut- 1/2 cup
Shallots- 1 small, roughly chopped
Ginger- 1/2 inch piece, peeled and roughly chopped
Chilli powder- 3/4th tsp
Water- 2 tbsp, adjust accordingly
Salt- to taste
Oil- 1 tbsp
Mustard seeds- 1/4 tsp
Curry leaves- a sprig

Grind together the coconut, shallots, ginger, chilli powder and salt with the water in a blender till you get a smooth paste.
In a saucepan, heat the oil and splutter mustard seeds and curry leaves.
Keep the heat to medium and pour in the coconut paste mix along with about a 1/4 cup of water.
Cook, stirring continuously, till you see the steam coming from the spatula when lifted off the chutney. 
make sure the chutney doesn't boil.
Also adjust water according to taste. I like mine a wee bit thick, so i reduced the water.

Assembling
IMG_5466
Keep a non-stick dosa tawa over medium heat.
When ready, add a ladle full of dosa batter and spread it in a circle.
Drizzle a spoon full of ghee over the spread out batter and along the side, lightly dabbing it into the batter. Wait for the dosa to slightly cook.
Spread a spoon of the onion chutney, sprinkle some idli podi and cook till the dosa slightly crisps.
Finally top one half of the dosa with a generous serving of the potato masala, fold over and cook for a minute or two after which you can transfer to a serving plate.
have them warm with a side of the chutney or sambar.

Bloggers' Buzz event announcement

A bunch us food bloggers met early this year in London and we had such a blast, we thought it was high time we took this whole thing to another level. So we brainstormed a bit and came up with Bloggers' Buzz, a platform for like-minded people to come together to share their passion for one thing- FOOD.

This is going to be a one day event with food blogging related master classes like basics in food photography, ethics and copyright, monetising your blog etc. and there will also be loads of networking opportunities with those attending. If that's not good enough then wait till you see the fabulous sponsors that we have roped in for the event and we assure you, you will be leaving the event with a big smile, some new friends and a goody bag full of surprises.

If you are a food blogger based out of UK or Europe or someone who simply fancies food in general, then this is definitely where you need to be. Do check out our official event blog http://bloggersbuzzuk.blogspot.co.uk/ for more details and updates and register right away as we have some really cool prizes to be won for a few competitions we will be running from Jan onwards. If you would like any more details regarding this, drop in a line to Nupur at bloggerbuzzuk@gmail.com or just leave a comment on this post :)

We are counting on you guys out there to make this event a success. So do book a place and feel free to spread the word. The more! the merrier!

With loads of love and Christmas cheer,
The Bloggers' Buzz Team

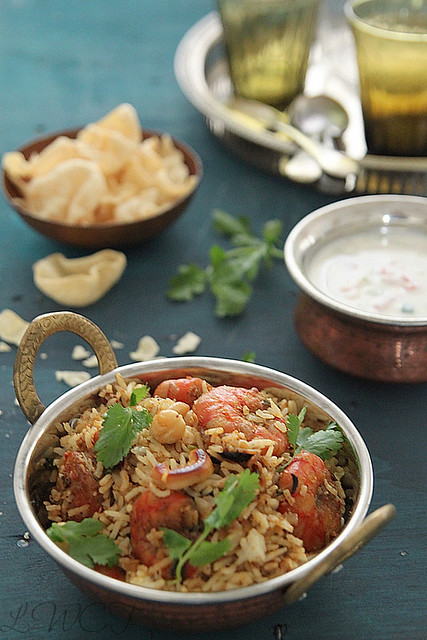
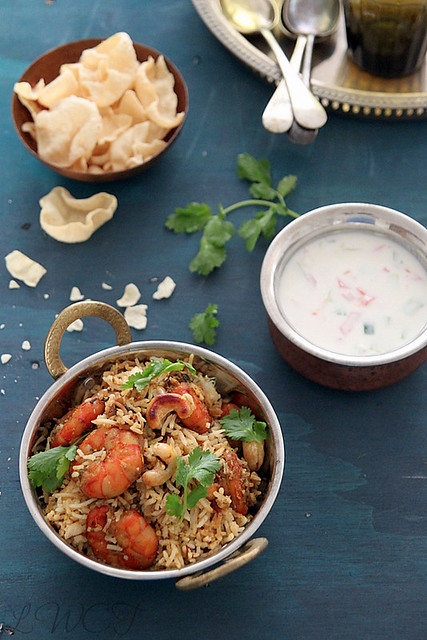
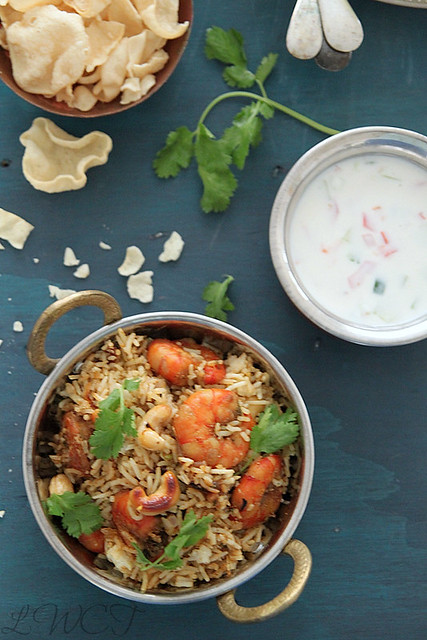
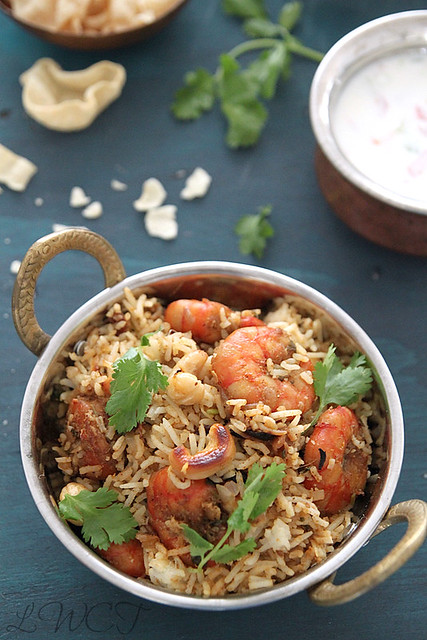
Keralan prawn biryani

0 nhận xét

IMG_5119
As I have said numerous time before, I am a sucker for biryani, good or bad. I can thoroughly enjoy it without an issue. That said, I completely suck at making biryani the proper way and so cant flaunt it when I have guests over. I do experiment with different types of biryani when its just us at home and sometimes it comes out ok, but most of the time, not good.

When the lovely people over at Flora asked me if I wanted to try making the Keralan Prawn Biryani recipe from their new cookbook called 'Let's Get Cooking,' I jumped at it. With around 30 odd recipes contributed by mums (and dads), the cookbook was put together by Jean-Christophe Novelli and has an array of easy recipes you can whip up in no time. You can view all the recipes in the cookbook here. It was also my first time using Flora Cuisine, and I must say I'm pretty impressed with it. Its a much healthier cooking oil which can be used in place of any oil or butter and used for baking, frying, greasing, sauteing and what not. I have been regularly using it for my cooking now and I love it.
IMG_5103
Coming to the recipe. One look at it and you will instantly realise its an easy peacy one, with no complications of a biryani. That said, its not the traditional biryani. So scoot if its what you are looking for. The rice here is cooked in a microwave, the prawn masala made separately and then both mixed together and served. Not the authentic biryani flavour you would get with this, but would suffice for one of those days you don't want to slog it out in the kitchen, but want something fancy and tasty. I had never cooked rice in a microwave and was wary about doing so, especially because it involved a huge quantity of ingredients and you definitely don't want to waste it by screwing it up. So I did a couple of Google searches, asked the contributor of the recipe (who btw has her own food blog) and some other friends and they all assured me it would turn out well as they regularly did it. 

I was still too chicken to do it and so tried it out with a small quantity of plain rice the previous day. All I have to say is, I'm hooked. I'm kicking myself for not discovering microwave cooking earlier. Its so easy and convenient and the best part, individual grains of rice which are perfectly cooked and fluffy. I now make different types of pulao and stuff in the microwave, which I shall blog about later. So anyways, the whole thing doesn't take any time to put together especially if you make the prawn masala a day or two ahead. Which is what I did and all I had to do was make the rice, garnish and assemble it on THE day. Taste-wise, I thought it was more like a prawn pulao than a biryani, but who cares, it tasted good nonetheless. 

Recipe adapted from Flora's Let's Get Cooking
IMG_5086
To marinate
Tiger prawns- 500 gms, peeled and cleaned
Chilli powder- 1 tsp
Turmeric powder- 1/2 tsp
Salt- to taste

For the masala
Flora Cuisine- 2 tbsp
Onion- 1 large, thinly sliced
Ginger paste- 2 tbsp
Garlic paste- 2 tbsp
Green chillies- 2, slit
Coriander powder- 2 tsp
Mint leaves- 1/4 cup, cleaned and roughly chopped
Coriander leaves- 1/3rd cup, cleaned and roughly chopped
Garam masala- 1 1/2 tsp
Salt- to taste
Water- 1/2 to 3/4th cup
Lemon juice- 1 tbsp

For the rice
Basmati rice- 2 cups, cleaned and soaked in water for around 15 to 20 minutes and then drained.
Flora Cuisine- 1 tbsp
Onion- 1 large, thinly sliced
Boiling water- 4 1/4 cups
Salt- to taste

Garnish (optional)
Cashewnuts- 3 tbsp
Onion- 1 half, julienned
Raisins- 1 tbsp
IMG_5095 
Marinate the cleaned prawns with all the ingredients under the marinate section and keep aside for about 15 to 20 minutes. This is purely optional. Skip the step if time constrained.
Once the marinating time is over, you can start with the masala.
Place a large pan over medium heat and add the Flora Cuisine. Once hot, saute the onions till they turn soft and a light brown in colour.
Add the ginger, garlic pastes and green chilli and continue sauteing till the raw smell disappears, around 2 to 3 minutes.
Throw in the coriander powder, chopped mint and coriander leaves', garam masala and salt and mix it all in, stirring for about a minute or so.
Add the marinated prawns, water and lemon juice and simmer on medium heat till the prawns are cooked through and the masala is in semi-gravy form. Keep aside.
This can be made the previous day or 2 days in advance and refrigerated.
IMG_5102 
Add the boiling water into a large (big enough to comfortably hold the rice once it expands) microwave safe bowl and add the drained rice.
Season with enough salt, give a stir and cook without a lid in the microwave for about 10 minutes.
Simultaneously, heat 1 tbsp of the Flora Cuisine in a frying pan and sauté the onions for the rice till soft and light brown. 
After 10 minutes, remove the rice from the microwave (carefully, bowl might be hot) and add the sauteed onions to it. Give a thorough mix and continue cooking for about 12 minutes.
Once the time is up, check to see if all the water has been absorbed and if not, microwave for a further 2 to 3 minutes.
Take the bowl out, cover with a lid and leave aside for 10 minutes. You will then notice that the rice is perfectly cooked, and no water remains.

To assemble, fluff the rice gently using a fork and mix it with with the prawn masala. Make sure you don't over do the mixing and break the rice.
If using garnish, then heat 2 tbsp of Flora cuisine in a frying pan and fry the cashew nuts, onions and raisins separately till lightly crisp, drain on paper towels and when ready to serve garnish with the same.
Serve with pappad, pickle and raita.
IMG_5104 
Notes: The original recipe calls for frying the marinated prawns for around 4 minutes on each side and adding that to the masala. I omitted this step because I used pre-cooked prawns and doing so would have made it tough when cooked again in the masala. If using fresh prawns, then this step is highly recommended.
Quantities have been altered a bit to suit our taste.
I cooked the rice on full power (700Watts) for 22 minutes. Times vary according to your microwave power.
You can of course layer the biryani the traditional way and cook in the oven or on the hob top to get the 'dum' effect. But the whole point of this biryani is the simplicity and so I followed the above mentioned procedure
I froze the remaining biryani in an air tight container. Just take it out and let it thaw at room temperature before using and finally warm in a microwave before serving.

With thanks to Flora Cuisine for sending me all the ingredients to make this tasty Prawn Biryani.

Prawn thokku/ roast- A guest post for The Captain's Kitchenette; and the Andy Bates American Street Feasts Show

0 nhận xét

IMG_4808
There are so many wonderful food blogs out there, that I find it difficult to browse through all the yummy recipes they post. I still manage to run through a few once in a while, and eventually end up with tonnes of recipes bookmarked. Serah's beautiful blog, The Captains Kitchenette, certainly falls into this category and its her simple, easy-to-follow recipes that makes me a fan. I landed up on her blog after her sister (we were hostel mates in Chennai) posted a link to a recipe on FB. I was immediately hooked. We then exchanged a couple of emails, became friends on FB and the rest is history. She's now more of a friend than a random food blogger and I hope some day I get to meet her and her lovely family she cooks for. I also have to appreciate her for taking time to cook, photograph and blog in spite of having a toddler to tend to. Like I was telling her the other day, I complain if I have to continuously cook for a week ;)

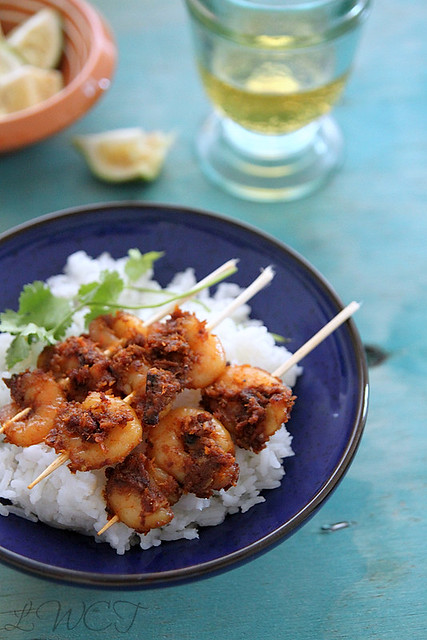
Since Serah was taking some time off to tend to other commitments, she asked me if I could do a guest post for her blog and I truly obliged. She gave me full leverage on what I could whip up and since she said she preferred sea food, I thought I'd make this prawn thokku for her. I came across the recipe on one of my recipe search sessions on the internet and immediately wrote it down (yes believe it or not, I actually wrote it down). Completely forgot to bookmark the page and so apologies to the person who originally posted it. I did try searching for it again, but since this was written down ages back, I really had no luck.
IMG_4861
Thokku, loosely translated means paste, and I presume this is more a TN preparation as opposed to the mallu (Kerala) way of making prawn roast. The use of fennel seeds make this dish quite unique, and of course something with grated coconut can never go wrong. This is a favourite prawn recipe of ours and has made its appearance on quite a few occasions. Although it goes well with some warm rice, dal and pappad, my favourite way to have it is as a starter with some chilled beer. just thread it onto small skewers, sprinkle the masala on top, and serve. It's a crowd pleaser, trust me!

So without wasting more time, head on over to Serah's kitchenette for the recipe and while you are there dont forget to take a peek around and drool. I have bookmarked a whole lot of recipes from her blog and seriously, dont forget to check out the authentic Coorgi recipes she's put up. Absolutely droolworthy!
Thanks a bunch for having me over Serah :)
IMG_4839

On another note, here's something street food lovers might be interested in. Food Network is hosting a brand new series documenting the vibrant street food scene in the US called American Street Feasts and is hosted by the charming Andy Bates (yes, the blue-eyed Pie-Man with a delicious Brit accent). I have caught bits and pieces of his show here and is quite an eye-opener, especially because street food is seriously catching on and we have just started exploring some of the places.

The show basically follows Andy on a street food odyssey across the US, visiting the most vibrant food destinations and discovering the stories behind the recipes. He uses them as inspiration to create his own recipes, some of them being the Braised pork belly and Waldorf salad in a pretzel wrap and the Crawfish ball and Jambalaya. The show is aired every weekday at 12.30pm and 6.30 pm on Food Network and if you haven't been able to catch the previous episodes, visit Andy's collection page and give it a go. You can also use the interactive 'Street Food Map' to find out where to get the best street food in UK and while you are at it, go on and submit your suggestions on what to feature and so on. For the fans out there, Andy Bates' new cookbook is out in the market, so go on and grab you copy from any of the leading book stores or Amazon.

With thanks to Food Network for a copy of the cookbook

 
  • The Best Blog Recipes © 2012 | Designed by Rumah Dijual, in collaboration with Web Hosting , Blogger Templates and WP Themes