Showing posts with label tea time snack. Show all posts

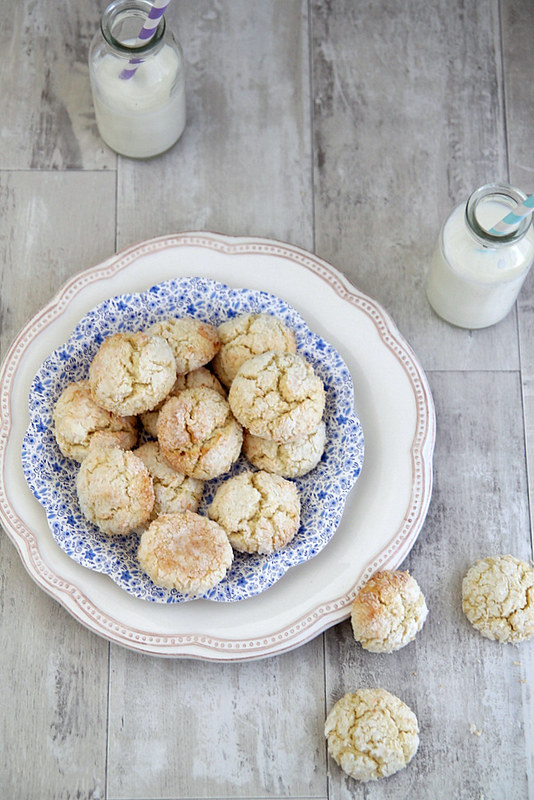
Lime and coconut crinkle cookies

0 nhận xét

IMG_3779
Its been a while since I posted a cookie recipe on the blog. Well, that's because I rarely make cookies and other than biting into them fresh out of the oven, I kinda don't like them that much. Of course its a different story for Ro, who claims he buys Oreo cookies just because I don't make any at home.

So last week I was heading over to G's place for a fun afternoon dress-up session (more about that later) and I had to take something for her lil boy who is so so adorable. I was on a tight schedule and had to figure something that could be easily made, with available ingredients and of course tastes good. I scouted around my bookmarked recipes and found this recipe, and I strangely had a couple of limes lying around in the fridge.
IMG_3763 
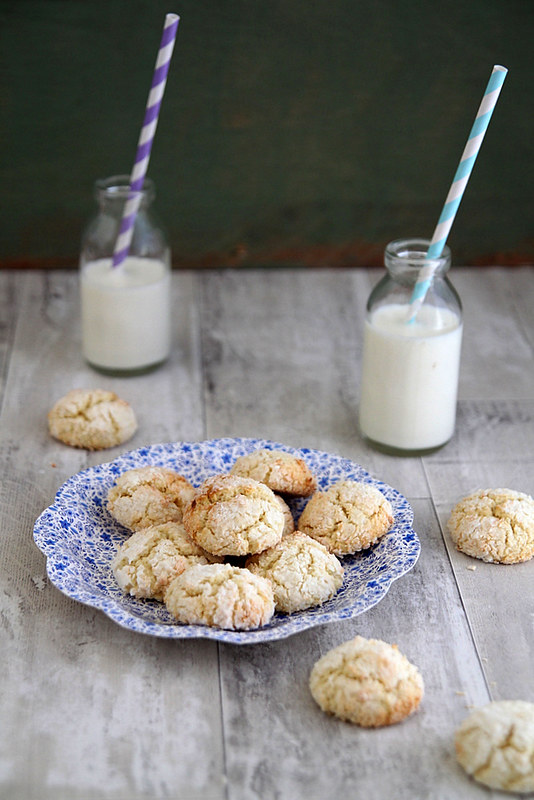
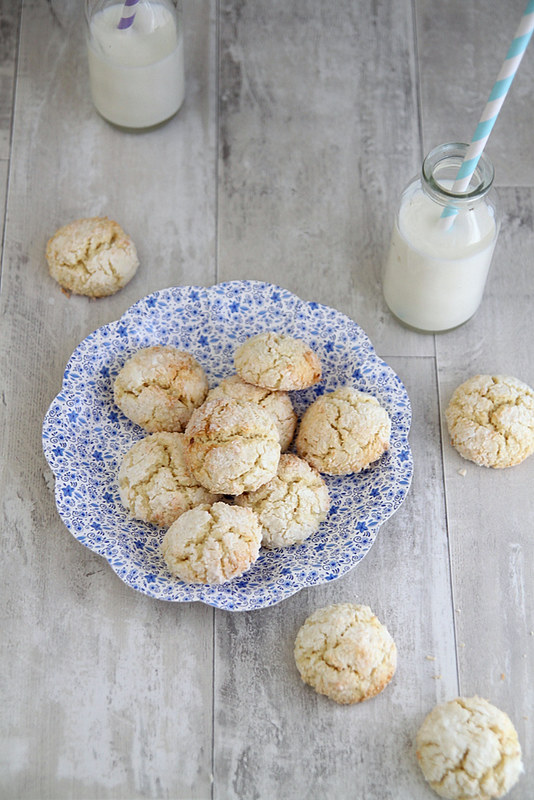
I've developed this new found love for lime (well, I always liked it in a margarita), mostly after tasting the awesome lime filling my boss makes for the macarons. It's perhaps one of my fav fillings, closely followed by passion fruit. I was a bit sceptical about whether kids would like lime and coconut as a flavour, as its somehow very adult-y, but then I had to give it a shot to see if it was worth it. I for one, loved it. G told me she and her nanny loved it, but I didn't get around to asking if lil S liked it. I served the leftover few to my niece and nephew the next day and they loved it, so I'm thinking even kids may actually have a thing for that flavour.

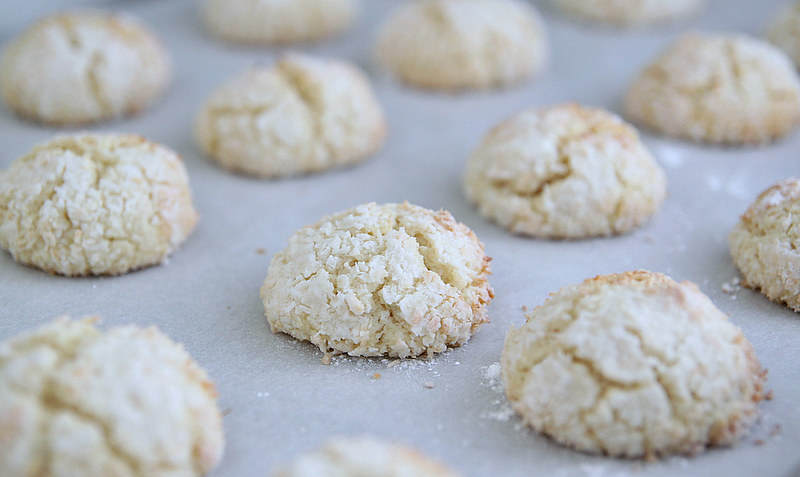
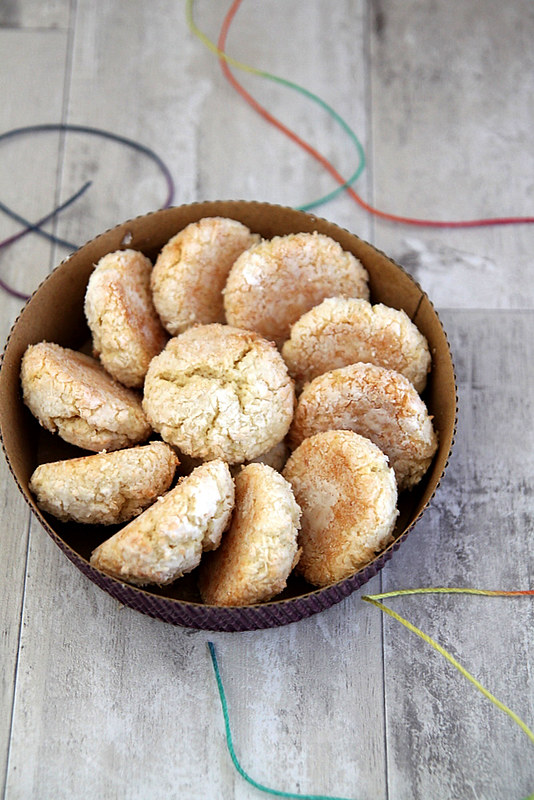
To be honest its very lime-y and coconutty. If you don't like these two flavours that much, then don't even bother scrolling down. If you like the lime flavour, but the coconut not so much, then do as the original recipe calls for where you roll the dough in granulated sugar and not coconut. The 15gms of coconut in the cookie doesn't really bring out too much of its flavour. I wanted it to be coconutty and hence rolled it it coconut.

Recipe adapted from here (makes around 36 to 38 cookies)
IMG_3749
Unsalted butter- 80 gms, at room temperature
Caster sugar- 100 gms
Egg- 1, small
Lime zest- from 1 lime
Lime juice- 2 tbsp
Dessicated coconut- 15 gms + enough to roll the cookies
Plain flour- 220 gms
Baking powder- 2 tsp
Icing sugar- to roll the cookies (around 2 tbsp)

Cream together the butter and sugar in a large mixing bowl, till light and fluffy. I used a silicone spatula for this as my butter was of a nice easy-to-handle consistency. Use the paddle attachment of your stand mixer to make the creaming easier.
Into the mix add the egg, lime zest and juice and dessicated coconut.
Mix till you get a smooth mix. I switched to a wooden spoon to make this job easier. You can use the same spatula, or even a whisk if that's easier for you.
Sieve together the plain flour and baking powder and add it to the butter mix, bit by bit, mixing after each addition. Use a fork to do the mixing.
One the mixture has come together, cover with a cling film and refrigerate for about 1/2 an hour.
IMG_3785
When ready to bake, preheat the oven to 180C and line 2 baking trays with baking paper.
Into a large plate add the icing sugar on one side and the dessicated coconut on the other. 
Keep a cup with water ready by the side because you'd need to keep wetting your hands to roll the dough.
Make small balls with the dough, first roll it in the dessicated coconut, followed by a generous roll in the icing sugar and place on the baking tray about an inch apart.
Continue till you finish the entire dough.
Bake for about 10 minutes and 12 if its a bit on the bigger side but not longer.
Cool on wire racks and enjoy them immediately or store in air tight containers and use up in 2 to 3 days (if you can stay away from it that long) :)
IMG_3757
Notes: The mix curdled quite a bit when i started mixing and of course I panicked but once you add the flour, it becomes alright
The original recipe used granulated sugar for the first coat, but i thought coconut was a better option. Feel free to replace it with granulated sugar.
The cookies are really lime-y, so reduce it to 1 tbsp if you don't want it too strong.

Lemon madeleines

0 nhận xét

I know this post was supposed to go up a couple of weeks back, but that was me being optimistic about posting stuff on the blog from home. Horrible internet connection and working on a tablet is not really a favourite thing, and to add to it, blogger or flickr - one of these- were acting up, forbidding me to place images the way I want. Anyways, I had to have the post up and running because as part of my New Year resolution, at least a recipe post a week on the blog was a must. I actually don't have anything else in my drafts and if i need to keep with the resolution:
1. The weather must be significantly better for me to (want to) take pictures
2. I should get off my lazy ass and cook
3. I should unpack my bags and dig out the props i bought from India (really cool ones BTW)
4. I should get off my lazy ass and COOK!!!

After diving straight into work, today is my day off and I don't see any of the above happening. Its Valentine's day, and what I should actually be doing is to cook up a storm for Ro (who couldn't care less about VD) and then cuddle up and watch a movie or something. But all I'm thinking of is what cocktail I can make with the new bottle of Cointreau I picked up from duty free and how many varieties I can whip up with the mixers lying around home. (It's only 11.30am btw! Do I have a drinking problem??? No don't answer that). Its raining and unbelievably windy and I don't want to cant go out. Oh, and Ro is working from home and in about 15 minutes he's going to ask me 'what's for lunch.' I'm going to reply 'love and fresh air,' and then it might end up in an argument and we'd be the awesome couple who fights on every VD.
Ok so madeleines. When I visited Paris last September with my blog buds, one of the things on my 'to buy list' was a madeleine tray. We visited a couple of stores that sell cooking paraphernalia and they all had gorgeous madeleine trays, but bloody expensive. So I conveniently forgot about it and instead came back home with other rubbish.  

Imagine my excitement when I found a similar tray in TKMaxx for a third of the price. I had to pick it up and make madeleines immediately. So I did and they came out perfectly well. Its so easy to incorporate a flavour of choice into these and I chose lemon- i used my home made extract. Its just a basic sponge recipe and I'm sure you can make it without the molds, but then they wont be called madeleines, will they? I once saw a post trending on Pinterest where oven safe spoons replace the molds. They don't give you the bump, but they do look pretty madeleine like and is a substitute for the tray. 

Enjoy!

Recipe adapted from here (makes 18, 8cm madeleines)
Eggs- 3 large, at room temperature
Granulated sugar- 1/2 cup
Dark brown sugar- 2 tbsp
Butter- 1/2 cup
Plain flour- 1 cup
Baking powder- 1/2 tsp
Salt- a pinch
Vanilla extract- 1 tsp
Lemon extract- 1/2 tsp
Lemon zest- 1 tsp, freshly grated
Whisk together the flour, baking powder and salt in a bowl and keep aside.
Beat together the eggs and both the sugars on high speed, either in a free standing mixer with whisk attachment, or using a hand whisk, for about 5 to 8 minutes or till pale and thick.
While the egg mix is being whisked, melt the butter in a saucepan and keep aside. It should be warm to touch.
Into the egg mix add the vanilla and lemon extracts and the lemon zest and whisk till just combined.
Sift in the flour mix bit by bit, folding well after each addition. Do this slowly and carefully, as you don't want to deflate the egg mix. I used a silicone spatula to fold it in.
Take about 1 cup of this batter and mix it with the warm melted butter.
Whisk it in really well to make sure the butter has been nicely mixed in with the batter.
Add this to the remaining egg batter and gently fold it in till well mixed. (Its easier to mix a bit of the batter with the melted butter and then add that to the bigger batch. You also don't end up deflating the mix too much.)
Cover with a cling film and refrigerate for a minimum of 1 hour. You can also keep it up to 3 days in the fridge.
When ready to bake, preheat oven to 190C and generously grease a 2 12 mold madeleine trays with melted butter using a pastry brush. Also dust the molds with plain flour (tapping out the excess) to be on the safer side.
Drop a tbsp each of batter into each mold. It will be slightly domed in the centre which is precisely what you want.
Bake for about 9 to 11 minutes or just until the cake springs back when touched with a finger, or till the edges turn a light brown. Don't over bake it.
Take the pans out of the oven and immediately tap out the madeleines on to a wire rack.
Dust with some icing sugar and serve immediately with a cup of coffee.

Notes: I had only one 12 mold tray and so after i finished baking the first batch, i kept it aside for a few minutes to cool down and then repeated the greasing process. The dough was kept back in the fridge while the first batch was baking. The second batch also came out perfectly fine for me.
The madeleines are best had immediately, but it can also be stored up to 3 days in an air tight container in the fridge.

Smoked salmon- two ways

0 nhận xét

IMG_5133
It's beginning to look and feel a lot like Christmas this side of the pond. Temperatures have significantly dropped and a white Christmas is predicted for London this year. We did have our tiny stint with snow recently, but thanks to a drunken night out, I happily missed the snowfall (or flurries??) by sleeping in late. It wasn't that strong in Central London and since it didn't even settle on the ground, there was no proof that it actually snowed. I was, needless to say, a bit bummed that I missed the first snow fall of the season, and added to it was everyone flaunting snow pics and status updates on FB. I am praying it does snow like crazy one of these days, much to the husbands annoyance :)

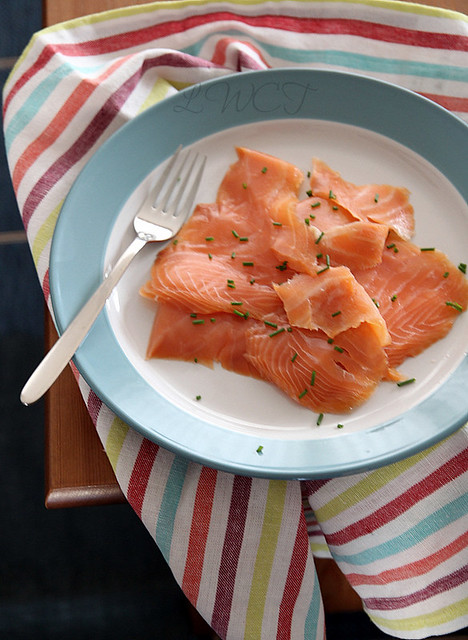
I know we are all running around trying to get gifts sorted in time for the big day. If you want some cool Christmas gift ideas visit The Handpicked Collection online store for some inspiration. The pretty heart shaped chopping board in the pic was my Christmas gift from the lovely people over at The Handpicked Collection. Also, they have launched The Handpicked Food Store online which features award winning smoked salmon and other fine foods from artisan British producers, handpicked by food experts. I was sent a smoked salmon taster to review from the store, and I decided to go ahead and use it wisely in a dish, or two.

Smoked salmon-cream cheese sandwich (makes 4 finger sandwiches)
IMG_5251 
Smoked salmon- 3 to 4 thin slices
Green cucumber- peeled and sliced into 8 small rounds
Whole wheat bread- 2 slices (use white if preferred)
Cream cheese- 2 tbsp
Chives- 1 tsp, finely chopped
Salt and pepper- to season (optional)

Mix together the cream cheese and chives and spread the mix on the sandwich slices.
Top with smoked salmon slices. Trim to required length, if necessary.
Place the cucumber rounds on top of the salmon and season with salt and pepper.
Finally, top with the remaining bread slice, cheese side facing downwards.
Using a serrated knife slice the sandwich into quarters and serve with some crisps.

Notes: Use a mayo-chive mix if you don't have cream cheese.
Slice off the edges from the bread if you want to, but we keep it on 
You can flavour the cream cheese with lemon, garlic, parsley etc etc.

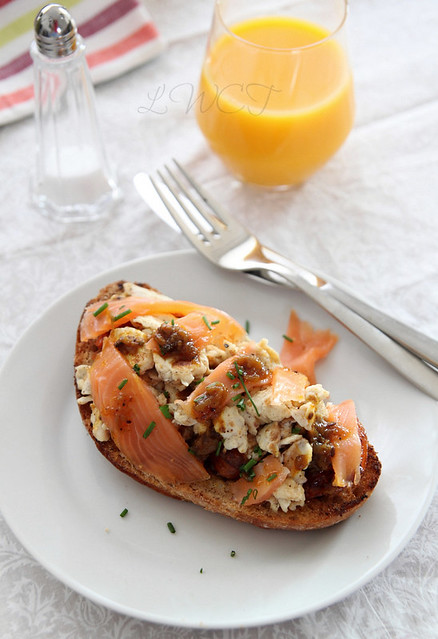
Smoked salmon breakfast bruschetta (makes 2)
IMG_5179 
Sour dough bread- 2 slices, toasted just before assembling
Butter- 2 tbsp
Eggs- 2, well beaten
Tomato- 1 small, cut into rounds
Salt and pepper- to taste
Chutney- 2 tsp (optional)
Smoked salmon- 2 thin slices, diced into long strips
Chives- finely chopped, to garnish

Heat a non stick frying pan and melt 1 tbsp of butter.
When bubbling, add the tomato rounds and fry on medium heat till done and slightly charred. About 3 to 4 minutes.
Flip the rounds and fry for a further 3 to 4 minutes.
Remove with a slotted spoon and drain on paper towels. Season with enough salt and pepper.
Into the same frying pan, add the eggs and scramble till the eggs are cooked, but don't dry it out too much.
Season with salt and pepper, give a final stir and transfer to a bowl.
IMG_5173
To assemble, place the toasted bread on to serving plates and butter them well using the remaining butter.
Add a layer of chutney (if using) and spread it as evenly as possible.
Top with the grilled tomato followed by scrambled egg and slices of smoked salmon
Drizzle some of the chutney on top of the salmon, garnish with chives and serve immediately.

With thanks to The Handpicked Collection and Handpicked Food Store for samples 

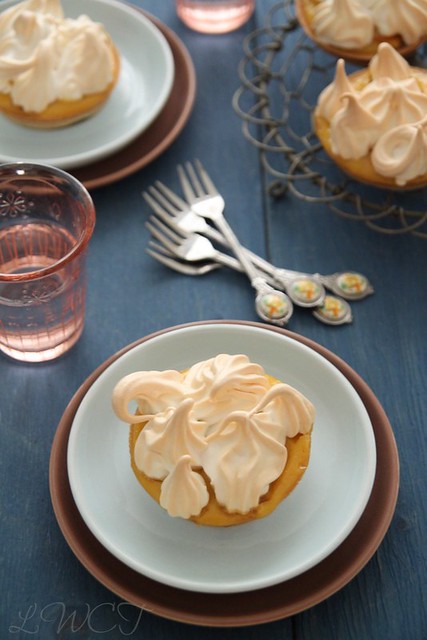
Banana-passion fruit meringue tarts

0 nhận xét

IMG_4777
'Hi, my name is Nisha and I'm a passion fruit addict' would be my opening line at an AA equivalent meeting, but for food addicts.
If I'm not mistaken, I went through a bout of passion fruit love sometime last year as well. Yes, just after summer is over and the fruit is fading from the market, but is ridiculously expensive. I thought I was over that whole passion fruit obsession, and that's when a couple of us food bloggers (Suchi, Nupur, Sonal, Nayna and Jagruti) ended up going to the Cake & Bake Show last month and had a passion fruit and banana tart made (right in front of us) by none other than Edd Kimber, the Great British Bake Off winner, 2010. It was so good, I couldn't get it out of my mind. I HAD TO MAKE IT!

So I came back home, did a thorough check of where I could get passion fruit purée and was truly disappointed. None of the local stores sold it and my only option was to pick it up online...and I would have if it wasn't so bloody expensive and came in large quantities. So the ordeal was soon forgotten until I dropped into Ottolenghi one day and had the infamous passion fruit meringue tartlets. Ok new idea brewed and I HAD TO MAKE IT. So chucked the whole plan of purée, instead decided to improvise using passion fruit juice and some pulp. The outcome was brilliant and I finally made the tartlets. 
IMG_4760-1 
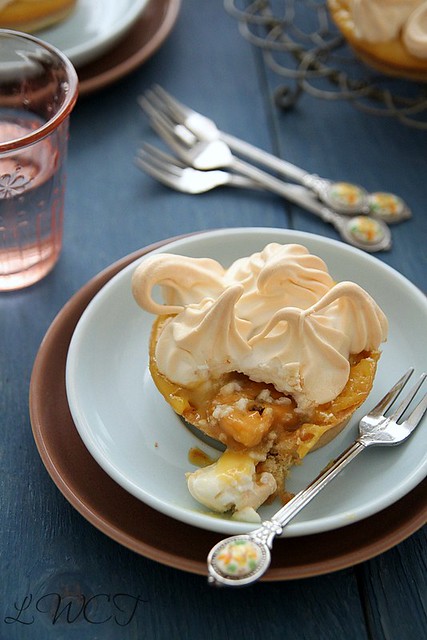
I always stayed away from lemon curd and lemon/ lime based desserts because I was not a fan of the tangy stuff (in desserts, I mean). With the fear of passion fruit curd being something like that, I was pleasantly surprised at how nice it tasted, albeit the slight tanginess which was clearly balanced by the sweetness of the curd. Its heavenly to dab it on a piece of warm toast or, if you cant wait, spoon it right out of the sauce pan and eat while still warm. Somehow, the banana and passion fruit come together, and is a match worth exploring again in the future. If there was one fault. id say it was a bit too much on the sweeter side when it all comes together. Reduce the sugar in the meringue and curd and you should be fine.

Basically I have Edd Kimber to thank for this brilliant idea. The recipe, he said, would be in his new book, but obviously I had other plans....Google. I made the curd a day ahead, since everything together might have been hectic. Also, the lighting was bad on that day and I didn't want to take a chance and make the tarts only to be disappointed by lighting. Not that lighting was any better the day I actually made the tarts, but I had no patience to wait further. The entire process may look torturous, but if you spread it across 2 days, its really no hassle. So here you go, the recipe for a delightful tea time tart.
IMG_4782 
Banana-passion fruit meringue tarts (makes 6 tartlets)
Short crust pastry- 1 sheet (recipe below)
passion fruit curd- a little over 1/2 cup (recipe below)
Caramelised bananas- 1/2 cup
Meringue- around 2 cups

Short crust pastry
Plain flour- 200 gms
Baking powder- 1/4 tsp
Salt- 1/4 tsp
Sugar- 1 tbsp (optional)
Cold butter- 100 gms, cut into cubes
Cold water- 3 to 4 tbsp/ as required
IMG_4722
Mix together the flour, baking powder salt and sugar in a large mixing bowl.
Add the cubes of butter and rub it into the flour, using your hands. It should resemble coarse bread crumbs.
Add the cold water bit by bit till it all comes together and you get a soft pliable dough.
Cling wrap it and chill in the refrigerator for an hour.
(I used ready made all-butter short crust pastry shells, but have tried making pastry with the above recipe and it works fine. Have also tried with ready rolled pastry and its even easier)
Meanwhile, butter your tart tins and pre heat oven to 180C.
When ready to use, roll out the dough on a slightly floured surface and cut into rounds to fit your tart tin. You can also butter a muffin tin and use that instead of the tart tin, in which case you would get around 10 to 12 mini tarts.
Blind bake the tart shells for about 20 minutes or till golden brown. I didn't have any baking beans so I placed pieces of baking paper on top of the shells and filled them with enough rice. I kinda messed up here because in spite of filling them to the brim, the tarts still rose a bit in the middle. So use beads if possible.
When done, place on rack to cool completely.

Passion fruit curd (recipe adapted from here)
IMG_46621 
Passion fruit- 3, scoop out the flesh but discard the seeds (or eat them)
Passion fruit juice- approx. 1/4 cup
(The passion fruit you have may not be fleshy, in which case mix together the flesh and juice to make 125ml of pulp or just use 125ml of passion fruit juice alone but reduce sugar)
Eggs- 2, well beaten
Caster sugar- 80gms
Butter- 60gms, unsalted

Mix together the pulp, juice, caster sugar and butter in a saucepan placed over medium heat.
Stir till the sugar melts and the mixture comes to a boil.
Remove from heat and keep aside for about 3 to 4 minutes.
Gently pour in the beaten eggs, whisking continuously, or you will end up with curdled eggs.
Place the sauce pan back on low heat and keep whisking till the mixture becomes thick and smooth.
Pour into sterilised jars/ air tight container and keep refrigerated. The curd becomes a bit more thicker once it cools.
PicMonkey Collage 
Caramelised bananas
Banana- 1 large ripe one, sliced into 1/4 inch thick rounds
Brown sugar- 1 tbsp
Butter- 1/2 tbsp + enough to grease the tins 

Melt the butter and sugar in a saucepan. It should be all dark and bubbly.
Throw in the sliced bananas and toss around to coat it well, taking care to not break them up.
Remove from heat and keep aside to cool slightly.

Meringue 
Egg whites- 125ml (or half cup)
Sugar- 150gms
vanilla extract- 1/2 tsp

Whisk the egg whites in a free standing mixer (with balloon whisk attachment), on medium speed, till it doubles in volume.
Add the extract.
Increase speed to high and slowly add the sugar.
Continue whisking till you get stiff, glossy peaks.
Be careful to not over whisk and make it too dry.
Fill a piping bag (with round tip nozzle preferably) with the meringue and keep ready.
The above mentioned measure make a large batch. I made meringue cookies with the remaining. Feel free to halve and also reduce sugar as per choice.
IMG_4766 
Assembling
Place the tart shells on a baking tray and layer the bottom with the caramelised bananas...say around 4 to 5 slices per tart (of course adjust it according to your tart shell size)
Pour around 2 to 3 tsp of passion fruit curd over the bananas, say till about 3/4th full of the shell.
Pipe the meringue on top of the curd in whichever design you like, but make sure the tips are not too pointed or else you might end up with burnt tips. (You can also just slather with a spoon and swirl designs)
Place in an oven pre heated at 180C and bake for about 8 to 10 minutes or till the meringues are cooked through and brown in colour.
If you have a blow torch then omit this step and just brown them.
Next time I would place it under the broiler. I was too much of a chicken to do so this time.
Keep the tarts to cool for a while and then dig in.
You can also refrigerate it till further use.

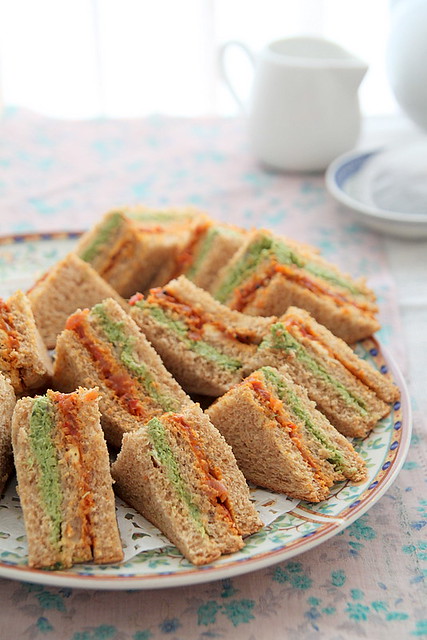
Ribbon sandwiches

0 nhận xét

IMG_4327 
I know that picnics and days out in the open are long gone, but I couldn't resist posting these delicious ribbon sandwiches before it was ridiculously late. The temperatures have dropped significantly and its no fun waking up in the morning to a cold apartment. The moment you are out from under your duvet you shiver and wish to crawl back in. We have finally taken out our winter clothes much to my dismay and Ro is already psyching me out saying winter is gonna be horrible. After 3 years of running back to India for Christmas, this year we are staying put. But that's about 70 days away and I have enough time to whine about it ;)

Coming to the sandwiches. These, when my mum used to make way back when we were kids, were not received with much enthusiasm. In fact I hated the coconut chutney more than anything. Fast forward to some 20 years later and I think I love it. I called up mum a couple of weeks back to get the recipe and she laughed so much at the irony. Also because, Ro is not a big fan of coriander leaves or any leaf for that matter and while my mum kept mentioning coriander leaves I kept referring to it as that thing, because Ro was sitting right next to me listening in on the conversation. He finally found out that a major chunk of the sandwich was made using coriander chutney and begged and pleaded to not do so. If its one thing I've learnt after 6 years of being married, its to ignore the other half when you see signs of the drama queen surfacing. And that's exactly what I did.
IMG_3122 
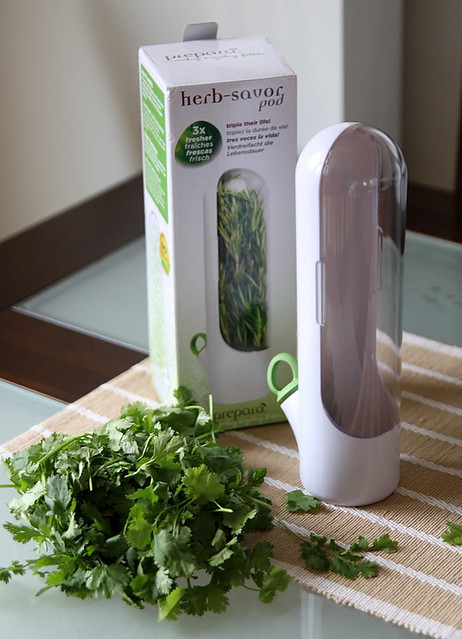
I also have to bring to your notice this uber cool gadget the lovely people over at The Handipcked Collection sent me. Its a Herb Saver Fridge Pod that keeps herb cuttings fresh and watered inside your fridge, thereby prolonging their live for a longer period. I can very happily say, 'it works.' The coriander leaves I used for this recipe were fresh even after about 2.5 weeks, except for a few leaves turning yellow here and there. I have had trouble trying to make them last in my fridge and they always end up rotting on me. If there was one downside to the product it would be that the plastic see through cover is a bit tough to handle. Its not something that just comes open with a quick pull and is a bit of a struggle. Other than that its quite a handy thing to have. It snugly fits on my fridge door and apparently can be used for vegetables like asparagus and stuff. Don't forget to check out The Handpicked collection for some great Gift ideas. I'm definitely a big fan.
IMG_4345
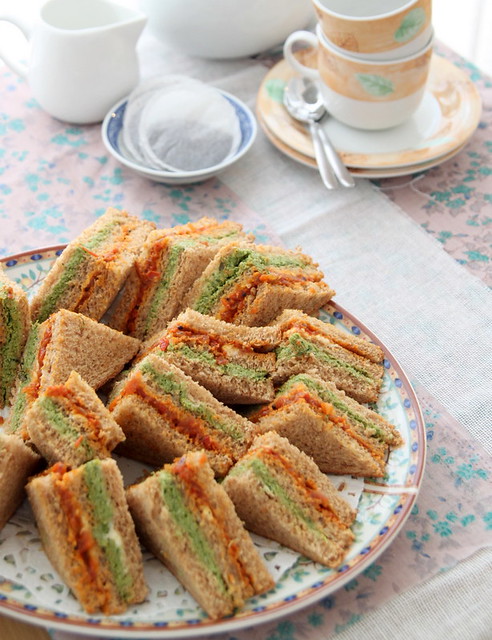
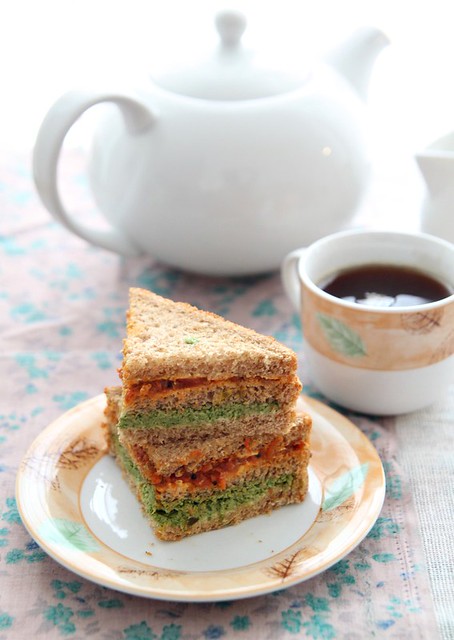
Anyhoo, once the sandwiches were done, Ro completely forgot about his coriander leaf aversion and all was good with the world. I made the two chtneys over 2 days and then on the 3rd assembled the sandwiches. If you do everything together at one go, I doubt you would ever want to make it again. So spread it out and its much easier. Will I make this again...hmm maybe when I'm in one of those proactive cooking moods. This sandwich is great for picnics and for an English Tea where finger sandwiches are a must. Its also very lah-di-dah :)

(Makes around 20 quarter sandwiches)
Bread- 15 slices (brown or white)
Coriander chutney- approx. 1 cup (recipe follows)
Tomato chutney- approx. 1 cup (recipe follows)
Butter- 1/4 cup (at room temperature)

Coriander chutney
IMG_4250-1
Coriander leaves- 2 cups, washed and roughly chopped
Grated coconut- 1 cup
Mint leaves- 10 to 12
Tamarind paste- 1 tsp (approx.)
Green chillies- 2 (adjust according to preference)
Salt- to taste
Sugar- 1/2 tsp

Grind together all the ingredients in a food processor/ blender, scraping down the sides at intervals, until you get a smooth-ish paste.
Resist the urge to add water though!
Transfer into an air tight container and refrigerate till ready to use.

Tomato chutney
IMG_4286
I followed this recipe of mine, except I didn't roast the tomatoes, just sliced them and used as it is. Feel free to roast them if you prefer it that way. I also used vegetable oil instead of olive oil and added curry leaves along with the mustard seeds. Once the chutney is done, keep aside to cool and then store in an air tight container till ready to use. It stays for about a week in the fridge.

Assembling:
Bring both the chutneys to room temperature.
Into the coriander chutney add the soft butter and mix it well. No traces of butter should be seen.
Do a taste test, add salt if required, and keep ready.
Onto the first slice of bread evenly spread about 1 tbsp of coriander chutney.
Top with another slice and spread the same amount of tomato chutney on it.
Finally top with a third slice and gently press it down to settle the fillings in.
Slice into half diagonally and then into quarters, or if you prefer, slice into smaller squares.
Serve for tea or at a picnic. It would be a hit trust me.

IMG_4375 
Notes: You can spread butter on the bread slices as well, but I didn't bother to.
I left the edges in tack as well, because Ro is a sucker for stuff like that. Feel free to slice them off if you think its too hard or something.
My mum sometimes does 3 layers with the third one being an egg mayo sandwich. Our cheap thrill when we were young was that it was made to look like our Indian flag :)
Store leftover sandwiches in an air tight container, slightly warm it in the oven for about 10 mins and have it the next day. that would make it slightly crisp as well.

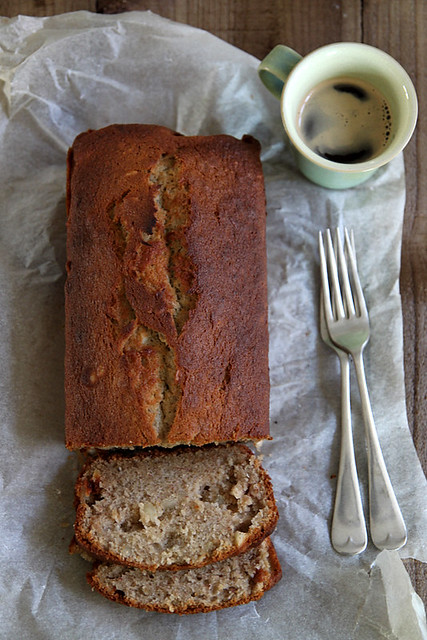
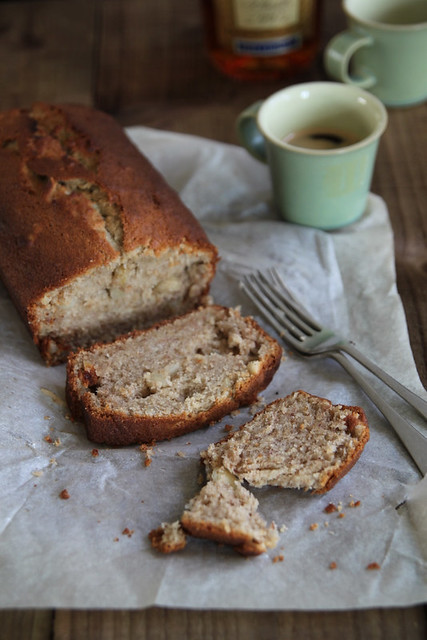
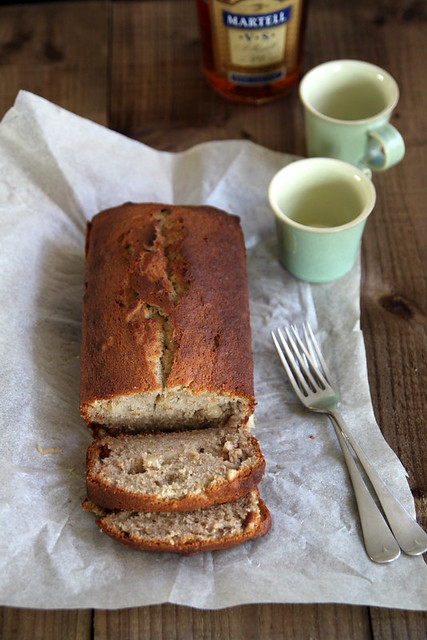
Banana and macadamia loaf

0 nhận xét

IMG_2560
It's been a while isn't it? It's been pretty chaotic around here with guests one after the other. On the other hand, I thoroughly enjoyed my 3 weeks with the sister-in-law. I cant begin to say how much fun it was shopping, gossipping, bitching, partying, lunching and sightseeing. Ro was going mad with two girls sitting and bickering about anything and everything that at the end of 3 weeks he even knew a tad too much about the reality show on telly 'real housewives of OC and NYC.' :)

I have exactly one week of rest before my in-laws get here for another 3 weeks of non stop sightseeing. I am slightly sick of London in general and cant handle any more touristy things, lucky for me Ro is on leave for 2 weeks and he can do the needful, I hope. To add to it, the Olympics has created major chaos for us, especially because we are in the midst of it all- 2 venues within 10 minutes of where I live...sigh!

I haven't cooked anything major in the past 1 month and I don't intend to do so in the coming weeks as well. Having gained a couple of extra kg's (thanks to all the binge eating) I am on a crash diet and has to reduce all that extra weight asap. Summer clothes look hideous on me and sadly all that extra fat cannot be hidden under jackets, thanks to the amazing weather we've been having.
IMG_2578
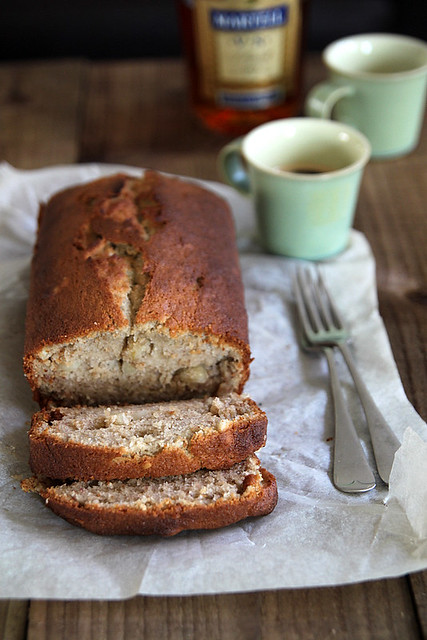
I don't think I will be able to visit all your gorgeous blogs in the coming weeks, but I am trying to update mine with a couple of scheduled posts and reviews which should take care of matters for at least 3 weeks. In the mean time, here is a banana loaf from my drafts, which I made a month back and was a hit breakfast item.

I must admit, although I'm a big big fan of bananas, I have not liked any banana based bakes I've made at home. Muffins, breads, cakes, nothing hit the spot for me, maybe because the bananas we get here are quite tasteless, not sweet at all and once they are out of the oven, the weird worm-like strings is somehow a total put off. So I resort to buying amazing organic banana loaves from the grocery store and its perhaps one of the moistest and best banana breads I've had.

This time however, in spite of the bananas not being over ripe, I decided to purée it instead of mash it and voila, I got the desired taste and consistency- incredibly moist with no weird black strings and the nuts added that extra crunch. If you are not a fan of nuts, you can very well omit it.

Recipe adapted from here
IMG_2574
Plain flour- 200 gms
Baking powder- 2 tsp
Salt- 1/2 tsp
Nutmeg- a generous pinch
Butter- 140 gms, unsalted and melted
Granulated sugar- 200 gms
Eggs- 2 large
Vanilla extract- 1 tsp (optional)
Bananas- 3, peeled
Milk- 125ml
Macadamia nuts- 70 gms, roughly chopped
IMG_2581 
Slice the bananas roughly and purée till you can no longer see any chunks. You should get a mix that is not too watery. Use milk, a tsp at a time, if you need to. I didn't need to use any.
In a large bowl whisk together the first four ingredients. Keep aside.
In another mixing bowl whisk together melted butter and sugar till well combined.
Add the eggs, one at a time, beating well after each addition.
Pour in vanilla extract and mix it all together.
Add the puréed banana and whisk continuously till they are well incorporated into the mix.
Tip in the nuts and milk and fold gently, but till everything's mixed well.
Finally, add the dry ingredients into the wet ingredients bit by bit, whisking after each addition.
Pour into a loaf pan which is buttered and lined with baking paper and bake in an oven pre-heated at 160C for about 50 minutes to an hour or when a wooden skewer inserted in the centre comes out clean.
Take the tin out of the oven and cool for about 10 minutes after which you tip the cake onto a cooling rack and cool completely.
You can then dust with some icing sugar, if required, or serve warm with a dollop of buttah. Its sinful!
IMG_2568 
Notes: The original recipe called for self raising flour. If so just replace the flour with that.
There was also 1/2 cup of rum added to the wet ingredients. We are both not rum drinkers and so didn't have any at hand. However, brandy was an after thought and it was too late by then. If using rum, omit the milk and add that instead. I would do a glaze with it next time though :)
Use any kind of nuts- walnuts, cashew, hazel.
If you are not grossed out by the brown string like thingies from the banana, then fell free to just mash it up using a fork, instead of puréeing it. Puréeing however, made the cake super duper moist.

 
  • The Best Blog Recipes © 2012 | Designed by Rumah Dijual, in collaboration with Web Hosting , Blogger Templates and WP Themes