


Its been a while since I posted a cookie recipe on the blog. Well, that's because I rarely make cookies and other than biting into them fresh out of the oven, I kinda don't like them that much. Of course its a different story for Ro, who claims he buys Oreo cookies just because I don't make any at home.
So last week I was heading over to G's place for a fun afternoon dress-up session (more about that later) and I had to take something for her lil boy who is so so adorable. I was on a tight schedule and had to figure something that could be easily made, with available ingredients and of course tastes good. I scouted around my bookmarked recipes and found this recipe, and I strangely had a couple of limes lying around in the fridge.
 I've developed this new found love for lime (well, I always liked it in a margarita), mostly after tasting the awesome lime filling my boss makes for the macarons. It's perhaps one of my fav fillings, closely followed by passion fruit. I was a bit sceptical about whether kids would like lime and coconut as a flavour, as its somehow very adult-y, but then I had to give it a shot to see if it was worth it. I for one, loved it. G told me she and her nanny loved it, but I didn't get around to asking if lil S liked it. I served the leftover few to my niece and nephew the next day and they loved it, so I'm thinking even kids may actually have a thing for that flavour.
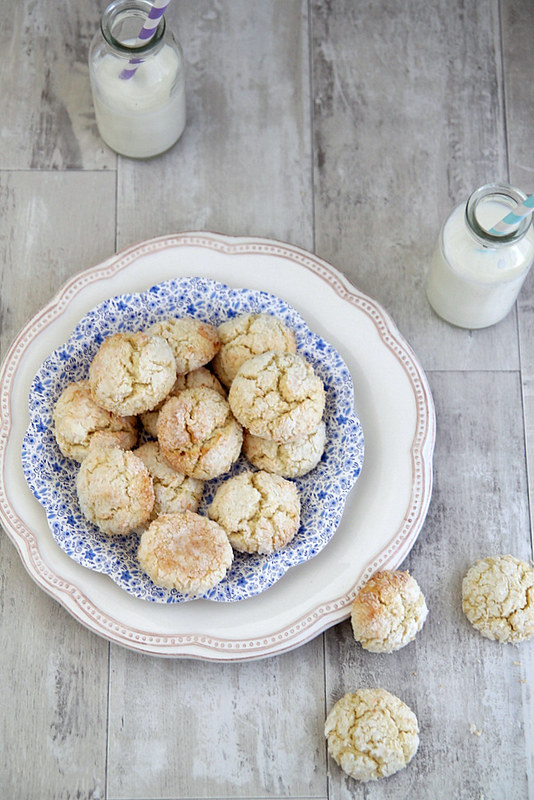
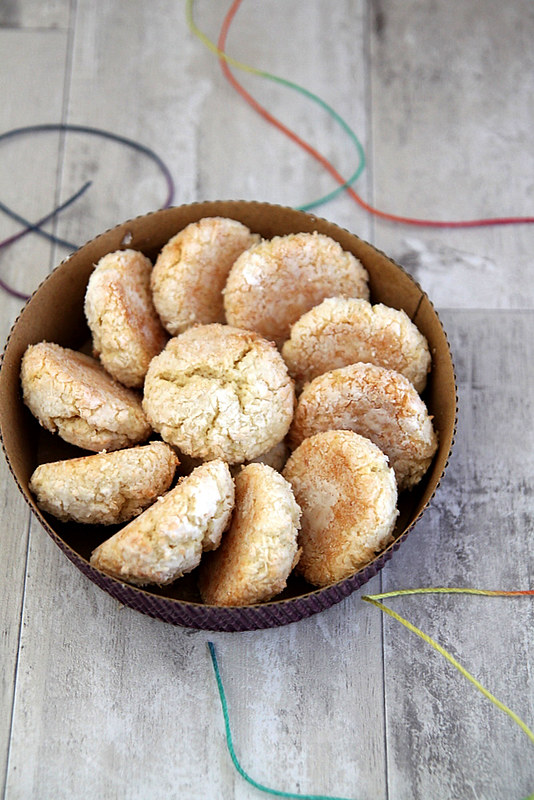
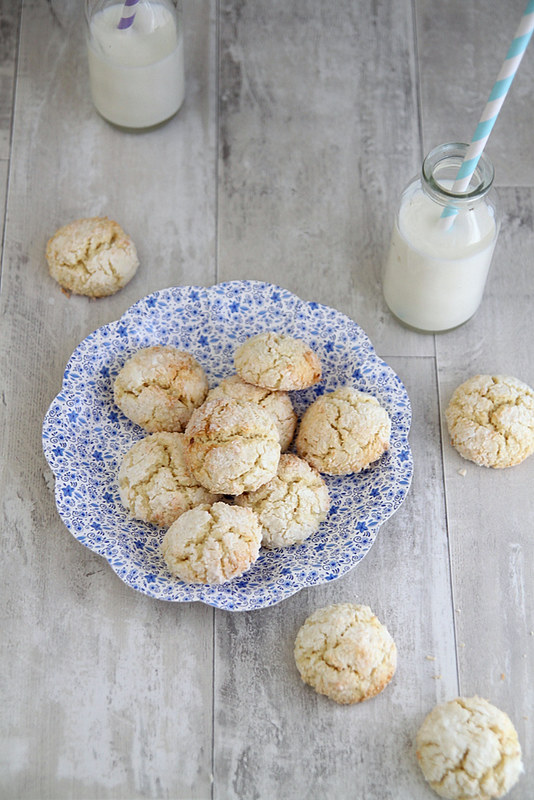
To be honest its very lime-y and coconutty. If you don't like these two flavours that much, then don't even bother scrolling down. If you like the lime flavour, but the coconut not so much, then do as the original recipe calls for where you roll the dough in granulated sugar and not coconut. The 15gms of coconut in the cookie doesn't really bring out too much of its flavour. I wanted it to be coconutty and hence rolled it it coconut.
Recipe adapted from here (makes around 36 to 38 cookies)
So last week I was heading over to G's place for a fun afternoon dress-up session (more about that later) and I had to take something for her lil boy who is so so adorable. I was on a tight schedule and had to figure something that could be easily made, with available ingredients and of course tastes good. I scouted around my bookmarked recipes and found this recipe, and I strangely had a couple of limes lying around in the fridge.
To be honest its very lime-y and coconutty. If you don't like these two flavours that much, then don't even bother scrolling down. If you like the lime flavour, but the coconut not so much, then do as the original recipe calls for where you roll the dough in granulated sugar and not coconut. The 15gms of coconut in the cookie doesn't really bring out too much of its flavour. I wanted it to be coconutty and hence rolled it it coconut.
Recipe adapted from here (makes around 36 to 38 cookies)
Unsalted butter- 80 gms, at room temperature
Caster sugar- 100 gms
Egg- 1, small
Lime zest- from 1 lime
Lime juice- 2 tbsp
Dessicated coconut- 15 gms + enough to roll the cookies
Plain flour- 220 gms
Baking powder- 2 tsp
Icing sugar- to roll the cookies (around 2 tbsp)
Cream together the butter and sugar in a large mixing bowl, till light and fluffy. I used a silicone spatula for this as my butter was of a nice easy-to-handle consistency. Use the paddle attachment of your stand mixer to make the creaming easier.
Into the mix add the egg, lime zest and juice and dessicated coconut.
Mix till you get a smooth mix. I switched to a wooden spoon to make this job easier. You can use the same spatula, or even a whisk if that's easier for you.
Sieve together the plain flour and baking powder and add it to the butter mix, bit by bit, mixing after each addition. Use a fork to do the mixing.
One the mixture has come together, cover with a cling film and refrigerate for about 1/2 an hour.
Into a large plate add the icing sugar on one side and the dessicated coconut on the other.
Keep a cup with water ready by the side because you'd need to keep wetting your hands to roll the dough.
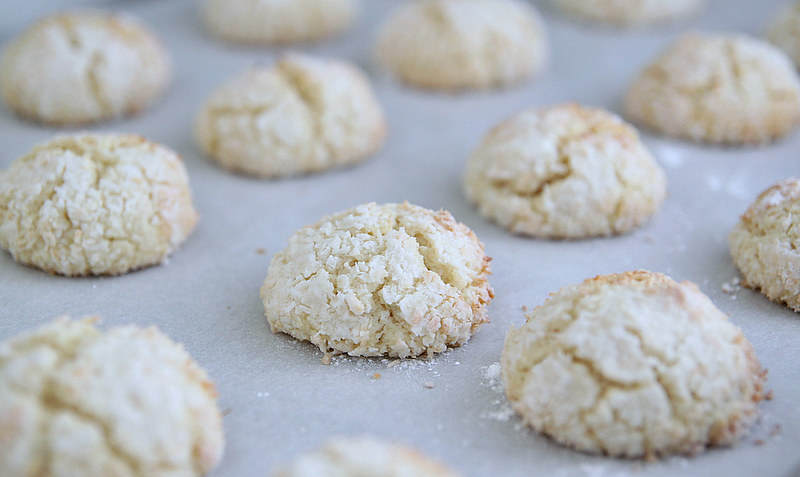
Make small balls with the dough, first roll it in the dessicated coconut, followed by a generous roll in the icing sugar and place on the baking tray about an inch apart.
Continue till you finish the entire dough.
Bake for about 10 minutes and 12 if its a bit on the bigger side but not longer.
Cool on wire racks and enjoy them immediately or store in air tight containers and use up in 2 to 3 days (if you can stay away from it that long) :)
Notes: The mix curdled quite a bit when i started mixing and of course I panicked but once you add the flour, it becomes alright
The original recipe used granulated sugar for the first coat, but i thought coconut was a better option. Feel free to replace it with granulated sugar.
The cookies are really lime-y, so reduce it to 1 tbsp if you don't want it too strong.


