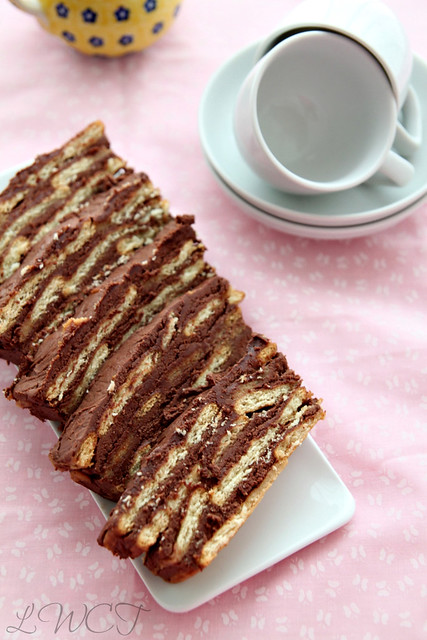
No bake biscuit pudding (biscuit cake)

0 nhận xét

IMG_5434-1
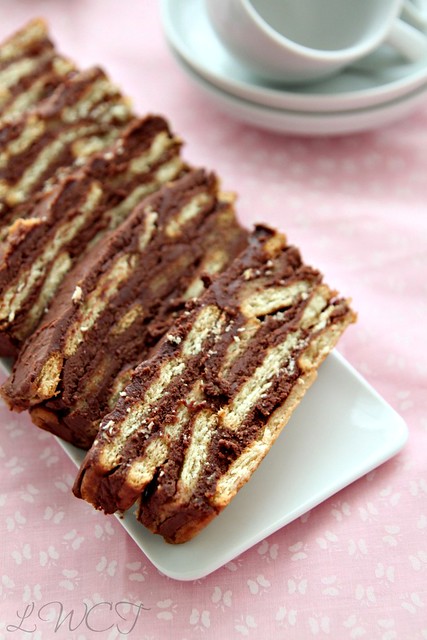
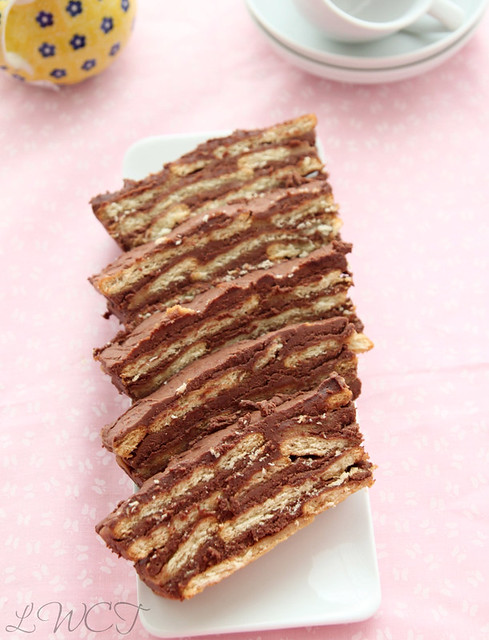
This is my mums signature dish. She makes it at every party and get together and is so popular among everyone. Back in those school/college- going days (I know I sound like a grand mother) whenever there is a party and my mums making a list of things to make, my brother and I would beg her to NOT make this damn biscuit pudding. It used to be so funny...even some of my uncles and relatives used to joke saying, we are not coming to your house if you are serving that biscuit pudding as dessert. Ironic, because, today I'm missing home terribly and thought what better to post than my mums infamous biscuit pudding on this Diwali day, and remember all things comforting and secure...home.

She used to claim its so damn easy to put together and was any day better than a store bought tub of ice cream (which we wouldn't agree of course) and also since it could be cut into slices, it made for a perfect fuss free, plate-free dessert, hence less washing up and easy solution. You might by now understand where I get my lazy genes from..yes mum, thank you very much. But in all honesty, I would completely understand her reasoning. Parties used to go till late in the night and no one wants to sit and wash dishes and clear up stuff till the wee hours of the morning. No dish washer and no live-in house maid to make this job easier. So anything to ease this process was welcome. 
IMG_5440
I called her up the other day to get the recipe and my exact line was 'Mummy I want the recipe for that horrible biscuit pudding you make.' To which she replied, I knew you would one day ask me for the recipe and I shall not give you. I said don't push it since I already had a tonne of biscuit pudding recipes from google searches and if by chance one of those turned out awesome, it would replace her boring recipe. After pulling each others legs for a while, she slyly told me shed just made the recipe that very day cos they had guests over for lunch the next day and so I got the recipe off hand.

So this Diwali, when everyone's making jamuns and Mysore pak and other yummy desserts, go against tradition and made this biscuit pudding instead. Its hassle free and tastes absolutely delish. I have tried another version of the same from Shabs Cuisine and it was great, even though a bit time consuming, and is much more richer and fancier than this version. Take your pick. Either ways, you will love it.

I would also like to dedicate this post to a blog reader of mine U, who sends me the sweetest emails and keeps in touch with me constantly. I thoroughly look forward to her inputs on the recipes I have posted and she once requested for a biscuit pudding recipe. Although I'm terribly late in posting it, I hope she enjoys it and is the recipe she was looking for. 
IMG_5424 
Tea biscuits/ Marie biscuits- 1/2 a pack (as needed)
Coffee/ Espresso powder- 1 1/2 tsp
Water- 1 cup
Butter- 100 gms, at room temperature
Icing sugar- 1 cup
Cocoa powder- 4 tbsp
Milk- approx. 2 tbsp
Vanilla extract- 1/2 tsp

Make a cup of coffee by diluting the coffee/ espresso powder in 1 cup boiling water. Keep aside to cool.
In a large bowl beat together the butter and sugar till light and fluffy. You can do this using a spatula or your hand held beater/ free standing mixer. Its not too difficult if your butter is soft enough.
Sift the cocoa powder into the mix and continue beating till they are all mixed well.
Add the vanilla extract followed by milk and continue beating till everything comes together. Add the milk bit by bit and see if it reaches the required consistency. It shouldn't be too stiff, but easily spreadable consistency, and not too watery. I used around 1 1/2 tbsp.
Dip the biscuits in the coffee and place a layer at the bottom of the pan (refer notes). Its ok if some of them overlap.
Drop a couple of spoons of the chocolate-butter cream mix on top of the biscuits and using a palette knife/ spatula spread it out as evenly as possible and pushing the cream into all the corners and spaces. Again, it need not be smooth and stuff.
Continue with another layer of biscuits followed by cream till all of it is over and the cream is the top most layer. I got 4 layers of each.
Fold over the cling wrap, give a gentle press and refrigerate for at least 4 hours..
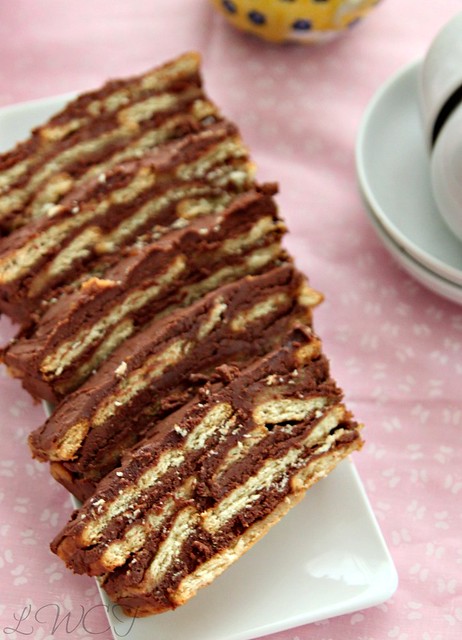
When ready to serve, lift the pudding out of the pan, unfold it, turn it onto a plate and decorate (if needed) or immediately slice and place in a serving plate.
IMG_5414 
Notes: There are 2 ways to assemble the pudding..
  • Line a 9 inch loaf pan with cling film, so that the ends fall over the sides and there is enough cling film to fold over the top. This method will let you lift the entire thing off the pan and slice into desired sizes. Less messier, easier and looks pretty.
  • Just layer the entire thing in a square glass/ brownie dish and slice them as required. May be a bit tricky to get the pieces out, but my mum follows this method. She says it works.
The chocolate melts really fast when kept outside for too long, so hand around paper napkins along with the slices. You don't want chocolate stains on your new Fab India cushion cover do you?? :)
You can decorate the top with chopped nuts, chocolate swirls etc. I didn't do it because Ro will dig into it in a matter of seconds and its not worth all that decoration ;)
My mum uses up an entire pack of biscuits, but that could be because she uses a square Pyrex dish for the same. If using up all the biscuits, you may need a wee bit more coffee.

Sponsored video: The Truffle Kerfuffle

0 nhận xét

There are days when I just dont even want to think about cooking, leave alone actually do it and on those rare occasions, I actually do wish I had some other option other than the ready microwave meals or take away. Scouting around on the internet looking for easy recipes when you are short of time, or even worse..hungry, is not a great idea. First of all, the numerous food pics make you hungry and second, you have waaay too many ideas put in front of you, you end up being more confused and frustrated.

But not to worry people...Scratch Meals comes to your rescue with their wonderful, fresh meals which can all be cooked in the time it takes to heat a ready meal. And what's even better, they are all collaborated by Michel Roux Snr, arguably the finest chef in the world. So you head over to Sainburys on your way back from work, take your pick from Chicken Tikka Masala, Chorizo Paella (I feel stupid thinking I have slaved over this for hours in the past), Chicken Thai Green Curry, Noodle Laksa and Tagliatelle Pistachio Pesto, get home, follow instructions, and in under 8 minutes you have your meal ready.

But there seems to a be slight problem now. Michel Roux has lost a very expensive (30K! gasp!) truffle and a reward is being given to anyone who finds it. It is known to have fallen into Scratch Meal packs and anyone who finds it could win £1 off their next meal and also stand a chance at winning the £10,000 reward for its safe return. For more information on the hunt and clues regarding the missing truffle follow Scratch on Facebook and Twitter.

A heated discussion with Michel's sous chef Richard over a video call has been recorded the day after the truffle went missing. Check it out if you want to get some clues regarding the same.
PS: Apparently pigs are better at finding truffles than dogs. Just a hint ;)

The post has been sponsored by Scratch Meals

Blueberry breakfast muffins

0 nhận xét

IMG_3856
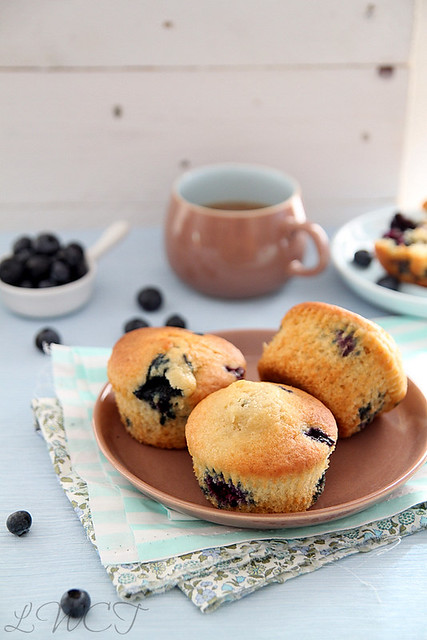
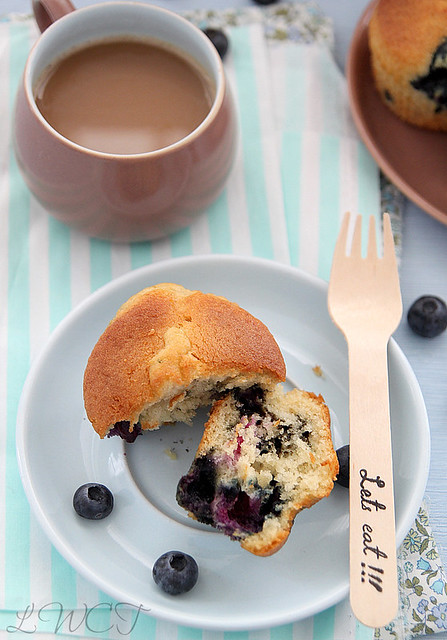
The husband started complaining about how boring his morning breakfast of toast, butter and cold meats were getting too monotonous and I thought I'll whip up some blueberry muffins for him. The muffins came out ok but our gluttonous minds set to work the moment they came out of the oven and so we were left with around 3 by the next morning. Since its just me and Ro doing all the eating, I usually make small quantities of all the cakes and bakes and cookies and such. This was no exception and yes, out of 8 large muffins, we ate around 5 within a time span of about 3 hours and then resisted the urge to have them as dessert after dinner.

So the muffins lasted for exactly one morning and it hasn't made its way through ever since. But please don't judge them by what I just said. It's got nothing to do with taste, just that blueberries went out of season right after this and the husband went back to having toast and cold meats because the muffins still left him hungry!!!!

I have tried making muffins numerous times before and except for the time I tried them with whole wheat, the rest have all been disastrous. I keep wanting them to taste (and look) like the Starbucks ones, but they don't come anywhere close. These, however, were moist, easy to put together and good to look at, and I was sold. If I ever make blueberry muffins again, I shall be sticking to this recipe. Well unless Starbucks actually gives me the recipe for their mother of a muffin :)

Recipe adapted from here (makes 8 of them)
IMG_3881-1 
Egg- 1 large
Sugar- 1/2 cup
Vegetable oil- 1/4 cup
Vanilla extract- 1/4 tsp
Plain flour- 1 cup
Salt- 1/4 tsp
Baking soda- 1/4 tsp
Plain yogurt- 1/2 cup
Blueberries- 1/2 cup (heaped)
IMG_3863-1 
Mix together flour, salt and baking soda in a small bowl. Keep aside
In a large mixing bowl, using a wire whisk or a wooden spoon, beat the egg till light and fluffy.
Gradually add in the sugar, while continuously whisking, followed by oil.
Stir in the vanilla extract.
Tip in the dry ingredients alternating the yogurt and mix it all in, without any traces of flour being obvious.
Slowly fold in the blueberries and using a large ice-cream scoop add the batter to a muffin pan, lined with muffin cases/ cups.
Bake in an oven preheated at 200C for about 20 to 22 minutes or till a skewer comes out clean (if you by chance pierce a blueberry, it wont come out clean, so don't take that into consideration)
Transfer the tray on to a wire rack and after about 5 minutes, remove the muffin cups and leave to cool completely.
Stays fine at room temperature for 2 days.

Notes: Original recipe calls for sour cream, but I had only yogurt at hand and used it instead. came out super moist whatsoever.

Prawn thokku/ roast- A guest post for The Captain's Kitchenette; and the Andy Bates American Street Feasts Show

0 nhận xét

IMG_4808
There are so many wonderful food blogs out there, that I find it difficult to browse through all the yummy recipes they post. I still manage to run through a few once in a while, and eventually end up with tonnes of recipes bookmarked. Serah's beautiful blog, The Captains Kitchenette, certainly falls into this category and its her simple, easy-to-follow recipes that makes me a fan. I landed up on her blog after her sister (we were hostel mates in Chennai) posted a link to a recipe on FB. I was immediately hooked. We then exchanged a couple of emails, became friends on FB and the rest is history. She's now more of a friend than a random food blogger and I hope some day I get to meet her and her lovely family she cooks for. I also have to appreciate her for taking time to cook, photograph and blog in spite of having a toddler to tend to. Like I was telling her the other day, I complain if I have to continuously cook for a week ;)

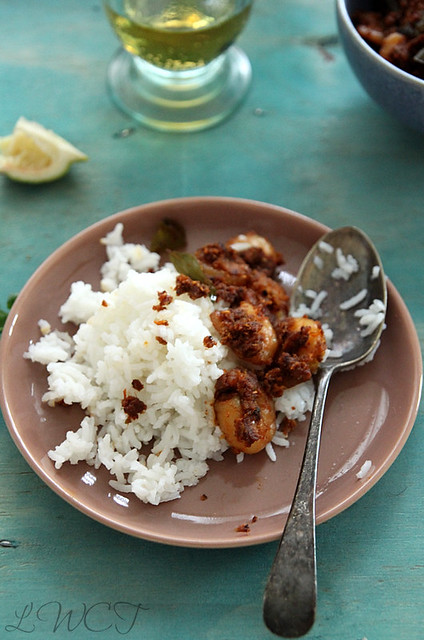
Since Serah was taking some time off to tend to other commitments, she asked me if I could do a guest post for her blog and I truly obliged. She gave me full leverage on what I could whip up and since she said she preferred sea food, I thought I'd make this prawn thokku for her. I came across the recipe on one of my recipe search sessions on the internet and immediately wrote it down (yes believe it or not, I actually wrote it down). Completely forgot to bookmark the page and so apologies to the person who originally posted it. I did try searching for it again, but since this was written down ages back, I really had no luck.
IMG_4861
Thokku, loosely translated means paste, and I presume this is more a TN preparation as opposed to the mallu (Kerala) way of making prawn roast. The use of fennel seeds make this dish quite unique, and of course something with grated coconut can never go wrong. This is a favourite prawn recipe of ours and has made its appearance on quite a few occasions. Although it goes well with some warm rice, dal and pappad, my favourite way to have it is as a starter with some chilled beer. just thread it onto small skewers, sprinkle the masala on top, and serve. It's a crowd pleaser, trust me!

So without wasting more time, head on over to Serah's kitchenette for the recipe and while you are there dont forget to take a peek around and drool. I have bookmarked a whole lot of recipes from her blog and seriously, dont forget to check out the authentic Coorgi recipes she's put up. Absolutely droolworthy!
Thanks a bunch for having me over Serah :)
IMG_4839

On another note, here's something street food lovers might be interested in. Food Network is hosting a brand new series documenting the vibrant street food scene in the US called American Street Feasts and is hosted by the charming Andy Bates (yes, the blue-eyed Pie-Man with a delicious Brit accent). I have caught bits and pieces of his show here and is quite an eye-opener, especially because street food is seriously catching on and we have just started exploring some of the places.

The show basically follows Andy on a street food odyssey across the US, visiting the most vibrant food destinations and discovering the stories behind the recipes. He uses them as inspiration to create his own recipes, some of them being the Braised pork belly and Waldorf salad in a pretzel wrap and the Crawfish ball and Jambalaya. The show is aired every weekday at 12.30pm and 6.30 pm on Food Network and if you haven't been able to catch the previous episodes, visit Andy's collection page and give it a go. You can also use the interactive 'Street Food Map' to find out where to get the best street food in UK and while you are at it, go on and submit your suggestions on what to feature and so on. For the fans out there, Andy Bates' new cookbook is out in the market, so go on and grab you copy from any of the leading book stores or Amazon.

With thanks to Food Network for a copy of the cookbook

Afternoon tea with Champagne at the Corus Hyde Park

0 nhận xét

IMG_4880
Some time around last week we turned 7 (OK fine, I don't know the exact date, but that's besides the point really). Yes! 7 years since we met each other in a small cafe in Chennai. Me, never wanting to get married, He, enthusiastic about getting married. Poles apart on a lot of things, but on the same page for a few other. Yet! we somehow have managed to make it this far. Its been a rough 7 years with me Ro would say, but I would shrug and say that's marriage. I think Ro's good husband material :)

After so long, we don't even bother wishing each other remembering 'petty' occasions like this. Although, the die hard romantic in me, sometimes do wish it wasn't so. I had been wanting to do an Afternoon Tea session for a long time and when an opportunity came up, I grabbed it thinking we will have a nice afternoon out together. But Ro of course had better things to do than spend an afternoon having 'tea' with me, and so had to change plans. Determined to not dampen my spirits, I grabbed a good ol' girlfriend of mine and headed out into Central London for a fun afternoon out. And boy, am I glad I did, because believe it or not, a day out with a girl friend can sometimes prove to be so much more therapeutic than a romantic afternoon out with the husband :)
IMG_4878
Afternoon Tea is such a big deal here its not funny. Some hotels like The Ritz and Inter Continental are soooo known for their Afternoon Tea deals, you have to book a table waaay in advance. Although that was the kind of afternoon tea I had in mind, this deal was good enough for me, and its Groupon that I have to thank for this fabulous offer. From hair cuts to restaurant deals to cooking classes to mini breaks I have done it all. In the initial days after signing up, it used to be a struggle to not pick up the amazing voucher deals.  Now I have a grip on myself and although I scout the website frequently, its only when I absolutely need something do I pick it up. The Afternoon Tea with Champagne for two was too good a deal to pass and I am glad I picked it, because it was so worth it.
IMG_4869 
Corus Hyde Park is located bang opposite the park (as the name suggests) and is a 3 min walk from Lancaster Gate tube station. We headed straight to Olio's Brasserie, just off the reception area, and waited a good 5 minutes for someone to come greet us (not a good start, if you ask me). So I asked at the reception and was politely told someone would be with me soon. No luck again but then I spotted a stewardess at the counter and she guided us to our table. When we were kept waiting, I thought we would be placed somewhere near the stairs or something, but was pleasantly surprised to be seated right next to the huge windows, with good views of the autumn colours of Hyde park (not to mention enough lighting for my pictures, although it was such a gloomy and rainy afternoon, they haven't turned out that great).
photography post1
We were dutifully given our menu's and asked to pick the tea of choice. There were quite a few interesting options- from the traditional blends like Winchester Breakfast, Darjeeling and Earl Grey to the more contemporary ones like Rooibos orange and eucalyptus, Milk oolong and if that's not fancy enough for you, then try the Lavender hibiscus, a Blooming Tea, which literally does the same in your tea cup. We were not too adventurous with this and so settled for the Winchester breakfast and Classic Chai. Both were brought to the table promptly and we enjoyed the steaming cups of tea while it was pouring cats and gods outside. Oh and we also had to figure out how to handle the two flutes of Baron de Marc Gobillard, Brut Champagne in between sips of tea. Needless to say, the Champagne was happily welcomed, and the tea left to go cold in the tea pots.
IMG_4883IMG_4871 
Then came the exciting bit, the array of tarts, cakes, scones and sandwiches. Arranged in traditional 3-tiered plates, they were a pretty sight. Taste-wise, however, we were a tad bit disappointed. The cupcakes were too dry and the brownie (I think it was a brownie) was anything but moist. The carrot cake was good, but it was not with cream cheese, but more like butter cream. The tartlets were teeny tiny pastry cups filled with something like butter cream with a blackberry perched on one and a raspberry on another. I don't think they can technically be called fruit tarts, but they were pretty cute and we liked it. That said, the scones were to die for and we smothered ours with clotted cream and jam and had a blast getting some extra calories into our bodies. The sandwiches were also pretty good, with the cucumber and cream cheese being my favourite and the ham and cheese a close second. The macarons also did their job of being all good looking with the perfect feet and stuff and the flavours- orange and coffee- were not disappointing either. 
27
Our tea session stretched on for about 2 hours, because you just cannot stuff everything into your mouth at one go (and also because we weren't shooed out of the restaurant) and its something you really need to enjoy at a slow pace. So the next time you are in London, or anywhere in UK, make sure you treat yourself to a good English Afternoon Tea session. Also, don't forget to check out Groupon for some good deals in your area and trust me, its a decision you wont regret.

Thanks to Groupon for a gift voucher with which I picked up this deal.

The Saucy Fish Co. review and an Avocado salad to go with it

0 nhận xét

IMG_4519-1
I have for you today two items that I was never fond of. After a looong gap, I gave them one more opportunity to please me, and what do you know, seems like I quite enjoy them. Shocked at this, and pleasantly surprised at how much my tastes have changed, I am embracing this new found love for Avocado's and Salmon...yes, two completely different food genres...with all my heart.

Fish has never been my favourite, and I can very strongly say, it never will be too. But of late, I have started experimenting with it at home (much to Ro's delight) and I can proudly say I eat a few varieties of it, if made the way I like with absolutely no taste of fish coming through (much to Ro's despair). So when I was asked to review a Saucy Fish Co product, I was a bit apprehensive as to how it would be, considering that they all came with their respective sauces and I didn't need to do any jazzing up of my own.
IMG_4391 
I checked out their website and was amazed at the huge variety of options available- 22 to be precise, yes 22 different types of fish products ranging from fresh fish and sauce pairings to foil bake bag fish dishes to fish cakes and standalone sauces. The fish cakes looked soooo delish on their website, I had to pick it up, and so were the sauces, perfect for some home made fish pie. So off I went to the local store only to be disappointed. The shelves were empty. This happened to me twice, which obviously means there is high demand for the product in the market (or the store does a rubbish job of stocking enough of it). I somehow HAD to get my hands on it desperately, now that my patience was running.
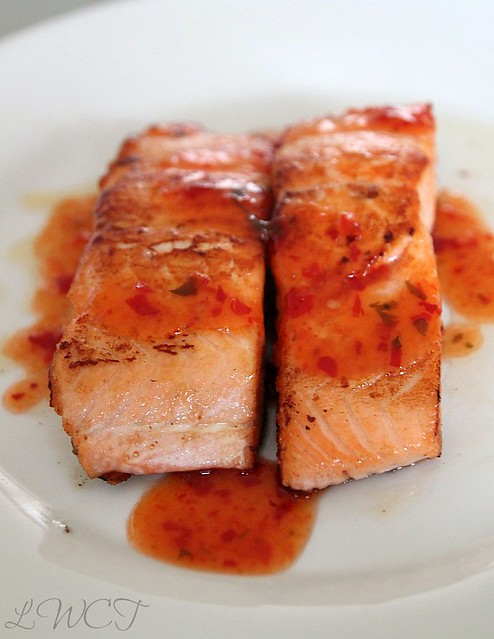
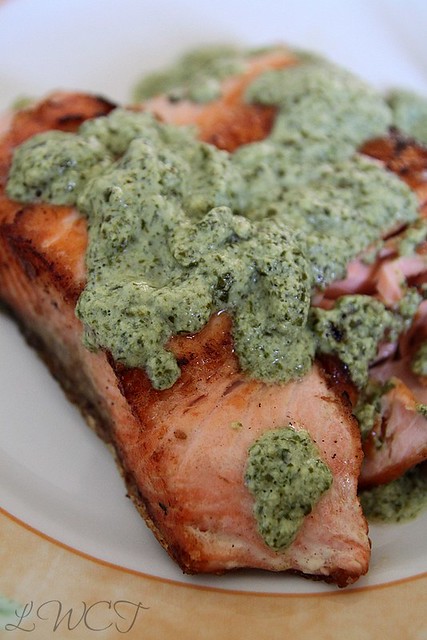
Third time, I was lucky, but not lucky enough to get the products I wanted and so had to make do with what was available. I picked up a pack of the salmon fillet with watercress and crème fraiche dressing and the salmon fillet with a chilli, lime and ginger sauce. The salmon fillets we Ro dutifully pan fried to perfection and I must say, it truly was a sight to see the colour changing and the skin getting all crispy. Even I got excited seeing it, and Ro was literally drooling. The sauce came in small sachets and just needed to be immersed in a mug of hot water for a while and was ready to be poured on top or had on the side, whichever way you prefer.
IMG_4576 
Taste-wise, both of us preferred the one with the chilli, lime and ginger sauce, which we were a bit apprehensive about in the beginning, but was pleasantly surprised at how the slightly sweet-tasting sauce paired perfectly well with the salmon. The water cress and crème fraiche dressing, after we jazzed up with some salt, was pretty good, but the first one was definitely our fav. I actually had quite a bit of it, much to my Ro's surprise. I do hope I get to try some more of their products (hopefully they would do a better job with stock) and considering how easy it is to whip up a tasty meal in minutes, I would definitely consider buying Saucy products again.

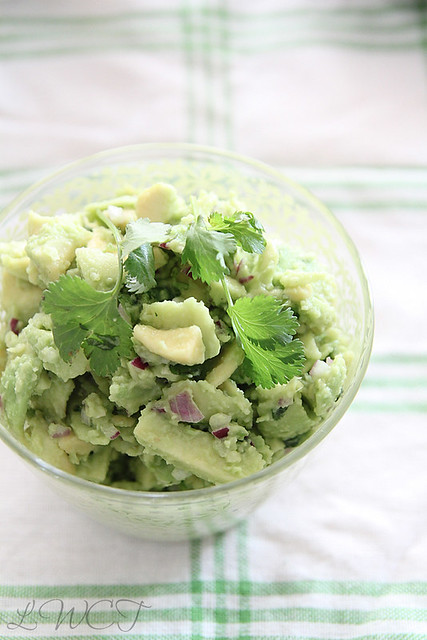
The salmon and sauce makes for a full meal if you have a salad or some roast potatoes or so on the side. We had it with this simple avocado salad, which again was a true eye opener. Thanks to my sis-in-law for passing on this easy peacy recipe, we now like avocado. Even my fussy brother who hates anything green, loved this. So you have to trust me on how good it tasted. I

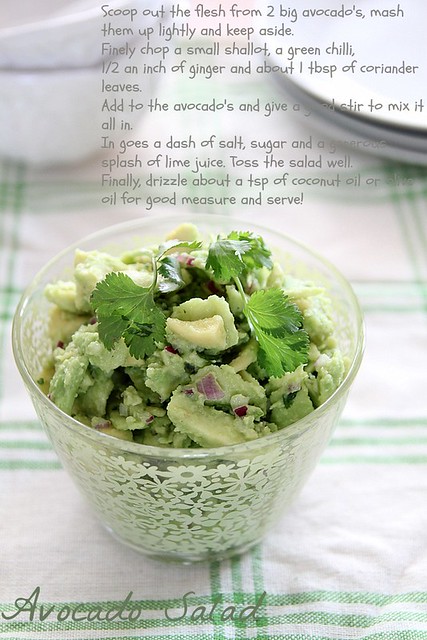
Avocado salad
IMG_4545
Avocados- 2 large, flesh cooped out
Small onions- 2 to 3, finely chopped
Green chilli- 1, finely chopped
Ginger- 1/2 inch, peeled and finely chopped
Coriander leaves- 1 tbsp, finely chopped
Sugar- 1/4 to 1/2 tsp
Salt- to taste
Lime juice- a generous dash/ squeeze
Coconut oil- 1 tsp
IMG_4548 
Place the avocado flesh in a large bowl and break it up. Mash it with a fork, but not to mashed potato consistency. There should still be small chunks left.
Tip in the onions, chilli, ginger and coriander leaves into the bowl and mix well with the avocados.
Add the salt, sugar and lime juice and give it a toss. Do a taste check to see if its all good.
Finally, drizzle the coconut oil over the salad, give a final mix and serve with a garnish of some coriander leaves.
You can add any oil of choice, but coconut oil gives it that distinct taste. Ro said he would prefer olive oil, but I loved it this way. 

With thanks to The Saucy Fish Co. for the vouchers to pick up the product from the store.

Banana-passion fruit meringue tarts

0 nhận xét

IMG_4777
'Hi, my name is Nisha and I'm a passion fruit addict' would be my opening line at an AA equivalent meeting, but for food addicts.
If I'm not mistaken, I went through a bout of passion fruit love sometime last year as well. Yes, just after summer is over and the fruit is fading from the market, but is ridiculously expensive. I thought I was over that whole passion fruit obsession, and that's when a couple of us food bloggers (Suchi, Nupur, Sonal, Nayna and Jagruti) ended up going to the Cake & Bake Show last month and had a passion fruit and banana tart made (right in front of us) by none other than Edd Kimber, the Great British Bake Off winner, 2010. It was so good, I couldn't get it out of my mind. I HAD TO MAKE IT!

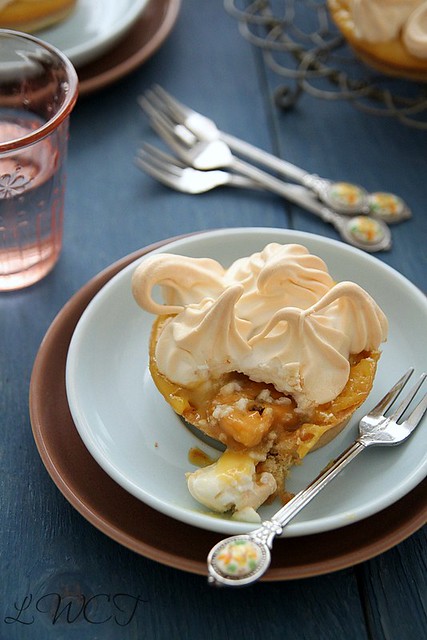
So I came back home, did a thorough check of where I could get passion fruit purée and was truly disappointed. None of the local stores sold it and my only option was to pick it up online...and I would have if it wasn't so bloody expensive and came in large quantities. So the ordeal was soon forgotten until I dropped into Ottolenghi one day and had the infamous passion fruit meringue tartlets. Ok new idea brewed and I HAD TO MAKE IT. So chucked the whole plan of purée, instead decided to improvise using passion fruit juice and some pulp. The outcome was brilliant and I finally made the tartlets. 
IMG_4760-1 
I always stayed away from lemon curd and lemon/ lime based desserts because I was not a fan of the tangy stuff (in desserts, I mean). With the fear of passion fruit curd being something like that, I was pleasantly surprised at how nice it tasted, albeit the slight tanginess which was clearly balanced by the sweetness of the curd. Its heavenly to dab it on a piece of warm toast or, if you cant wait, spoon it right out of the sauce pan and eat while still warm. Somehow, the banana and passion fruit come together, and is a match worth exploring again in the future. If there was one fault. id say it was a bit too much on the sweeter side when it all comes together. Reduce the sugar in the meringue and curd and you should be fine.

Basically I have Edd Kimber to thank for this brilliant idea. The recipe, he said, would be in his new book, but obviously I had other plans....Google. I made the curd a day ahead, since everything together might have been hectic. Also, the lighting was bad on that day and I didn't want to take a chance and make the tarts only to be disappointed by lighting. Not that lighting was any better the day I actually made the tarts, but I had no patience to wait further. The entire process may look torturous, but if you spread it across 2 days, its really no hassle. So here you go, the recipe for a delightful tea time tart.
IMG_4782 
Banana-passion fruit meringue tarts (makes 6 tartlets)
Short crust pastry- 1 sheet (recipe below)
passion fruit curd- a little over 1/2 cup (recipe below)
Caramelised bananas- 1/2 cup
Meringue- around 2 cups

Short crust pastry
Plain flour- 200 gms
Baking powder- 1/4 tsp
Salt- 1/4 tsp
Sugar- 1 tbsp (optional)
Cold butter- 100 gms, cut into cubes
Cold water- 3 to 4 tbsp/ as required
IMG_4722
Mix together the flour, baking powder salt and sugar in a large mixing bowl.
Add the cubes of butter and rub it into the flour, using your hands. It should resemble coarse bread crumbs.
Add the cold water bit by bit till it all comes together and you get a soft pliable dough.
Cling wrap it and chill in the refrigerator for an hour.
(I used ready made all-butter short crust pastry shells, but have tried making pastry with the above recipe and it works fine. Have also tried with ready rolled pastry and its even easier)
Meanwhile, butter your tart tins and pre heat oven to 180C.
When ready to use, roll out the dough on a slightly floured surface and cut into rounds to fit your tart tin. You can also butter a muffin tin and use that instead of the tart tin, in which case you would get around 10 to 12 mini tarts.
Blind bake the tart shells for about 20 minutes or till golden brown. I didn't have any baking beans so I placed pieces of baking paper on top of the shells and filled them with enough rice. I kinda messed up here because in spite of filling them to the brim, the tarts still rose a bit in the middle. So use beads if possible.
When done, place on rack to cool completely.

Passion fruit curd (recipe adapted from here)
IMG_46621 
Passion fruit- 3, scoop out the flesh but discard the seeds (or eat them)
Passion fruit juice- approx. 1/4 cup
(The passion fruit you have may not be fleshy, in which case mix together the flesh and juice to make 125ml of pulp or just use 125ml of passion fruit juice alone but reduce sugar)
Eggs- 2, well beaten
Caster sugar- 80gms
Butter- 60gms, unsalted

Mix together the pulp, juice, caster sugar and butter in a saucepan placed over medium heat.
Stir till the sugar melts and the mixture comes to a boil.
Remove from heat and keep aside for about 3 to 4 minutes.
Gently pour in the beaten eggs, whisking continuously, or you will end up with curdled eggs.
Place the sauce pan back on low heat and keep whisking till the mixture becomes thick and smooth.
Pour into sterilised jars/ air tight container and keep refrigerated. The curd becomes a bit more thicker once it cools.
PicMonkey Collage 
Caramelised bananas
Banana- 1 large ripe one, sliced into 1/4 inch thick rounds
Brown sugar- 1 tbsp
Butter- 1/2 tbsp + enough to grease the tins 

Melt the butter and sugar in a saucepan. It should be all dark and bubbly.
Throw in the sliced bananas and toss around to coat it well, taking care to not break them up.
Remove from heat and keep aside to cool slightly.

Meringue 
Egg whites- 125ml (or half cup)
Sugar- 150gms
vanilla extract- 1/2 tsp

Whisk the egg whites in a free standing mixer (with balloon whisk attachment), on medium speed, till it doubles in volume.
Add the extract.
Increase speed to high and slowly add the sugar.
Continue whisking till you get stiff, glossy peaks.
Be careful to not over whisk and make it too dry.
Fill a piping bag (with round tip nozzle preferably) with the meringue and keep ready.
The above mentioned measure make a large batch. I made meringue cookies with the remaining. Feel free to halve and also reduce sugar as per choice.
IMG_4766 
Assembling
Place the tart shells on a baking tray and layer the bottom with the caramelised bananas...say around 4 to 5 slices per tart (of course adjust it according to your tart shell size)
Pour around 2 to 3 tsp of passion fruit curd over the bananas, say till about 3/4th full of the shell.
Pipe the meringue on top of the curd in whichever design you like, but make sure the tips are not too pointed or else you might end up with burnt tips. (You can also just slather with a spoon and swirl designs)
Place in an oven pre heated at 180C and bake for about 8 to 10 minutes or till the meringues are cooked through and brown in colour.
If you have a blow torch then omit this step and just brown them.
Next time I would place it under the broiler. I was too much of a chicken to do so this time.
Keep the tarts to cool for a while and then dig in.
You can also refrigerate it till further use.

Sponsored video: Black & Decker steam mop

0 nhận xét

Black & Decker is a brand known to most of us. In fact my first kitchen gadget was a B&D chopper my mom handed down to me after we moved into our first home as a newly married couple. The fact that I never used it much (thanks to the awesomest cook we had who preferred to chop, slice, blend the traditional way) is not to be highlighted though.

The latest addition to their home products range is the Steam Mop, a swanky looking gadget that you would want the moment you lay your eyes on it. I am not a big fan of vacuuming the house but when it comes to mopping, I actually don't have a problem. I don't find it therapeutic, but it does give a sense of achievement to see those wooden floors of mine gleaming.

Its for people like me, that the steam mop comes as a saving grace. The mop boasts killing 99.9% of germs and bacteria and is natural in its cleaning process, which means it needs only tap water to do the job, not to mention the fact that it is both family and eco- friendly. All you need to do is fill up its tank with water, plug in and go. The super heated steam kills any germs or bacteria on your floor and also loosens dirt and grease in seconds. The mop is convenient to use, with the 'Auto Select' technology ensuring the right amount of steam released, of course depending on the floor type selected (hardwood, laminate, marble, tiles etc.). The 500ml easy-fill water tank provides 22 to 40 minutes of cleaning time and is perfect for all those of you who want sparkling clean floors without the hassle of a cloth mop and bucket of water.

Go on, put it on your wish list for Christmas. I know I want one for sure. If the husband is reading this...hint hint!

To get a better idea of how the Steam Mop works, check out this video.

Ribbon sandwiches

0 nhận xét

IMG_4327 
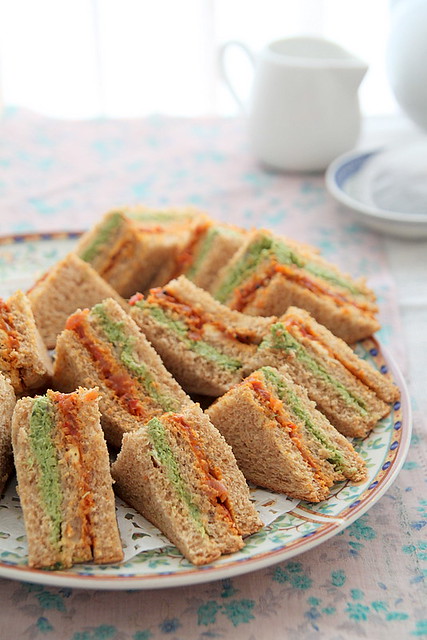
I know that picnics and days out in the open are long gone, but I couldn't resist posting these delicious ribbon sandwiches before it was ridiculously late. The temperatures have dropped significantly and its no fun waking up in the morning to a cold apartment. The moment you are out from under your duvet you shiver and wish to crawl back in. We have finally taken out our winter clothes much to my dismay and Ro is already psyching me out saying winter is gonna be horrible. After 3 years of running back to India for Christmas, this year we are staying put. But that's about 70 days away and I have enough time to whine about it ;)

Coming to the sandwiches. These, when my mum used to make way back when we were kids, were not received with much enthusiasm. In fact I hated the coconut chutney more than anything. Fast forward to some 20 years later and I think I love it. I called up mum a couple of weeks back to get the recipe and she laughed so much at the irony. Also because, Ro is not a big fan of coriander leaves or any leaf for that matter and while my mum kept mentioning coriander leaves I kept referring to it as that thing, because Ro was sitting right next to me listening in on the conversation. He finally found out that a major chunk of the sandwich was made using coriander chutney and begged and pleaded to not do so. If its one thing I've learnt after 6 years of being married, its to ignore the other half when you see signs of the drama queen surfacing. And that's exactly what I did.
IMG_3122 
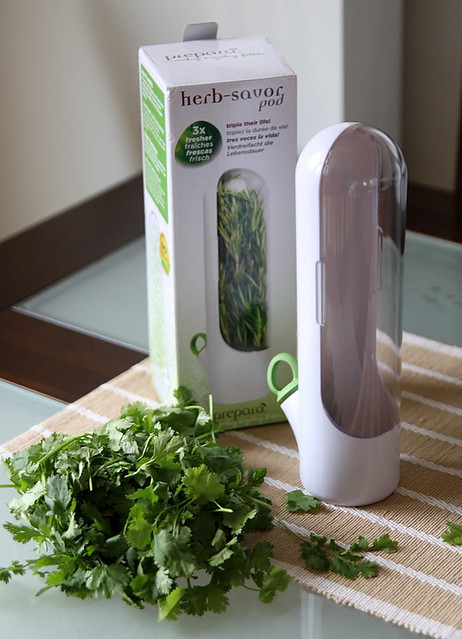
I also have to bring to your notice this uber cool gadget the lovely people over at The Handipcked Collection sent me. Its a Herb Saver Fridge Pod that keeps herb cuttings fresh and watered inside your fridge, thereby prolonging their live for a longer period. I can very happily say, 'it works.' The coriander leaves I used for this recipe were fresh even after about 2.5 weeks, except for a few leaves turning yellow here and there. I have had trouble trying to make them last in my fridge and they always end up rotting on me. If there was one downside to the product it would be that the plastic see through cover is a bit tough to handle. Its not something that just comes open with a quick pull and is a bit of a struggle. Other than that its quite a handy thing to have. It snugly fits on my fridge door and apparently can be used for vegetables like asparagus and stuff. Don't forget to check out The Handpicked collection for some great Gift ideas. I'm definitely a big fan.
IMG_4345
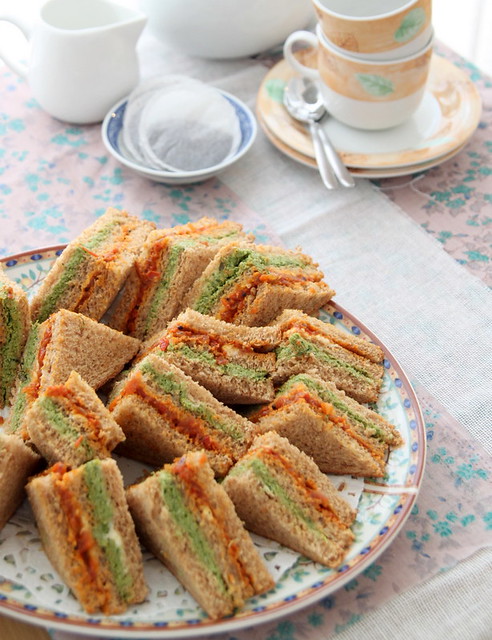
Anyhoo, once the sandwiches were done, Ro completely forgot about his coriander leaf aversion and all was good with the world. I made the two chtneys over 2 days and then on the 3rd assembled the sandwiches. If you do everything together at one go, I doubt you would ever want to make it again. So spread it out and its much easier. Will I make this again...hmm maybe when I'm in one of those proactive cooking moods. This sandwich is great for picnics and for an English Tea where finger sandwiches are a must. Its also very lah-di-dah :)

(Makes around 20 quarter sandwiches)
Bread- 15 slices (brown or white)
Coriander chutney- approx. 1 cup (recipe follows)
Tomato chutney- approx. 1 cup (recipe follows)
Butter- 1/4 cup (at room temperature)

Coriander chutney
IMG_4250-1
Coriander leaves- 2 cups, washed and roughly chopped
Grated coconut- 1 cup
Mint leaves- 10 to 12
Tamarind paste- 1 tsp (approx.)
Green chillies- 2 (adjust according to preference)
Salt- to taste
Sugar- 1/2 tsp

Grind together all the ingredients in a food processor/ blender, scraping down the sides at intervals, until you get a smooth-ish paste.
Resist the urge to add water though!
Transfer into an air tight container and refrigerate till ready to use.

Tomato chutney
IMG_4286
I followed this recipe of mine, except I didn't roast the tomatoes, just sliced them and used as it is. Feel free to roast them if you prefer it that way. I also used vegetable oil instead of olive oil and added curry leaves along with the mustard seeds. Once the chutney is done, keep aside to cool and then store in an air tight container till ready to use. It stays for about a week in the fridge.

Assembling:
Bring both the chutneys to room temperature.
Into the coriander chutney add the soft butter and mix it well. No traces of butter should be seen.
Do a taste test, add salt if required, and keep ready.
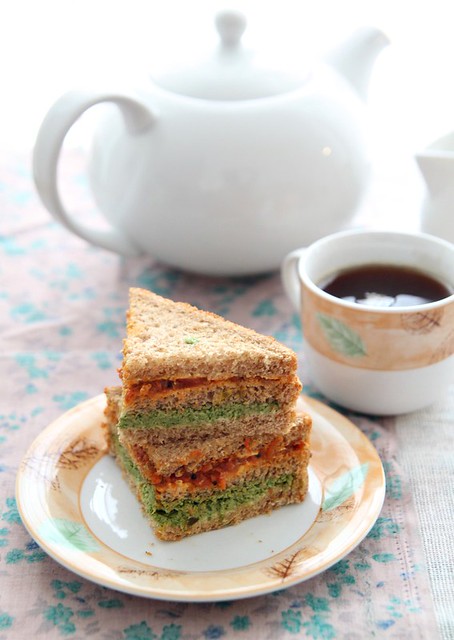
Onto the first slice of bread evenly spread about 1 tbsp of coriander chutney.
Top with another slice and spread the same amount of tomato chutney on it.
Finally top with a third slice and gently press it down to settle the fillings in.
Slice into half diagonally and then into quarters, or if you prefer, slice into smaller squares.
Serve for tea or at a picnic. It would be a hit trust me.

IMG_4375 
Notes: You can spread butter on the bread slices as well, but I didn't bother to.
I left the edges in tack as well, because Ro is a sucker for stuff like that. Feel free to slice them off if you think its too hard or something.
My mum sometimes does 3 layers with the third one being an egg mayo sandwich. Our cheap thrill when we were young was that it was made to look like our Indian flag :)
Store leftover sandwiches in an air tight container, slightly warm it in the oven for about 10 mins and have it the next day. that would make it slightly crisp as well.

One bowl passion fruit-yogurt cupcakes

0 nhận xét

IMG_4433
I made macarons a couple of days back. Well..tried to make would be more apt. I started with major enthusiasm but by the time I was done with sifting the damn ground almonds twice, all I could think of was a nice glass of wine and a movie. I somehow wanted to get it over and done with, which resulted in macs with feet, oh yes, but crinkled tops and weirdly shaped ones. While the macs were set aside to rest for an hour, Ro came by the kitchen and he even had the audacity to say 'looks like rats pissed in small pools.' Thank you very much, you shall sleep on the couch today, was my reply! Anyhoo, the macarons were a disaster and they are still on my table, waiting to go into the bin, but I'm waiting, for what? I don't know. I should just go chuck it right this minute. 

So after my macaron disaster I was a bit bummed because the sun was out shining and it was perfect for photography. I had major plans with the macs and was a lil disappointed. And then, I decided to browse (my own blog that is, how vain right?) and I came upon my all time favourite recipe..the French Yoghurt Cake. Of course, I shall just make these to prove that some things do come out nice, was my first thought. So I went and did one quick check to see if I had all the ingredients. Other than 1 egg, I had everything else. And then my second thought, why not improvise? Something I'm not very comfortable doing, especially with cakes, but what the hell...if it was a day of disasters, then I shall add fuel to fire. 
IMG_4515
So I got hold of some passion fruit lying around (begging to be used) and decided to make a cake. In between all this I convinced (begged) Ro to go out to the store and buy me eggs. The fact that he came back with a whole grocery bag full of rubbish is another story, but hey I got my eggs, I shall not complain. 

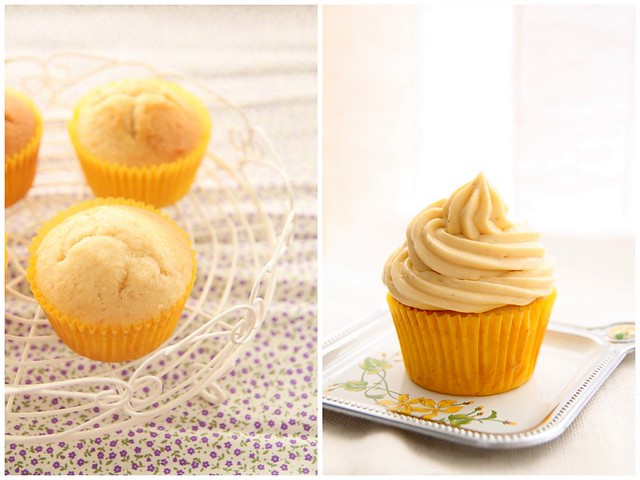
These lil darlings are so so so so so good, you will finish it all up in one go. They are also so easy to put together..no beating things separately, put it all into one bowl and there, you have the batter. You don't even need a beater. The recipe has never failed me and now that I know it can be improvised, its a winner. They are the softest, moistest cupcakes I have ever had and its because of this same reason that I use them as the base for all my upside down cakes. No fail recipe peeps, no fail. Even for amateur bakers, this is a brainless one, so do try it and tell me how it was. Here's the recipe.

Makes 7 to 8 medium size cupcakes or 1, 9inch cake
IMG_4483
Granulated sugar- 1/2 cup
Eggs- 2 small
Vanilla extract- 1/2 tsp
Plain yoghurt- 1/4 cup (I used Total Greek Yoghurt)
Passion fruit pulp/juice- 2 1/2 tbsp * (from 3 small passion fruit)
Plain flour- 1/2 cup
Baking powder- 1 tsp
Salt- a pinch
Flavourless oil- 1/4 cup
IMG_4409 
Into a mixing bowl whisk together (using a wire whisk, or even a wooden ladle) the first five ingredients till pale and well mixed.
Sift over the flour, baking powder and salt and continue to whisk, making sure no traces of flour is visible.
Add the oil and fold it all together to get a smooth, slightly loose batter.
Arrange the cupcake liners into the tray and fill each cup with the batter, till about 3/4th full.
Place the cupcake tin on a tray and bake in an oven pre-heated at 175C for about 20 to 22 minutes. I accidentally keep it for about 3 minutes longer and the tops began to brown. You know your oven best, so bake accordingly.
Do the skewer test and if it comes out clean, take the tin out of the oven and leave to cool for about 5 minutes after which you can carefully remove the cupcakes from the tin and leave to cool completely on a wire rack.
Serve along with tea and biscuits or store in an air tight container at room temperature for about 2 to 3 
days.
IMG_4441 
Notes: Feel free to experiment with any type of fruit juice. Replace passion fruit with orange juice, lemon juice (maybe a little less than the mentioned amount), or even honey to get a different flavour.
Also add some lemon/ orange zest to the batter.
If you cant find fresh passion fruit, you can use passion fruit juice instead. May be a bit on the sweeter side, so adjust sugar accordingly. 
*Scoop out the flesh from the fruit and run it through a sieve to get the juice.
The seeds and pulp taste yum, so don't throw it off. You can eat it all up (like I did) or mix with some confectioners sugar to do a glaze and pour over the cupcakes.

PS: On a different note... in case you are wondering what all this Sponsored Posts and videos are doing on my blog, its just that I have registered with a few marketing sites and they pay me to put up articles on certain products. Its just some pocket money generation for the blog to quench my prop shopping, ingredients sourcing fetish. So on and off you will find these posts and please don't be disheartened by the recurrence. If it is becoming a hindrance, I shall be the first one to take them off. Thanks for understanding.

Plenty - Juan Sheet advert

0 nhận xét

Somehow, the concept of using kitchen towels is not that popular in India and although I used to have a roll in my kitchen back then, it was never put to much use and all i did was admire the wrought iron kitchen roll holder I'd picked up on a trip to the US.

Fast forward to a year later and I was using kitchen towels like nobody's business and was running out of rolls every 2 weeks or so. I was so used to having them at arms reach in my kitchen here in UK and with this practise in mind, I tried the same in my moms kitchen back home. She used to panic about the number of kitchen towels I use and the usual line, 'its so expensive to buy a roll here, you cant use it like you do in UK. Please use the cloth towels to wipe surfaces.' I tried to explain to her it was so much more convenient, but then understood the problem. The towels were hopeless They were so thin and pathetic that one towel wouldn't do to mop up a spill, but I had to use 2 or even 3 in layers for it to have some effect. Needless to say, that kinda put an end to my cooking expeditions in my moms kitchen, well that and a couple of other mishaps :)

Back in my own comfortable kitchen and I was glad I had the option of using kitchen towels without much fuss. There are so many options available at the stores, but my favourite so far is Plenty which in itself has a few different types of towels, for any occasion you can think of. The original one (which I personally think is the best), the fat one (which is the latest addition and well, has 50% more sheets per roll; oh and also comes in fun prints) and the wipe, rinse and reuse one (which is such a brilliant discovery, I love it. You also end up using fewer towels). I mostly use my towels in the kitchen- to drain the oil off fried food, to wipe my glass hob top, to mop spills, wipe the bins and surfaces etc- but I also occasionally use them to wipe down glass windows, bathroom mirrors and the shower glass. It works like a charm and I'm so glad its affordable and widely available in all the stores.

To know more about Plenty and its uses, check out their website and don't forget to stop by at Juan's (the cleaning superhero), who does his magic to reveal what all Plenty can do. Check out the fun video below (he's quite funny).


PS: A recent discovery of rolling up herbs like coriander and mint in Plenty towels, and keeping them in the refrigerator making it last much longer, was jackpot. It really works people, trust me!


Domino's pizza vs the Naanizza I made

0 nhận xét

IMG_4103
As mentioned loads of times before, Fridays are pizza days for us. We mostly have pizza for dinner and if Friday is inconvenient, then Saturday it is. We are ardent pizza lovers and even the frozen ones make us drool. Well not so much, but you know we would have it without complaining much if that was our last choice!

Since we had guests visiting for the past 3 months, our pizza ritual had come to a standstill. We were just wondering how to revive it when I was asked to review the new Gourmet Pizza Range by Domino's. Of course I said yes, because its one of our favourite Pizza brands especially since we have had a couple of bad experiences with some of the other bands and we always return to Domino's. So off we log on to their website and make an order for a take away pizza. It's so convenient, I'm not joking. The wait for the pizza to arrive is the worst but since we are pro's at this whole thing, we time it perfectly well and get the pizza just when our stomachs start to rumble.

The Gourmet range from Domino's offers 4 different types of pizzas- the Firenze with salami, pepperoni and roquito peppers, the Florentine which is a vegetarian option with spinach, sun blush tomatoes, and feta cheese, the Rustica with chicken, bacon, spinach and tomatoes (which is what we ordered) and the Four seasons with a 1/4 of all the 3 above mentioned pizza's and sun blush tomato topping.
24
The Rustica was a good change from the usual Mighty Meaty which, as the name suggests, is loaded with all kinds of meat (delicious if I may add). This one was much mellow in nature with the individual flavours coming right through. If there was one complaint, I would say that the tomato was a bit too tangy for my liking and a bit over powering. I loved the addition of smoked bacon rashers and of course spinach is a winner for us any time.

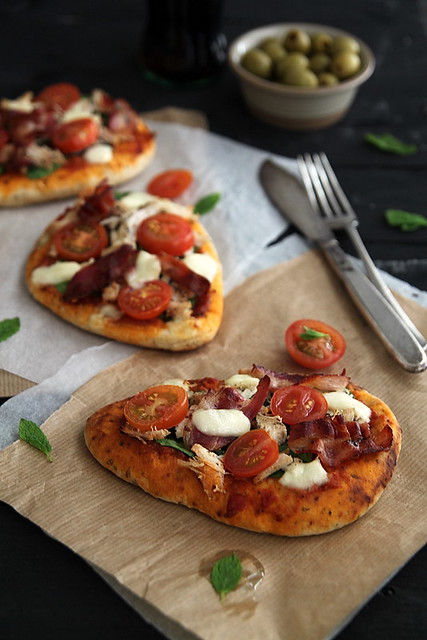
To make the review more exciting, I was also asked to create my own pizza and compare it to that of Domino's. I decided to go ahead and try making my version of the Rustica pizza at home. Since I was a bit time constrained, I chose to use Naan as the base. I have done it a lot of times before and must say its a really easy and tasty alternative to a normal pizza base. If you manage to get flavoured naan then even better because you get the best of both worlds. I also used pancetta instead of bacon which was probably not the best idea because bacon would have done more justice to it taste wise. The pancetta was not a bad choice but in the larger scheme of things, its flavour just got lost. Comparing mine to the Domino's Rustica- I love the pizza sauce Domino's uses, which of course I couldn't get right, so full points to Domino's for that. I used normal cherry tomatoes instead of the sun blushed ones since I thought that was what made it a tad too tangy, so points for me on that one. The chicken strips, I shall keep them bigger next time because Id shredded them too fine for it to stand out, Rustica did a great job with the size of the strips. Since I didn't want to keep any leftover filling, I loaded my naanizza with toppings, which was perhaps one advantage over the Domino's. But then you cant have it all right :)
IMG_4070
But on the whole Rustica stayed true to its name and I would definitely be trying out more pizza's from their Gourmet Range. People, if you haven't given it a go as yet, do try it and oh please do yourself a favour and also try the chicken kickers which I think is so yummy it makes me want to eat the entire thing without sharing with Ro. 

Naan- 4 small/ 2 big (plain or flavoured)
Pizza sauce- 4 tbsp
Baby spinach- 1/2 cup
Shredded chicken- 1 cup
Cherry tomatoes- 1/2 cup, sliced into halves
Pancetta- 4 to 5 rashers, cooked and sliced long
Mozzarella cheese- 1/4 to 1/2 cup (as required)
dried oregano- 1 tsp
Olive oil- to drizzle
IMG_4074
Dice the chicken into chunks and marinate with salt and pepper. Cook in a saucepan till well done and keep aside to cool.
Shred using a fork and keep aside. You can store remaining chicken in an air tight container in the refrigerator for 2 to 3 days, and use it in a sandwich or you can even freeze it.
Place the naan on a baking tray that has been lined with aluminium foil or baking paper.
Slather on 1 tbsp of pizza sauce on to each naan if using small ones, or 2 tbsp per big naan.
Arrange a layer of spinach leaves on top followed by shredded chicken.
Arrange the sliced cherry tomato cut side up. You may want to go easy on this if they are too tangy.
Either crumble the cooked pancetta and throw onto the naan or for a more orderly look, slice it lengthwise and place it strategically 
Finally add the mozzarella cheese, again in any way you like, over the toppings or next to it. Its cheese, you can eat it however:)
Sprinkle the oregano, drizzle olive oil and place in an oven preheated at 200C for about 6 t0 8 minutes.
Don't keep it in for too long, it can go crunchy on you.
Take it out of the oven and eat while hot, otherwise its rubbish.

Notes: Feel free to marinate the chicken with any spice you like. I kept it simple.
Some grated Parmesan would take it to the next level.

With thanks to Dominos Pizza for gift vouchers to pick up the pizza

Sponsored video: Method cleaning products

0 nhận xét

In our household there is a deal. If one of us does the cooking, then the other does the cleaning. Most of the time I am in charge of cooking and the other half takes care of cleaning. I must say its a convenient arrangement because I make a hell of a lot of mess while cooking and the husband bears the brunt of it all. Needless to say, its an on going feud at home regarding this and we never ever come to a conclusion.

We are also constantly on the look out for new products and better ways to ease up this process and that's where Method comes into play. I was thoroughly interested in finding out more about their range of cleaning products and when I did, it was a complete eye opener. Method is a brand that makes non-toxic products for people who want to go about the entire cleaning process in a greener, better way. They have a wide variety of products ranging from non-toxic surface cleaners to bathroom cleaners (like tub scrub and flushable wipes), laundry detergents, hand care gels in various fragrances and even the speciality range which comprises of cleaners and wipes for leather, wood, granite and marble and floor. Yup, so many choices!

There's more good news. Method is also a brand that prides itself in striving for sustainability. Going green is something they value and so their aim is to reduce carbon footprint as much as possible, both for the products as well as the company itself. They do not perform any animal testing and has been certified by PETA as a vegan and cruelty free company. The products are also absolutely fine to be used around children, as they do not contain any hazardous ingredients.

Not convinced yet?? Then go on and watch this fun video and be inspired to move against dirty. That's my motto henceforth.


The post has been sponsored by Method cleaning products.

Fraisier trifle and a master class with Eric Lanlard

0 nhận xét

IMG_3724
(Ridiculously long post with loads pics and info, so feel free to scoot right away)
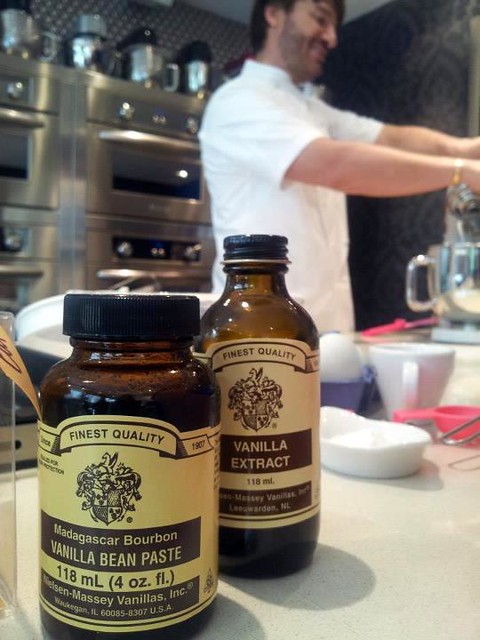
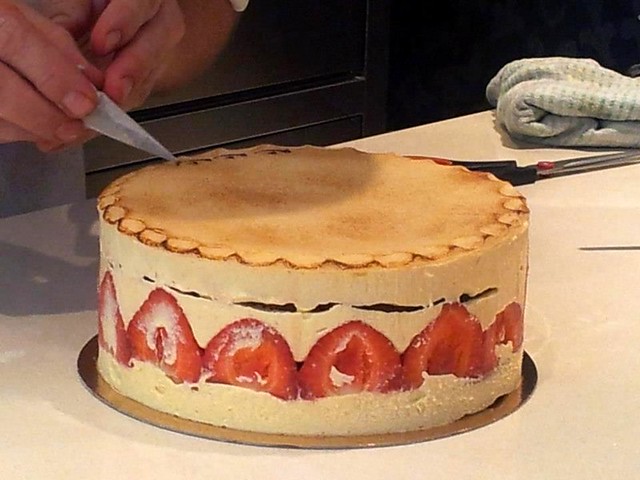
A few weeks back, some of us food bloggers were invited to a master class with Eric Lanlard featuring Nielsen-Massey Vanilla products at his signature store Cake Boy in London. It was an evening packed with loads of information on vanilla (which was truly an eye opener), yummy canapés and of course Eric Lanlard showcasing his fabulous baking skills by making a gorgeous French Fraisier, a cake so gorgeous to look at, you wont feel like cutting into it. And what a charming patissier he is...so full of energy, clearing our doubts, engaging us in conversation about baking and of course cute!!! :)

The class ended on a fine note with all of us getting goody bags along with the recipe of the fraisier cake and a challenge at hand. We were asked to create something to rival Eric's fraisier and blog about it. I have been breaking my head about it for so long to an extent it started haunting me in my sleep. I finally got around to doing the challenge a couple of days back and here is my take on it.
378253_396302733756158_1961166869_n 
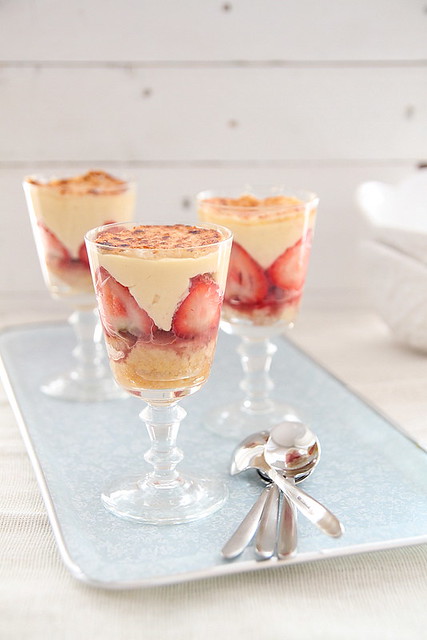
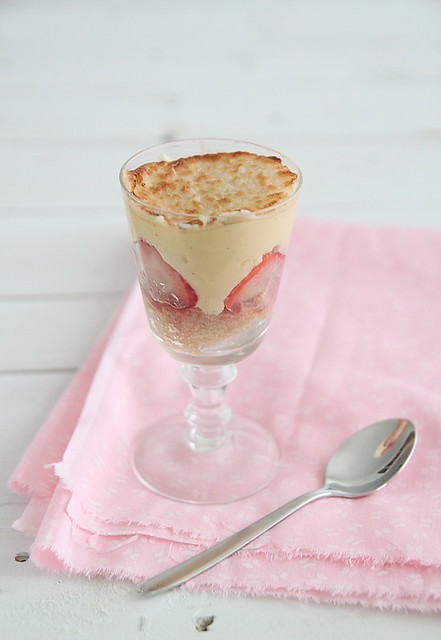
Since a fraisier cake was slightly out of my league, well mostly because it was just the two of us at home and scared that we would both finish it off in one sitting, I steered away from it. Instead I went ahead with a Fraisier trifle with all the goodness of the cake, but half the effort and oh so pretty they look in a glass and a great dessert idea since individual portions are less messier and storage in refrigerator is easier. 

I had baked a cake the day before for a friend and had some remaining which was on my kitchen counter nicely wrapped in cling film waiting to be assembled. I then set about making the filling of custard butter cream or fancily referred to as crème mousselini which I think is gods gift to bakers, especially to bakers who hate plain butter cream and cant pipe a frosting for nuts. I started off convinced I would screw it up somewhere and end up wasting a whole lot of ingredients, but when I saw it all come together, I knew I'd succeeded. And OMG I couldn't stop licking it from the mixing bowl and when I tried piping it on to a cupcake, it worked out just as fine and for the first time I had managed to pipe it without it it falling flat or it being too stiff it refuses to come out of the nozzle. I can very well say this is going to be my fav frosting as of now and my next experiment would be to try this with custard powder instead of making it from scratch. Yes laziness is my second name, in case you hadn't figured it out by now.
428942_396302973756134_2091831608_n 
Although Eric's recipe was the base of all this experimenting, I did tweak it a bit here and there to suit my availability of ingredients. Eric's cake was a basic sponge cake, (which I am definitely going to try some day) whereas I used a vanilla buttermilk cake which has provided me with great results. I feel its best on its own as a tea cake, but of course so versatile you can use it as a base for any other fancy stuff, like a Tiramisu cake for example. It is light and airy, and moist at the same time making it impossible to hate. My love for plain cakes and that too vanilla flavoured ones never end, so this is the latest addition to the list, with the French yoghurt cake still topping the list (more so because of how easy it is)

Anyhoo, the final outcome was great and we did enjoy scooping it out and eating mouthfuls. Next time however, I would omit the toasted marzipan, only because I'm not a big fan, not because its bizarre or anything. When I have something to celebrate, I would also try doing the entire cake like the one above so I can share the calorie intake with others and not suffer on my own. In the mean time, I am thoroughly enjoying the Nielsen-Massey Vanilla paste and extract that is making its way through to almost all my cooking expeditions (sweet of course) ;)

For Eric's original recipe, follow this link. I am giving my version here, with Eric's recipe as the base. The measurements given are for the fraisier cake on the whole and not the trifle. I have, however, explained how I went about getting the trifle in order.

Vanilla Buttermilk cake (recipe adapted from here, makes 2- 9 inch cakes or 12 large cupcakes)
14 
Cake flour- 2 cups (make your own by measuring 2 cups of plain flour and taking out 2tbsp of flour from that and replacing it with 2tbsp of cornflour. sift it together. This results in a more tender crumb)
Baking powder- 2 tsp
Baking soda- 1/8th tsp
Salt- 1/4 tsp
Unsalted butter- 10 tbsp, at room temperature (or 142 gms, 1 1/4 sticks)
Sugar- 1 cup
Eggs- 3 large
Egg yolk- 1 large
Vanilla extract- 1 1/2 tsp (of course I used Nielsen-Massey)
Buttermilk- 3/4th cup

Sift together the first 4 ingredients into a bowl and keep aside.
Into the bowl of a free standing mixer with paddle attachment, add the butter and beat on medium speed till soft and creamy.
Add the sugar and continue beating till the mix becomes light and fluffy, about 3 minutes.
In goes the eggs one at a time, beating well after each addition. Follow with the egg yolk and beat it in.
Beat in the vanilla. At this point the batter may look curdled, don't panic, just keep doing the good deed.
Now reduce the mixer speed to the lowest and add the dry ingredients and buttermilk alternatively, starting and ending with the flour mix.
Scrape down the sides, making sure no traces of flour is seen and everything is mixed well.
Pour into the lined cake pans and bake in an oven pre heated at 176C for about 30 minutes or till golden brown and the skewer test comes out positive.
If making cupcakes, fill liners till about 3/4th full and bake for about 20 to 22 minutes, checking in between.
Cool completely on wire racks and then cling wrap it and leave it at room temperature for up to 2 days.

Creme Mousselini (combination of Eric Lanlard's recipe and from here, makes 1 cup)
309288_396302783756153_80501488_n 
Creme patissiere/ pastry cream- 1 cup (recipe below)
Unsalted butter- 150 gms cut into cubes, at room temperature

Creme patissiere
Whole milk- 1 1/4 cups
Sugar- 1/4 cup
Egg yolks- 3 large or 4 small
Plain flour- 2 tbsp
Corn flour- 2 tbsp
Vanilla bean paste- 1 tsp (I used Nielsen Massey)
Kirsch liqueur- 1 tsp (optional)

Into a heat proof bowl throw in the sugar and egg yolks and whisk till you get a smooth mix.
Sift together the plain flour and corn flour and add to the egg, whisking till you get a lump free, smooth mix. Don't let this mixture sit for too long as the sugar will start eating into the eggs, thus making pieces of egg form. (thanks to cake boy for that piece of valuable information)
Meanwhile, pour the milk into a saucepan placed over medium heat, and bring to a gentle boil, just till the milk starts foaming up.
Take it off the flame and add it to the egg mix, bit by bit, whisking continuously till well incorporated. If you find pieces of curdled egg don't panic just run it through a sieve.
Return this mix back to the saucepan placed over medium heat and cook till boiling, whisking continuously to prevent the custard from sticking to the bottom and forming lumps. This takes quite a while, so patience is highly recommended.
When the custard boils and has become thick and silky smooth, continue whisking for about a minute longer and then take it off the flame.
Transfer to a mixing bowl and add half of the butter, whisking well to incorporate it into the custard.
Cover with a cling film and leave to cool in the refrigerator. Or if you have time on the kitchen counter.
Once completely cool, add the vanilla bean paste and liqueur (if using) and whisk it in.
Add the remaining butter bit by bit whisking well after each addition to get a smooth and gorgeous creme mousselini which makes a perfect frosting.

For assembling
Ripe strawberries- 1 kg, hulled
Marzipan- 200 gms, rolled out and cut into 9 inch circle.
Melted chocolate- for decoration
309259_274400052661791_234769332_n 
When ready to assemble, unwrap the cake and slice off the top if it has domed.
Then place the cake at the bottom of a cake ring and using a palette knife, spread a thin layer of creme mousselini over it.
Cut some of the strawberries in half and place it around the edge of the ring, cut half facing out.
Fill the centre with the remaining strawberries, making them stand upright. (the trifle version is as below).
Spread the remaining creme mousseline on top of the strawberries, trying to fill in the gaps as much as possible.
Place the second layer of cake on top and press down to settle them all in.
Place the cut out marzipan on top, flute the edges and toast using a blow torch.
Melt the chocolate and use it to write 'Fraisier' on top and decorate the cake a bit. Also use some strawberries dipped in chocolate to adorn the sides.
Chill for a few hours before you unmould to get a gorgeous looking cake.

Fraisier trifle     
141
Crumble some of the cake roughly and keep ready. You can also cut them into the exact size of the glass, but I didn't have the patience.
Get 3 see through glasses, tumblers, martini glass, pudding mould...anything you fancy and layer the bottom with the crumbled cake...generously and tuck it in lightly.
Melt about 3 tbsp of strawberry jam lightly and mix with 1 tsp water.
Spread a thin layer of jam on top of the cake.
Cut the strawberries as mentioned above and place them inside the glass, cut side outward.
Fill with one large strawberry upright.
Top generously with creme mousselini, filling in the gaps as much possible, but really its no big deal because the messier a trifle looks, the better.
Top with a toasted marzipan and chill till ready to serve.
IMG_3701
Notes: I don't own a blow torch so I rolled out the marzipan, cut them into rounds and placed under the grill for about 2 to 3 minutes to lightly toast it. But as you can see I ended up burning most of it. Take extreme care when you do this as one blink of the eye and you can end up with black marzipan.

Now I'm gonna say a lil prayer and hope I become the competition winner :)

Disclaimer: I was invited to attend Eric Lanlard's masterclass

 
  • The Best Blog Recipes © 2012 | Designed by Rumah Dijual, in collaboration with Web Hosting , Blogger Templates and WP Themes